 English
 Français
 Deutsch
 Español
Getting Started
Media Studio: create a Brand Kit
Import a Brand Kit from your website, review its extracted identity details and colors, then save the approved kit for other creative nodes.
YieldBI TeamGrowth ResearchUpdated Oct 2026
On this page
A Brand Kit gives creative nodes a reusable source for brand identity, so you can keep logos, colors, voice, and copy guidance together instead of re-entering them for each creative. Enter the details yourself or import a starting point from a website. Review the result before saving it; imported colors and other details may not match your approved brand guidelines.
1. Open the Brand Kit inspector
Open your Brand Kit inspector. For board setup, follow Add a node to the board. Select the managed account whose brand information you want to use. The node gives connected creative steps a place to draw from consistent brand guidance. Import a starting kit from a website, apply the account’s saved default, or enter the details yourself.
2. Import from your website
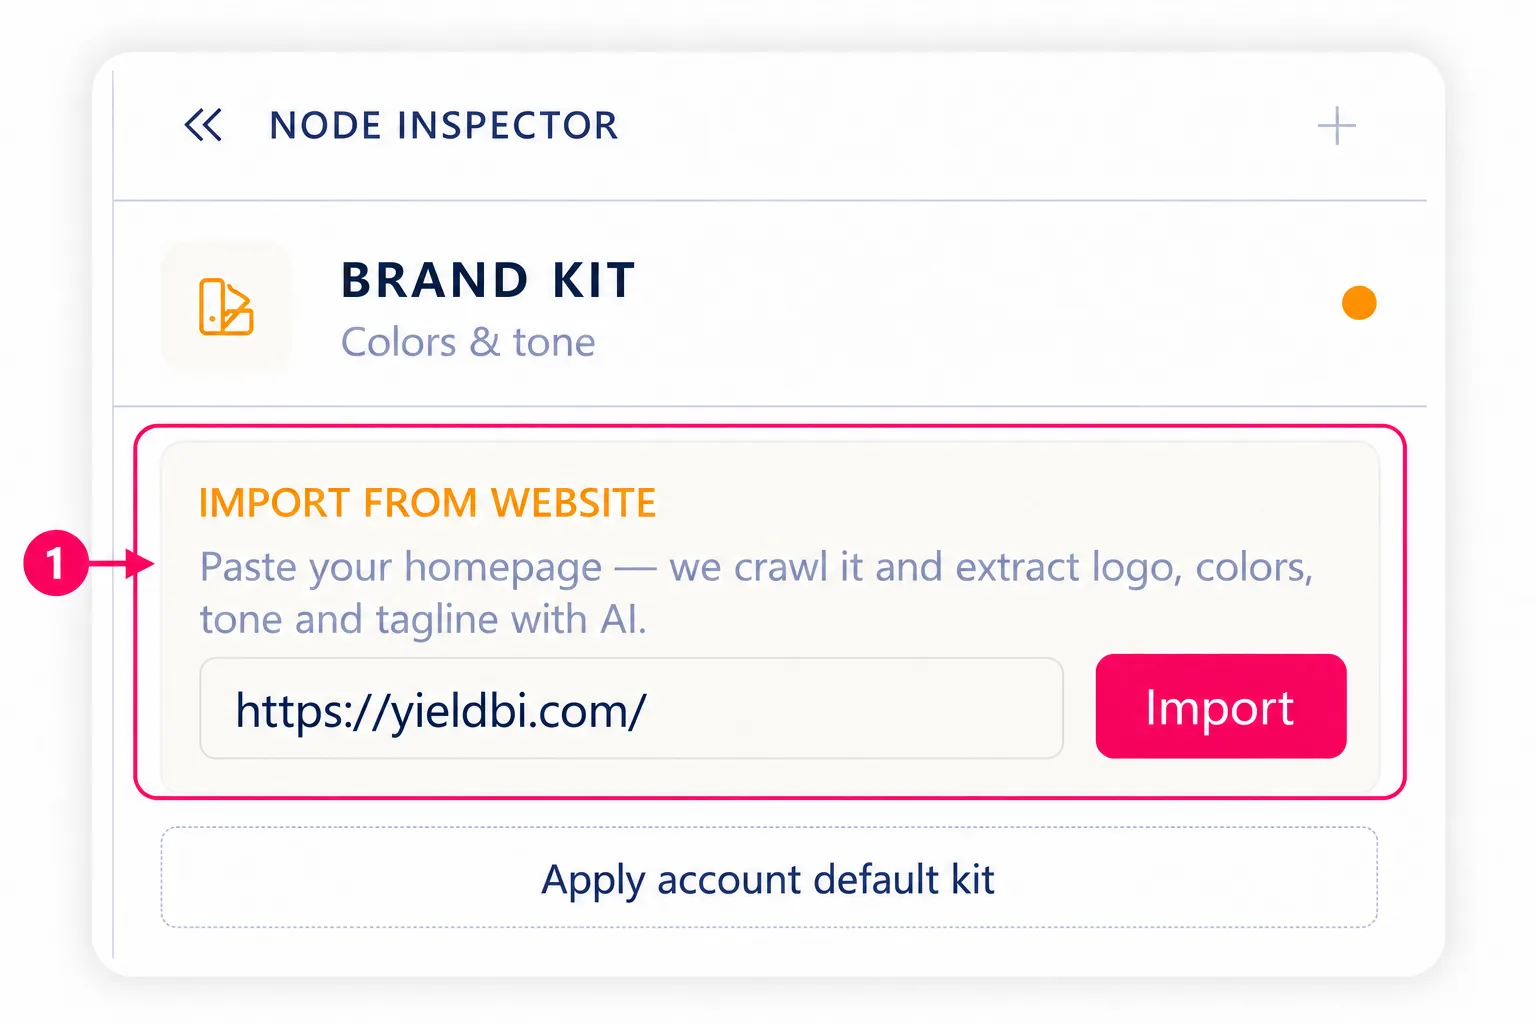
In Import from website, paste your brand’s homepage URL and select Import. YieldBI scans the site and tries to identify the brand automatically, including its name, logo, colors, tone of voice, and tagline, then uses those details to fill the Brand Kit fields. Wait for the Brand kit imported message and review the detected details, since the scan may miss information or identify something incorrectly. The import updates the current node; it does not save the kit to your library automatically. If you already have a saved account default, you can use Apply account default kit instead.
3. Review the imported fields and save
Each screenshot below restarts its callout numbering at 1.
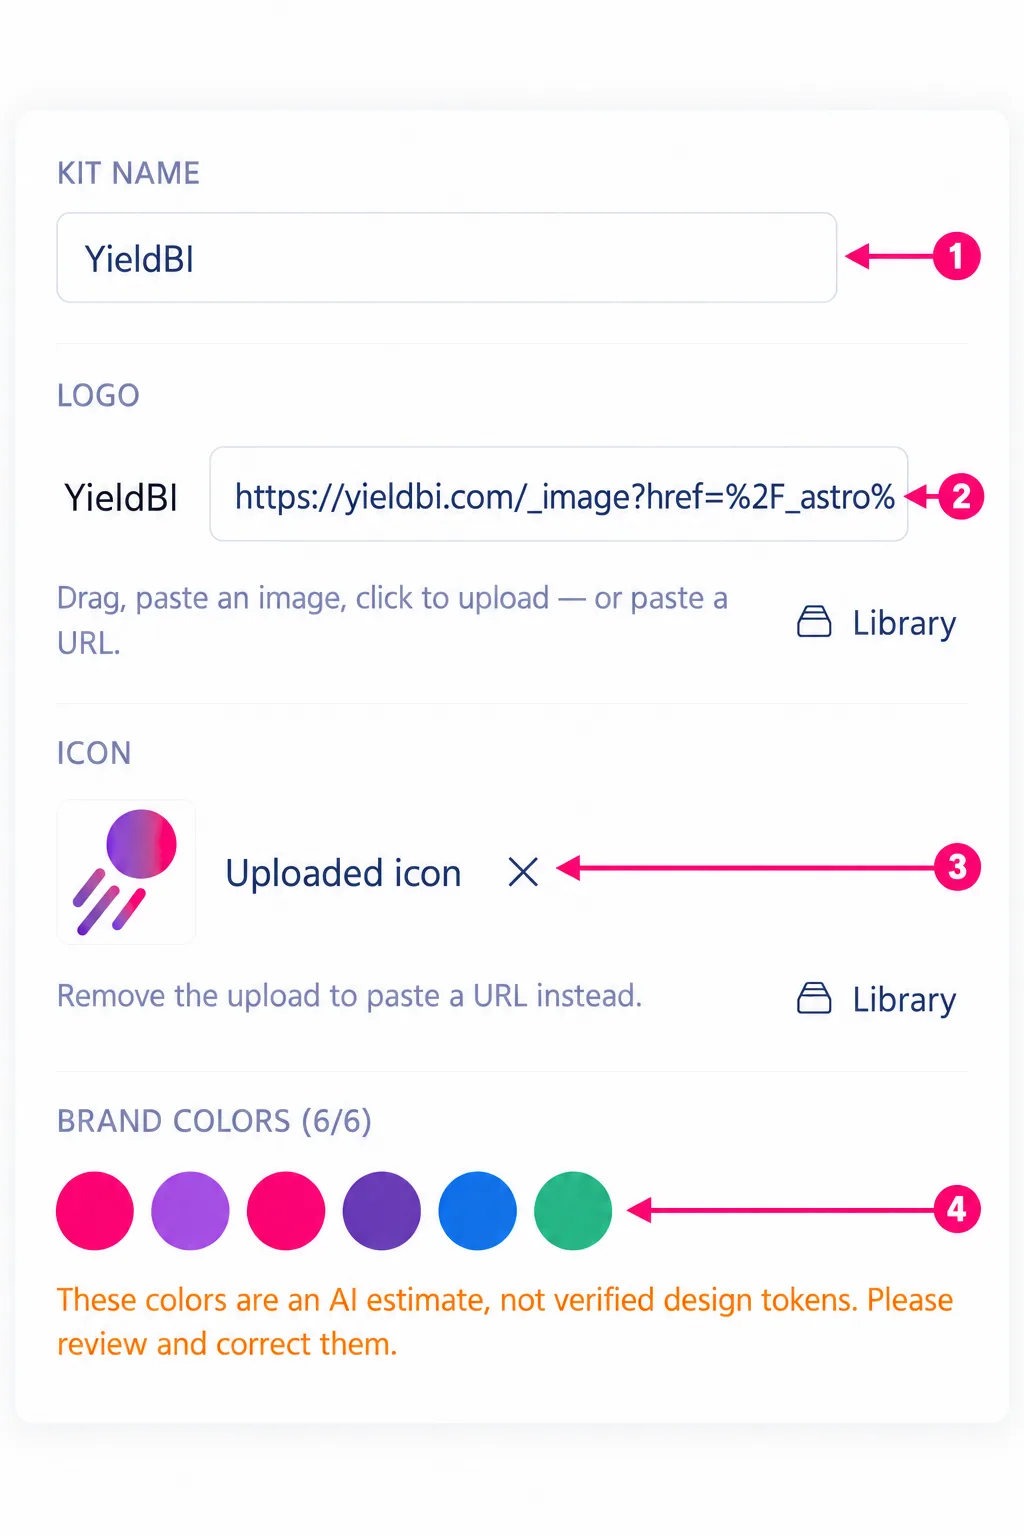
- Kit name: Confirm the detected brand name. A clear name helps you recognize the right kit when choosing or updating saved kits.
- Logo: Verify the detected logo, since it is a primary brand identifier in generated work. If it is missing or incorrect, use the official logo URL, upload a file, or choose an asset from the library. The app asks you to confirm image rights before an upload.
- Icon: Review the detected icon and replace or remove it if it is not the approved mark. An approved icon keeps small or compact brand placements recognizable.
- Brand colors: Website colors are an AI estimate, not verified design tokens. Correct them against your approved brand guidelines so new creative work uses the intended palette; remove campaign or page-specific colors that should not guide other creatives.
The Tone of voice field sits immediately above the fields in the next screenshot. Edit its detected summary so it describes how the brand should speak; this gives creative steps a consistent writing direction.
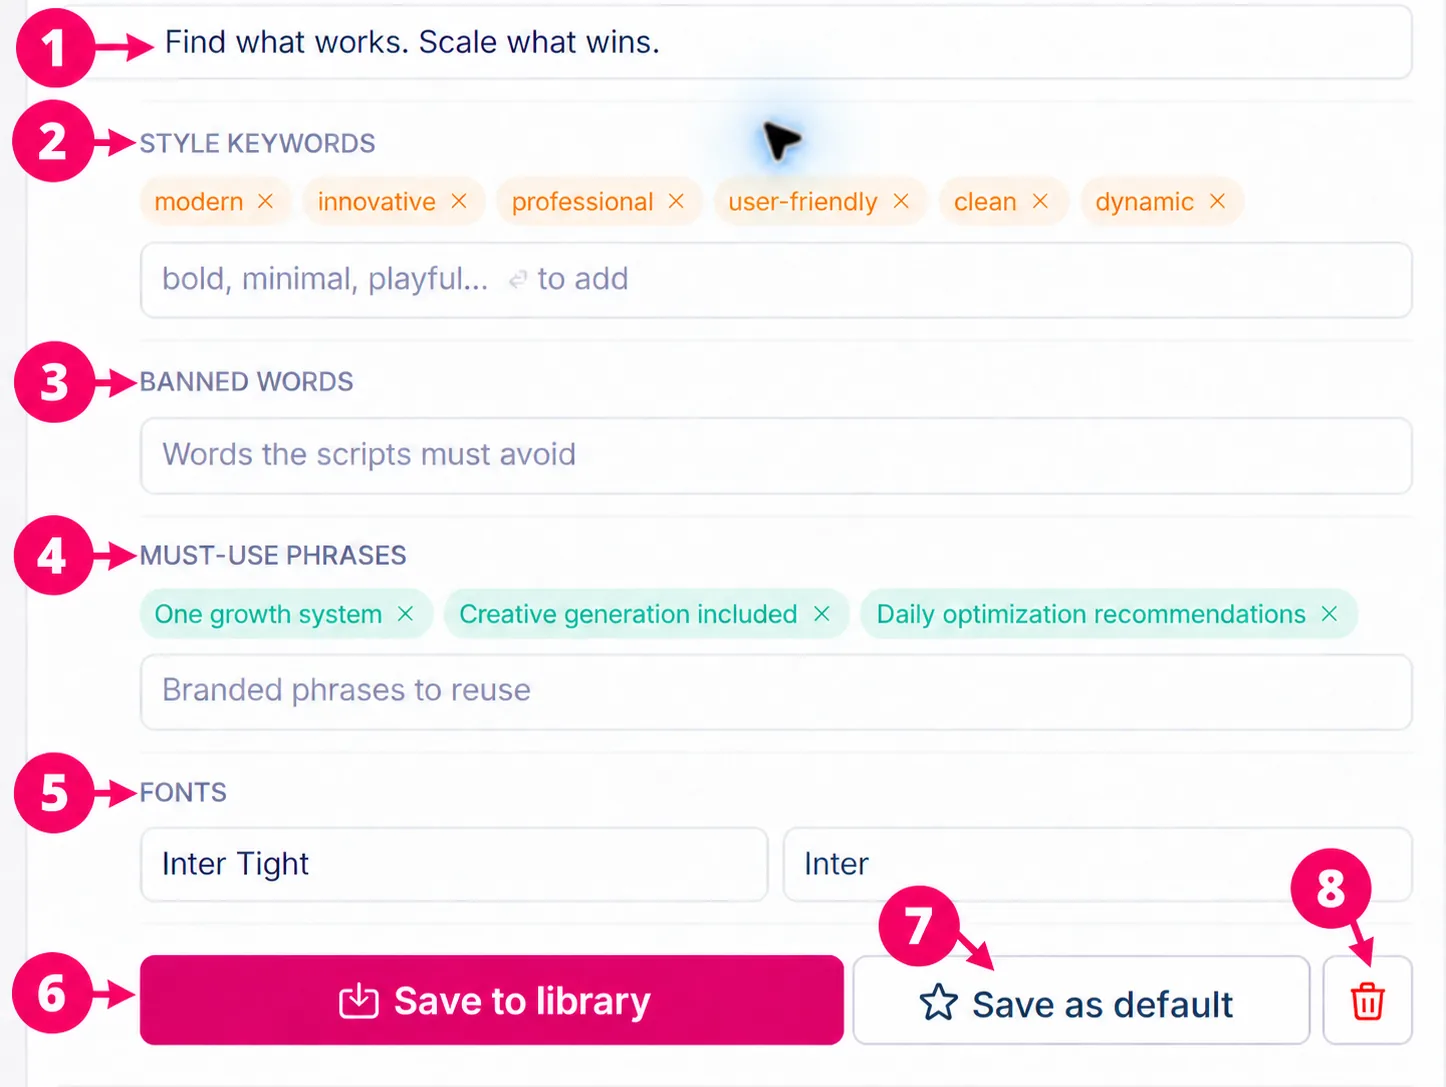
- Tagline: Check the detected tagline against approved brand copy. Keeping the approved version here makes it easier to reuse the core brand message accurately.
- Style keywords: Keep words that describe the brand’s visual or verbal style. These give creative direction a concise reference; remove generic or inaccurate terms that could steer results away from the brand.
- Banned words: Add wording the brand should avoid. This helps keep generated copy away from unwanted terms or claims.
- Must-use phrases: Add required brand phrases, if any, so they are available as guidance when creating branded work.
- Fonts: Check headline and body fonts against brand standards. Correct font names help maintain a consistent typographic style and readable hierarchy.
- Save to library / Update in library: Save a new kit for reuse, or update its existing library version. The button label depends on whether the kit is already saved.
- Save as default: Save the kit and use it to prefill new Brand Kit nodes for this account. Choose this when the kit should be the account’s starting point for future work.
- Delete: Remove this Brand Kit node from the current board.
Choose the account default only if this kit should be the starting point for future work across the account. Keep one approved source of truth for logos and colors, particularly if the website contains campaign variations that differ from the core brand.
4. Use the kit in a creative
Connect the saved Brand Kit to the node that should use it, such as a Product, Static Ad, or Storyboard. A connection makes the kit available; check the receiving node’s selected inputs or reference roles before generation. Compare the finished creative with the approved logo, palette, and copy rules. If it differs, revise the source or the receiving node’s selections before reusing that output.
Related reading
Learn the Media Studio canvas controls, start or reuse a board, load saved media, and choose the right node for your next creative step.
Getting StartedLearn how to add a Product from a catalog, your library, a URL, or scratch, review its details, and generate a reusable product sheet.
Getting StartedCompose a static ad from selected references, review the draft, approve it, download it, or send its image to Asset Manager.