 English
 Français
 Deutsch
 Español
Este artículo aún no está disponible en tu idioma. Se muestra la versión en inglés.
Getting Started
Media Studio: plan with Brain
Use the Brain node to turn a creative brief and selected source assets into a reviewable plan before generating images or video.
YieldBI TeamGrowth ResearchActualizado oct 2026
En esta página
The Brain node helps you prepare a creative plan from an intent, a scope, and selected inputs. It is a planning step: reading inputs and writing a plan does not itself generate images or video. Use it to decide what the creative should say and which source assets matter before sending work to the next node.
1. Add intent and scope
Open your Brain inspector. For board setup, see Add a node to the board. Write the intent in plain language: audience, product, offer, desired message, and any restrictions. If the plan includes a call to action or destination URL, use a real page you have checked. Example URLs and claims shown in screenshots are illustrative; do not copy them into a live campaign without verification.
The Intent section brings the brief into one place. Fill in the fields that matter to your creative:
- Instruction: Describe the story or image, intended viewer, product, and call to action. Use
@to reference a selected input when appropriate. - Applied skills: Add an available skill only when it helps the plan. Your instruction takes precedence if they conflict.
- Audience and locale: State who should see the creative and the language or regional version you need.
- Spoken brand name, camera, and voice: Set these when planning video or narration, then check that the final output follows them.
- Must not appear: List prohibited text, imagery, or presentation details, one per line.
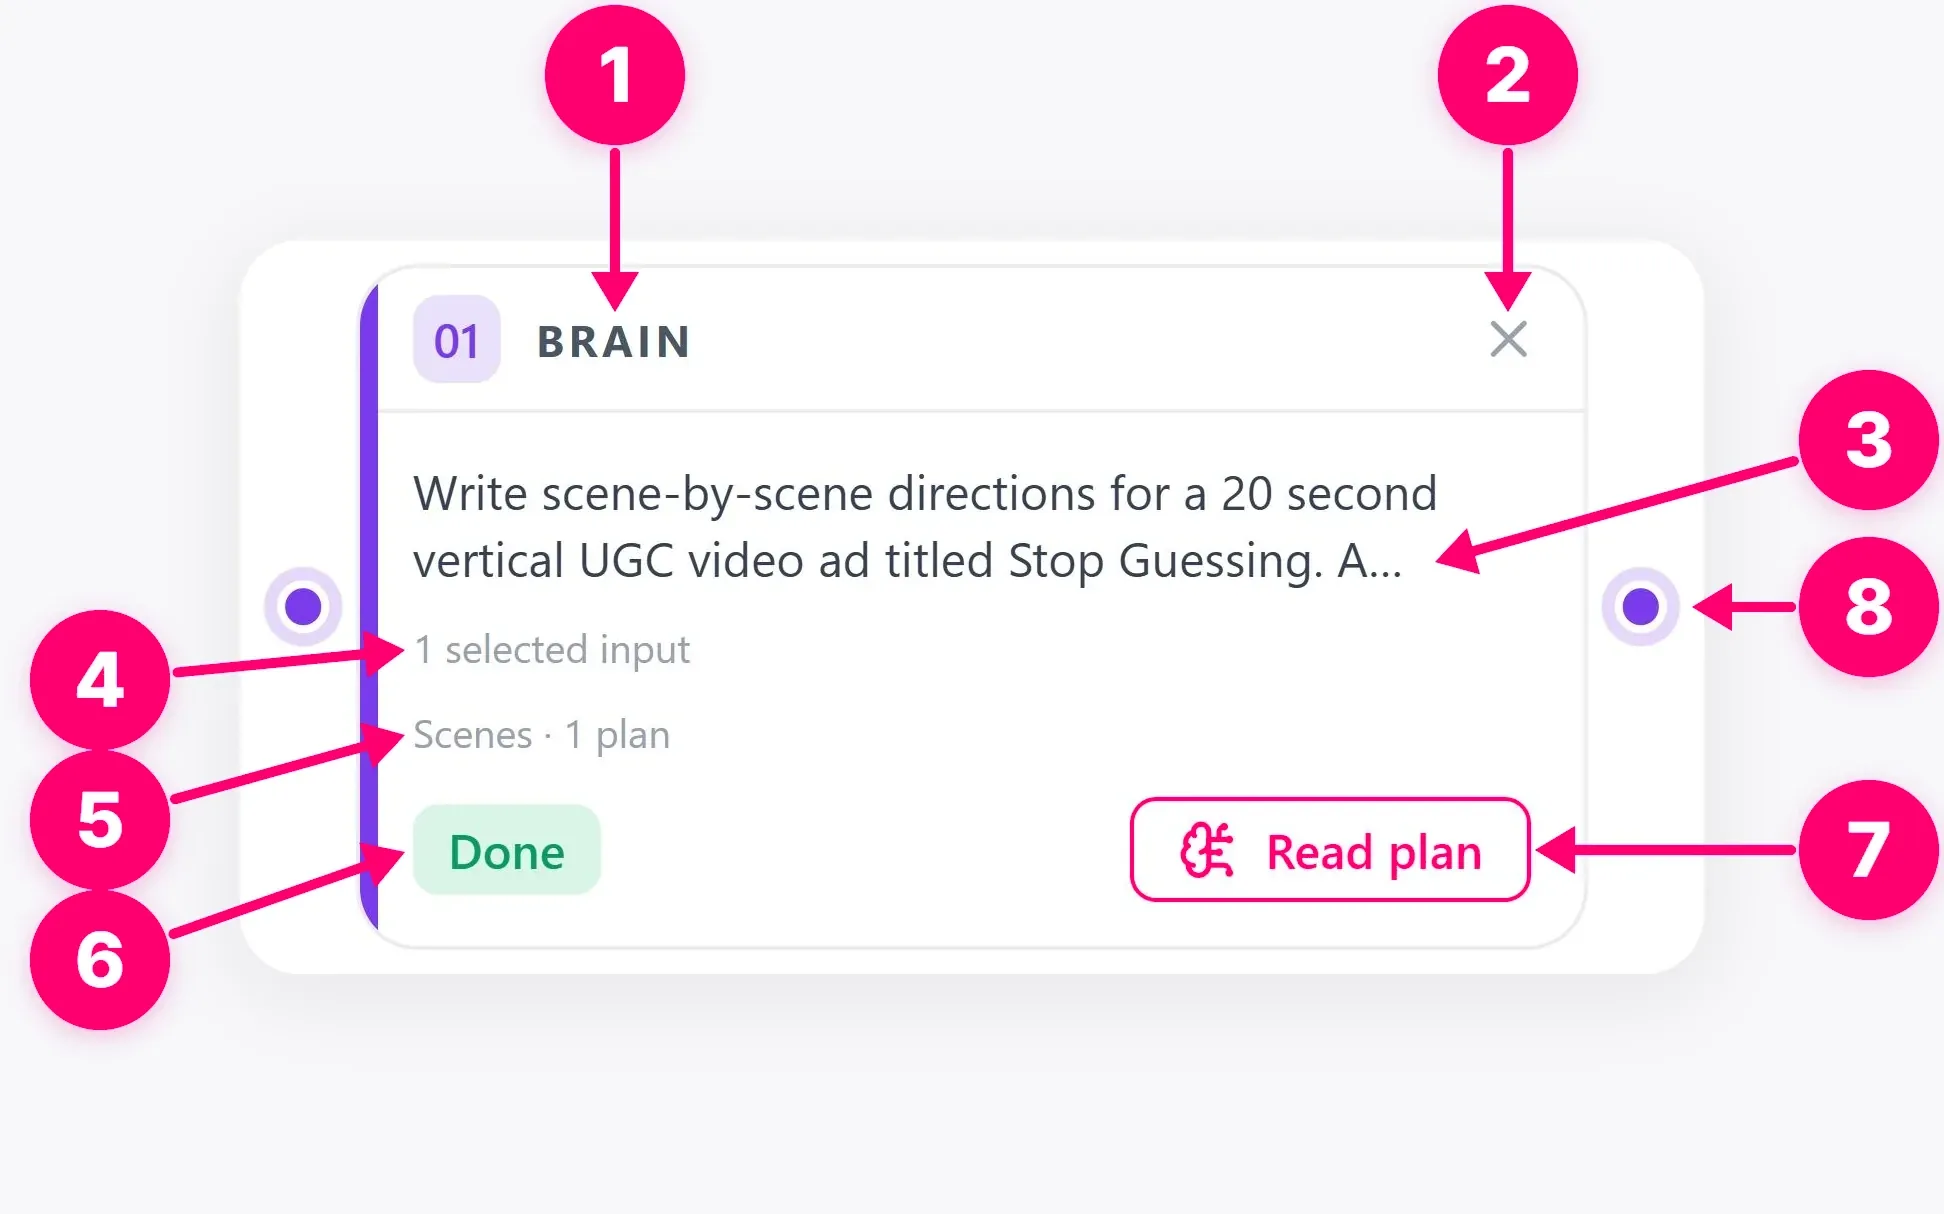
The Plan preview result and Read plan control show planning output. Read the plan before using it downstream; the preview is not a finished scene or ad.
Choose the scope and mode that match the work you want the plan to cover. Review the preview to see the type of output Brain will provide. The preview is text, not a finished asset. You can revise the brief and plan again if the proposed direction misses the audience or objective.
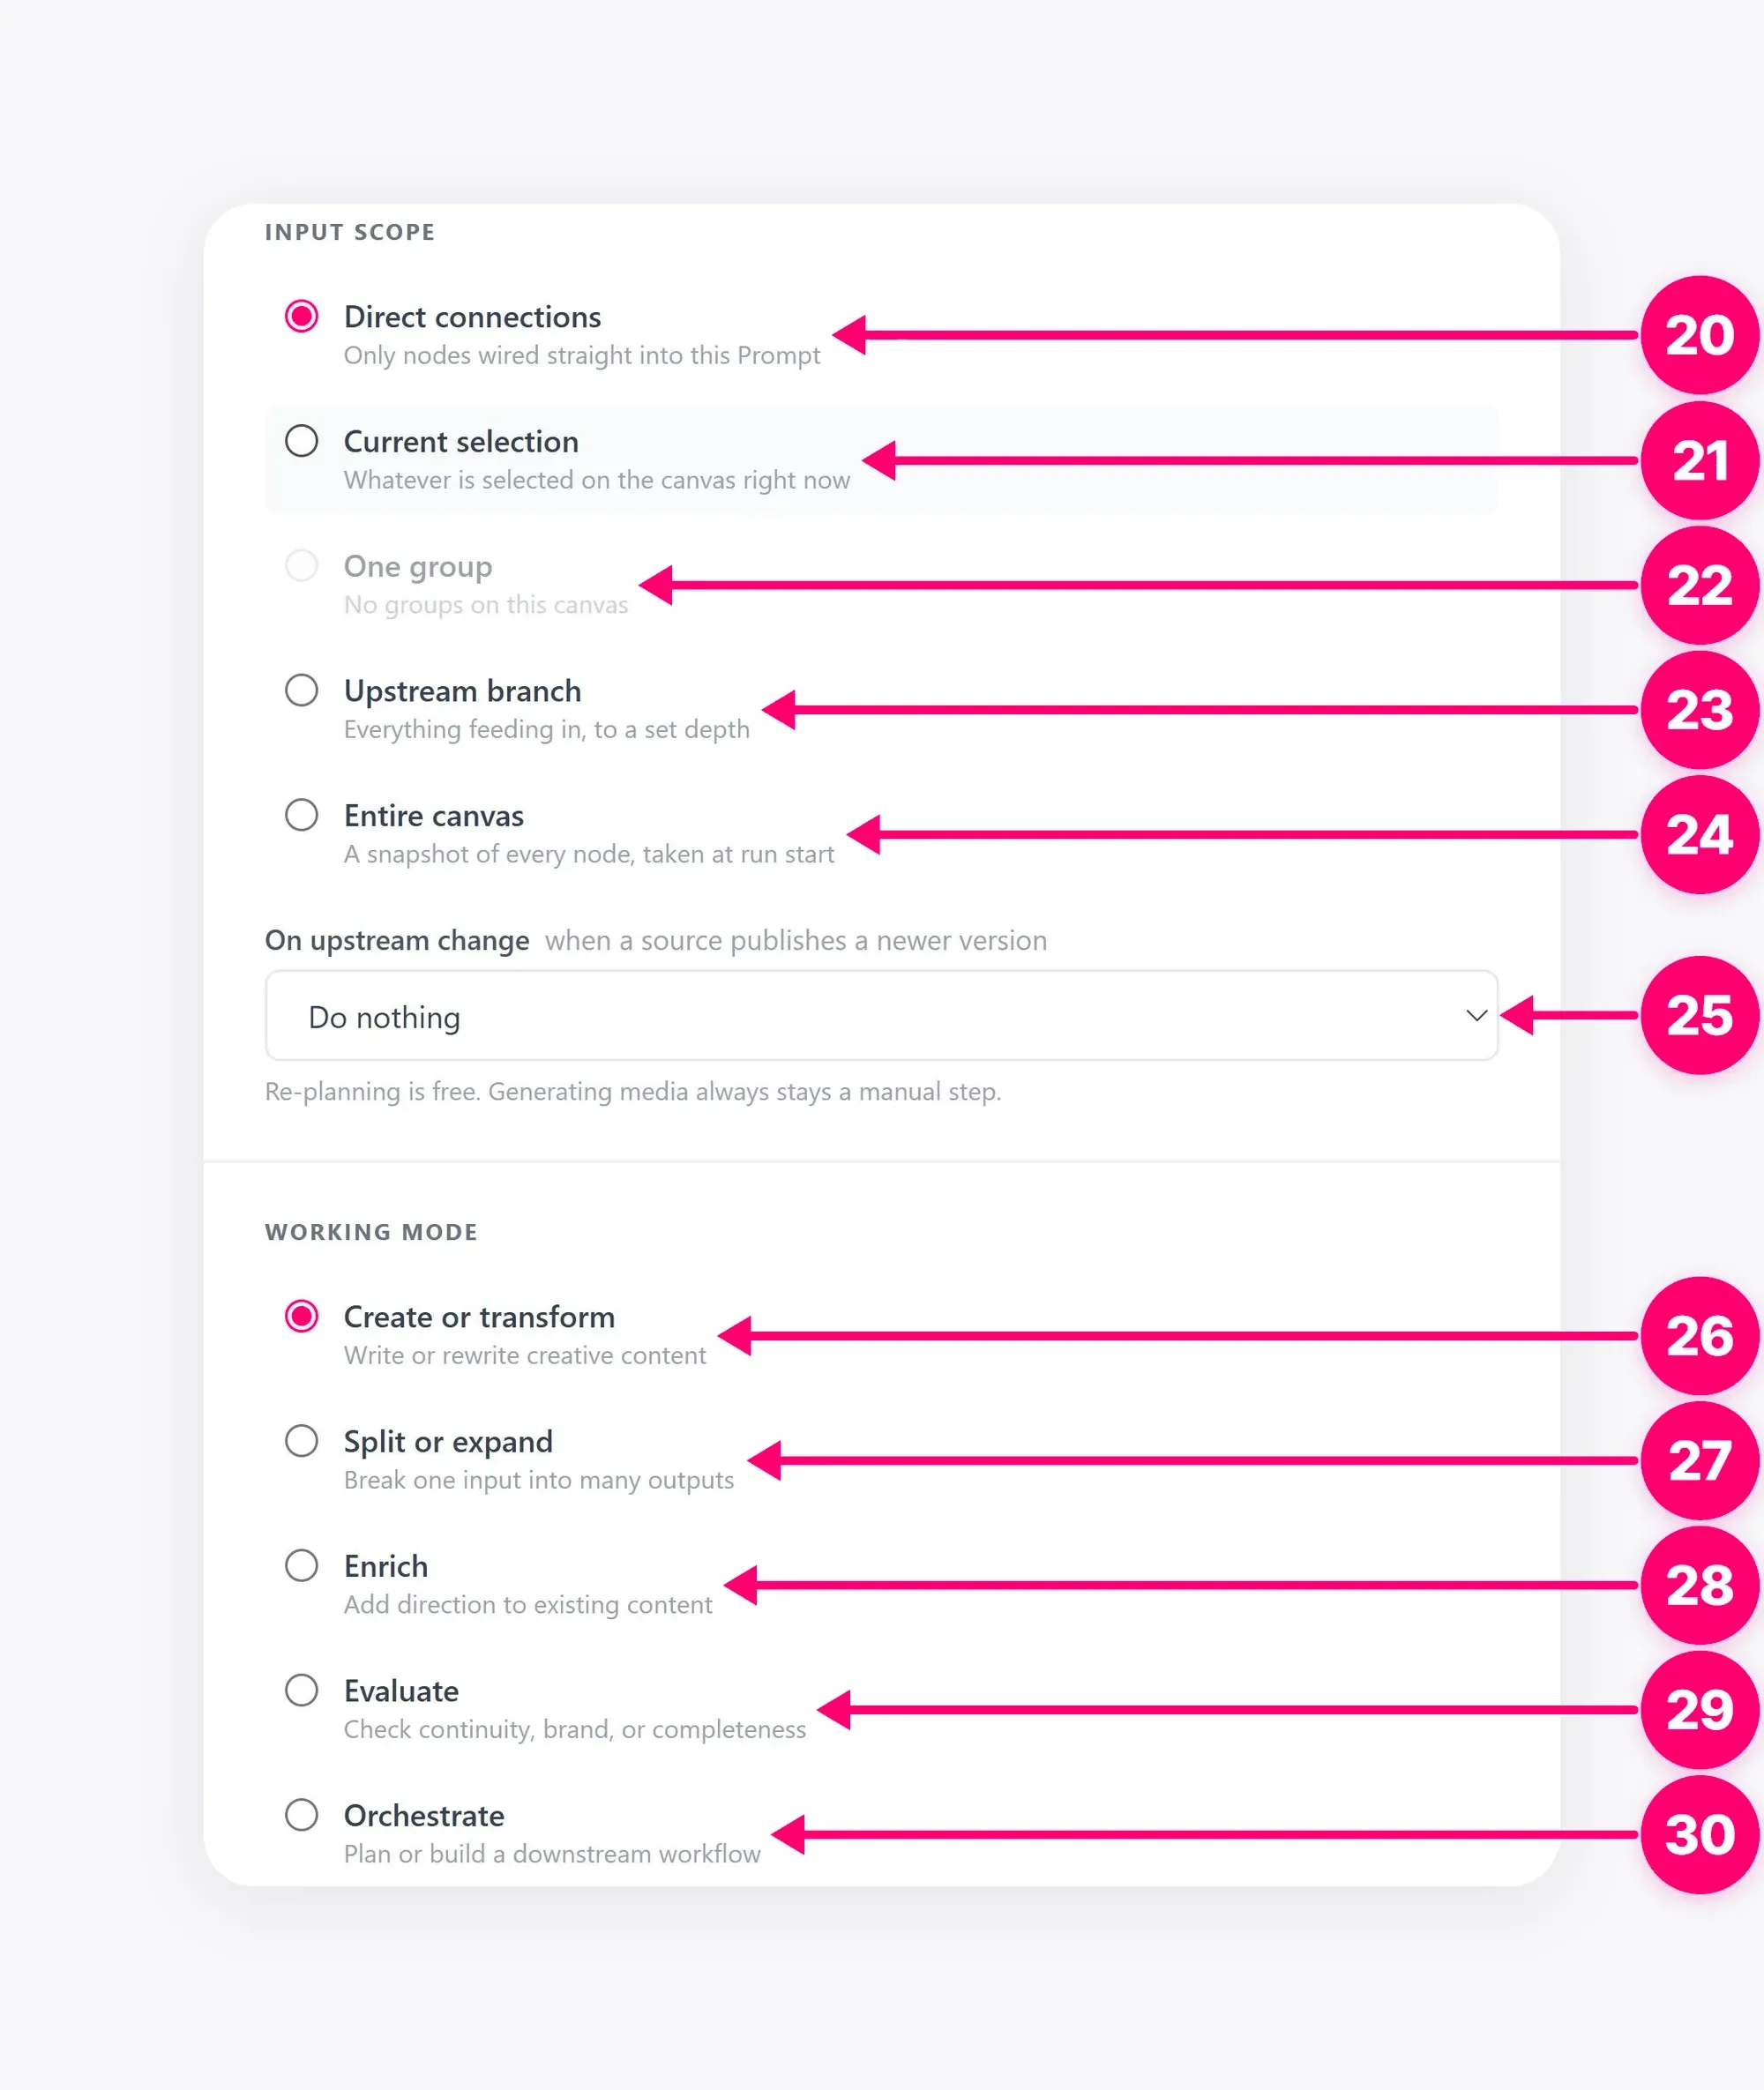
2. Select the inputs to include
Connect Brand Kit, Product, Cast, Location, or other source nodes that Brain should be able to reference. Then open the inputs section and select the exact connected outputs to include. A connection only makes an output available; nothing is included until you select it. Check the output versions, especially after regenerating a source sheet.
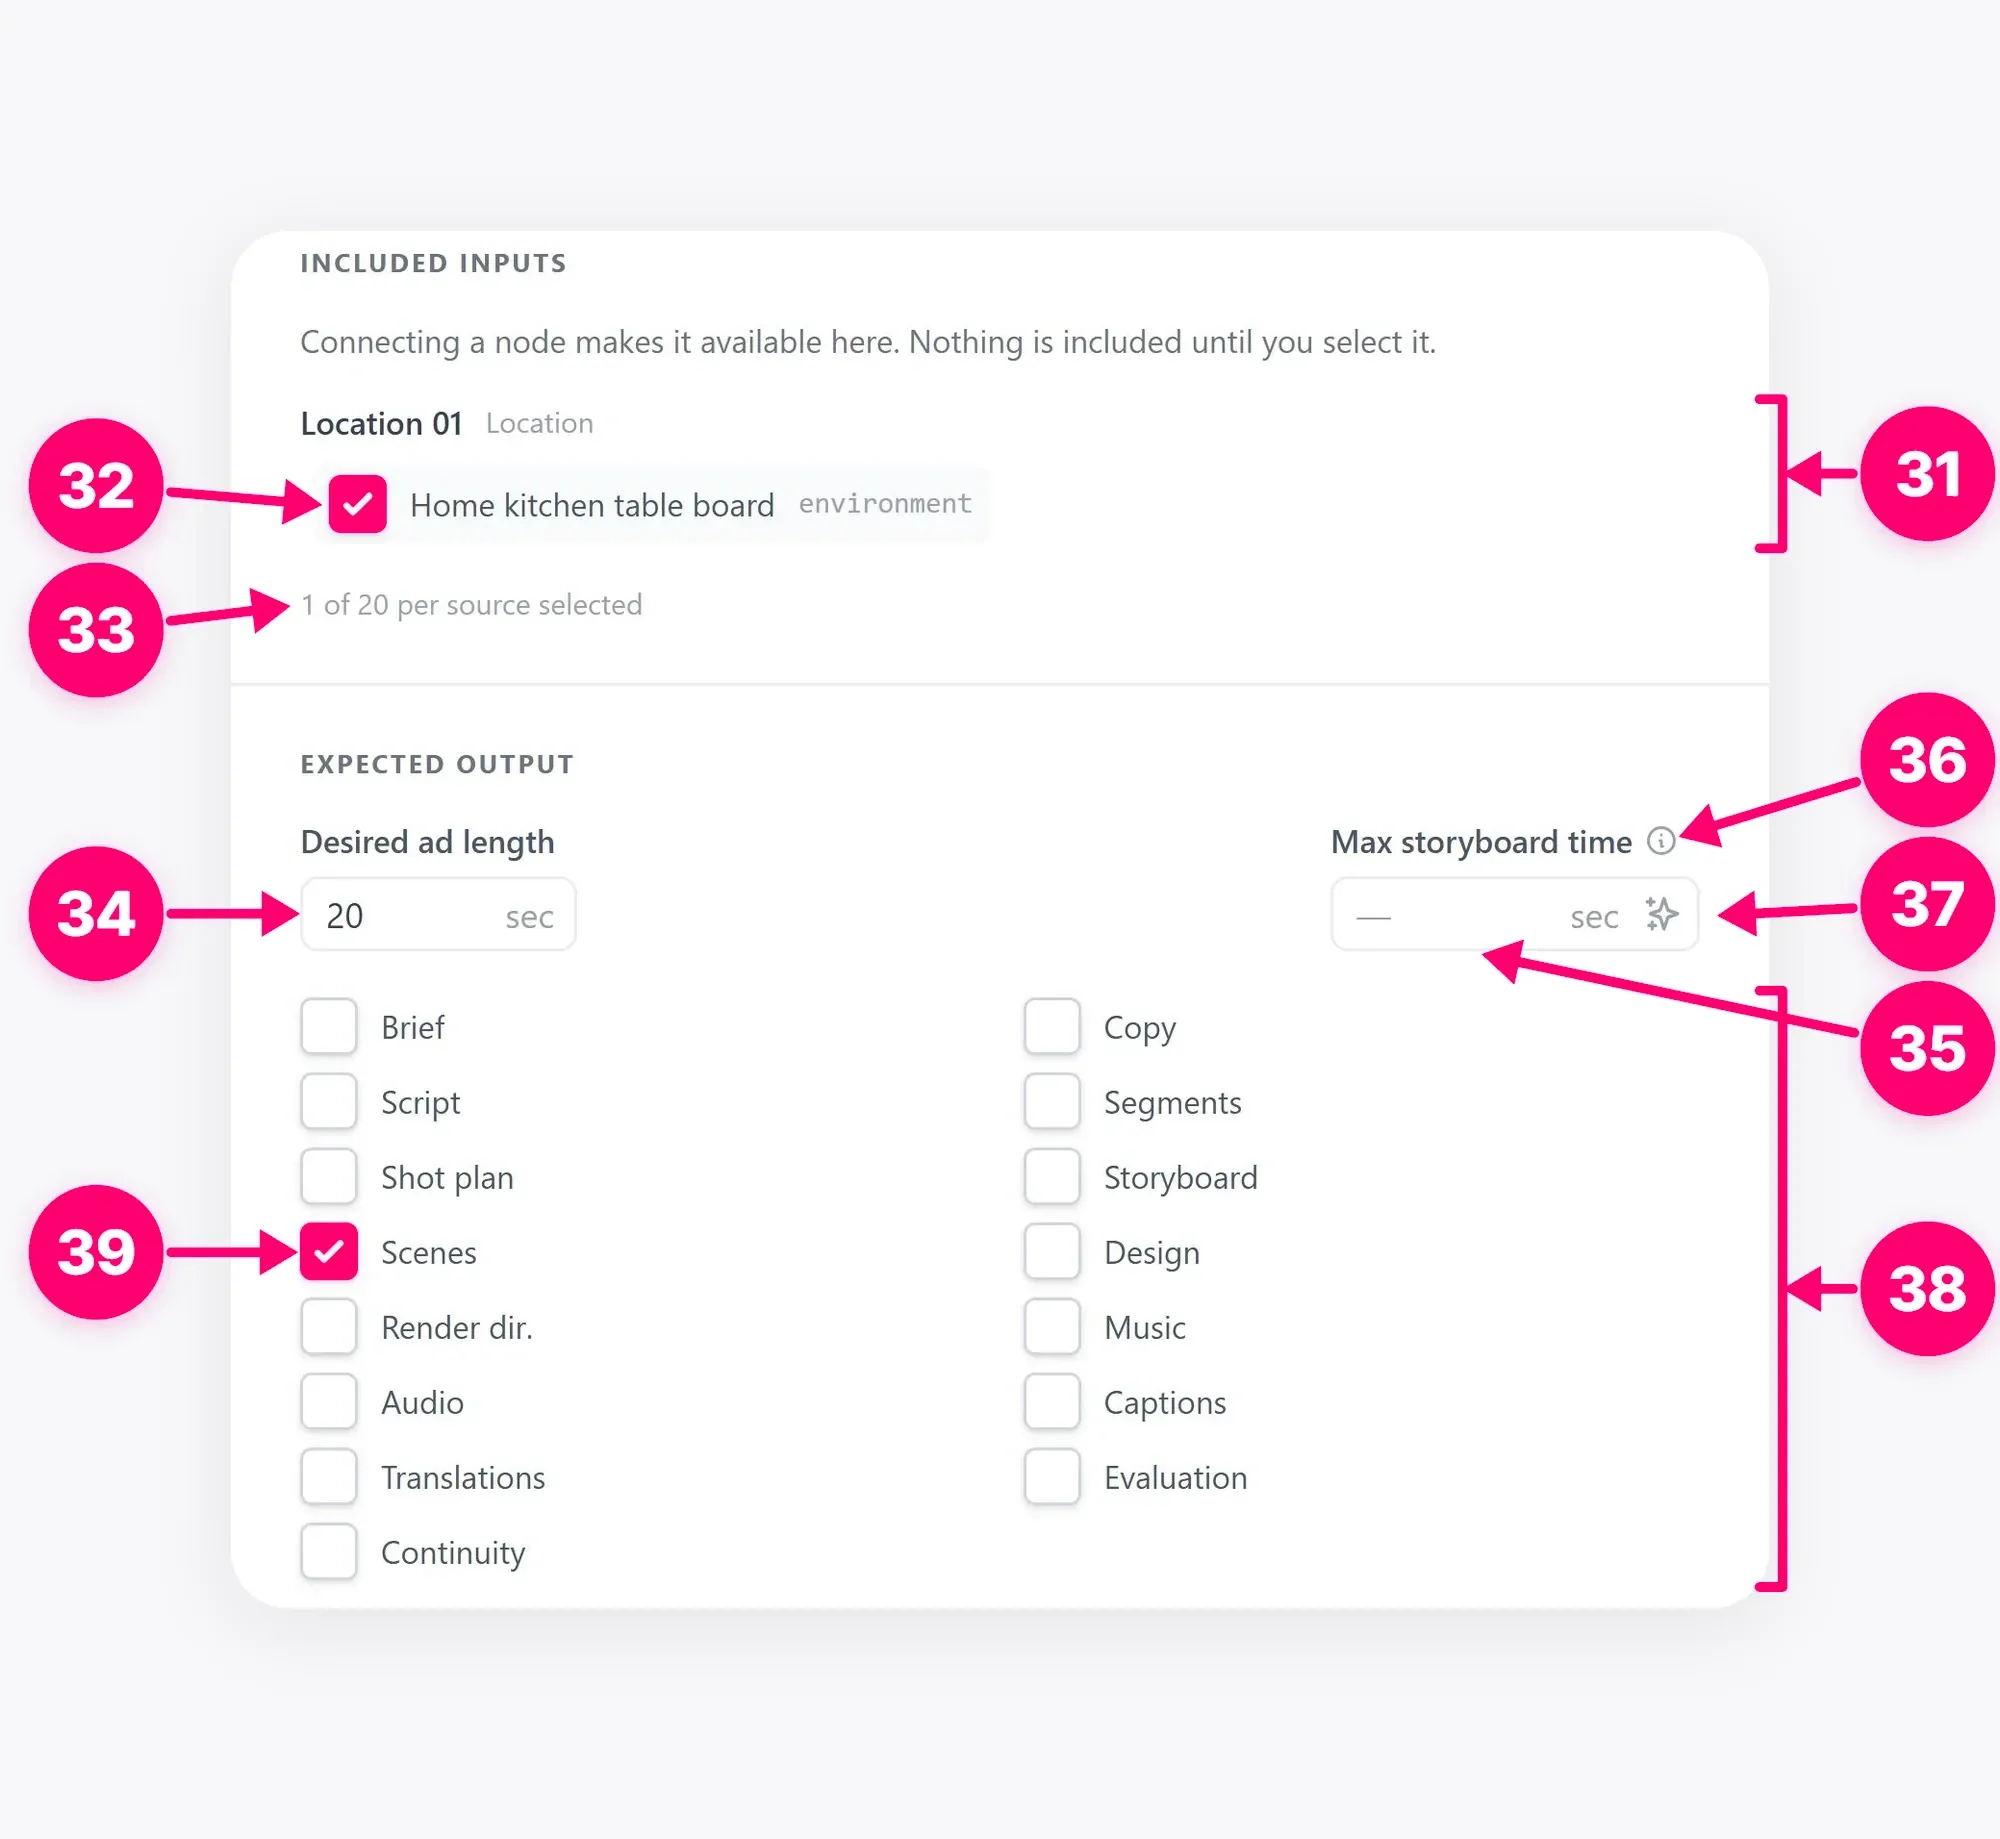
This distinction matters when a board contains multiple products or actor versions. Select only the assets needed for this plan, and confirm the Brand Kit is the approved one. If Brain’s response omits an expected source, return to this list before changing the prompt.
3. Run and review the plan
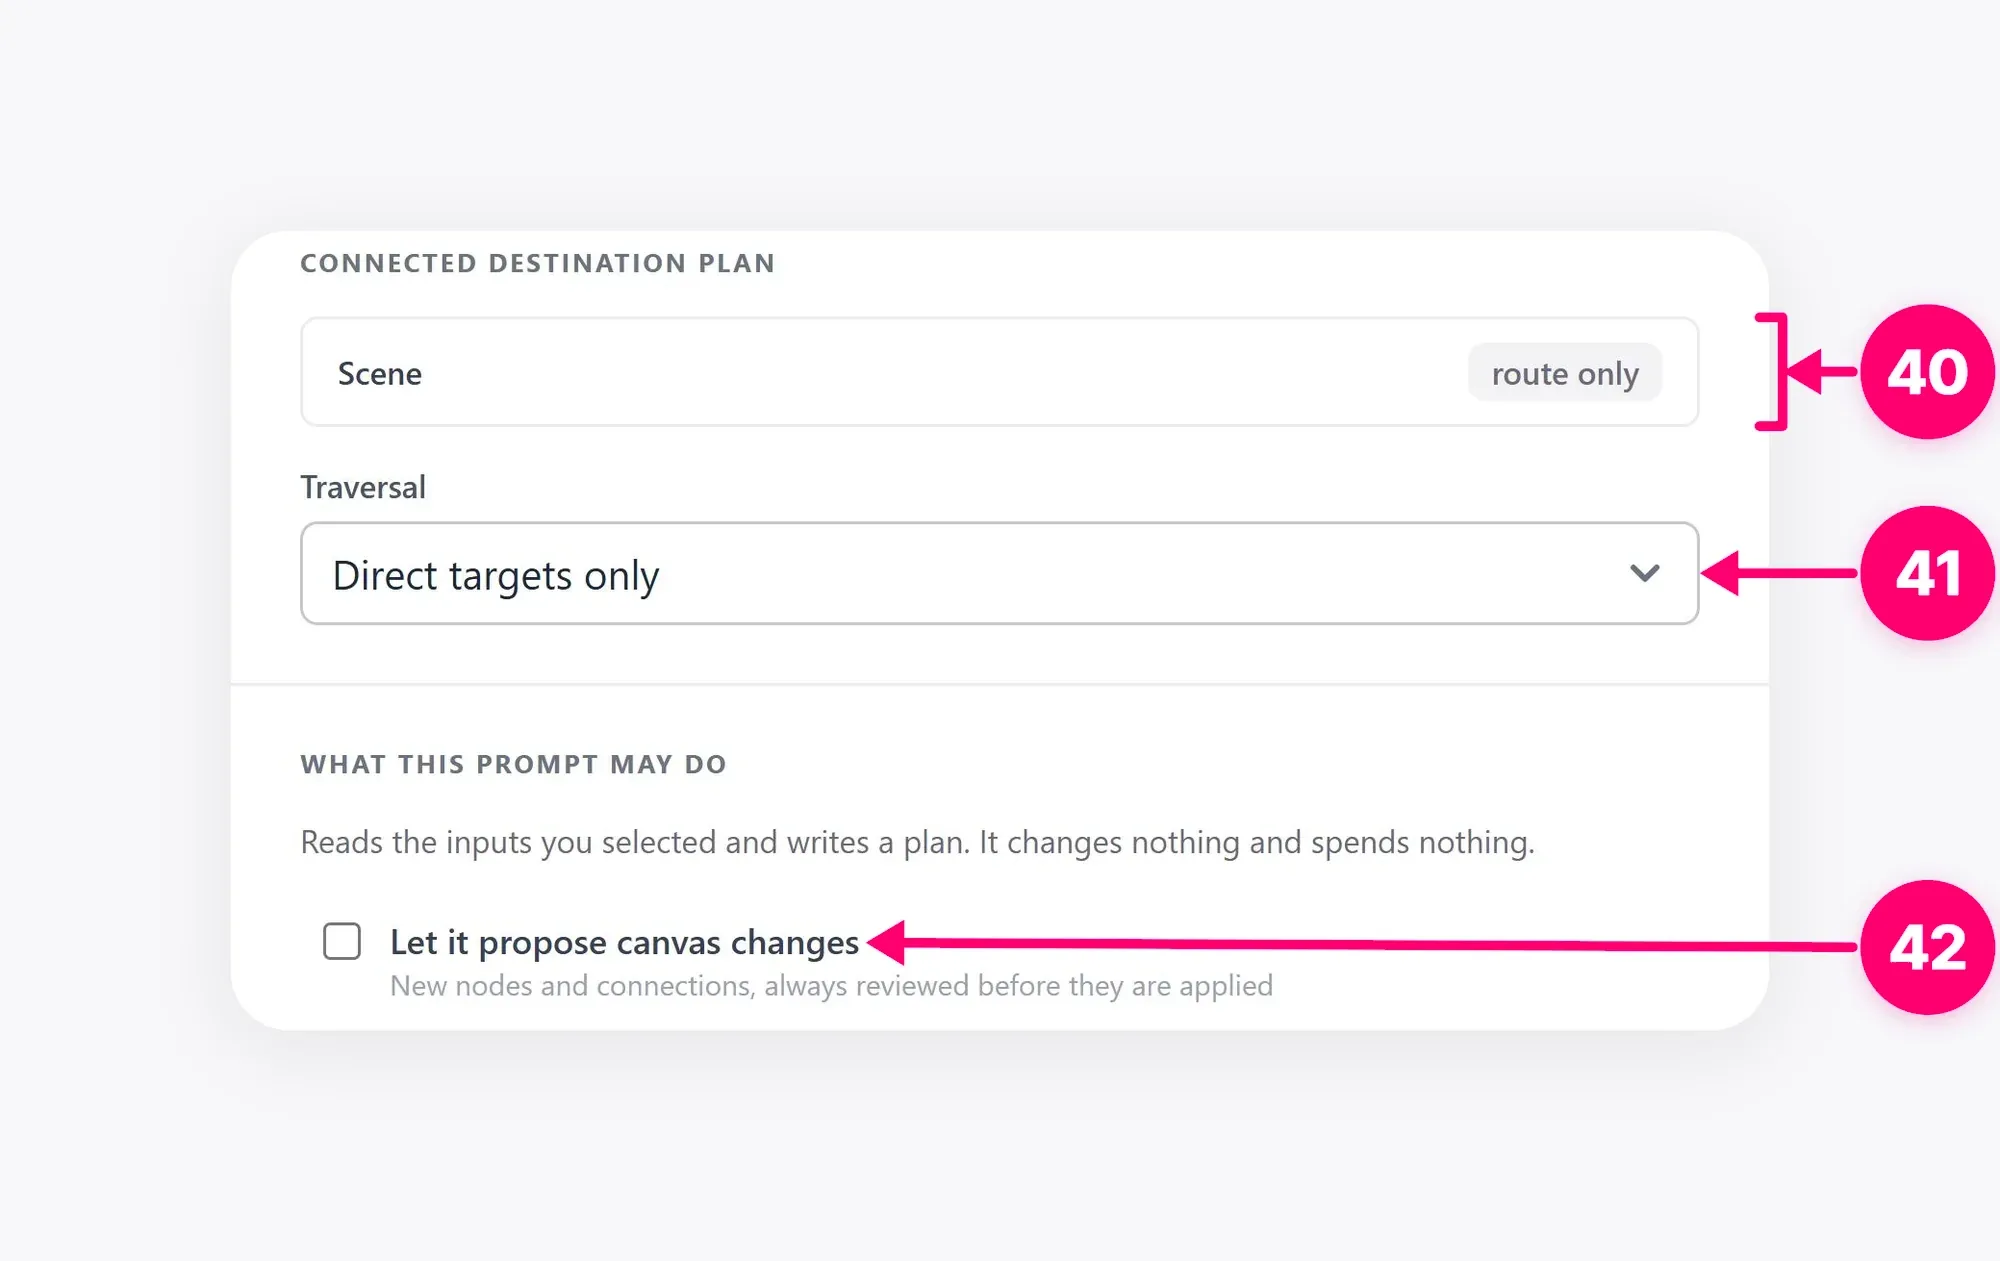
The destination section explains what the prompt may do. A basic planning run reads selected inputs and writes a plan. If you choose an option that proposes canvas changes, review the proposal before applying it. Do not treat a planning preview as a completed render or approved ad.
Choose an available planning model and run Brain. Model availability depends on your account. Read the output and execution history for the proposed structure, assumptions, and any unsupported claims. Edit the brief and rerun if necessary. Then use the approved plan to guide a Storyboard for video or a Static Ad for a still image.
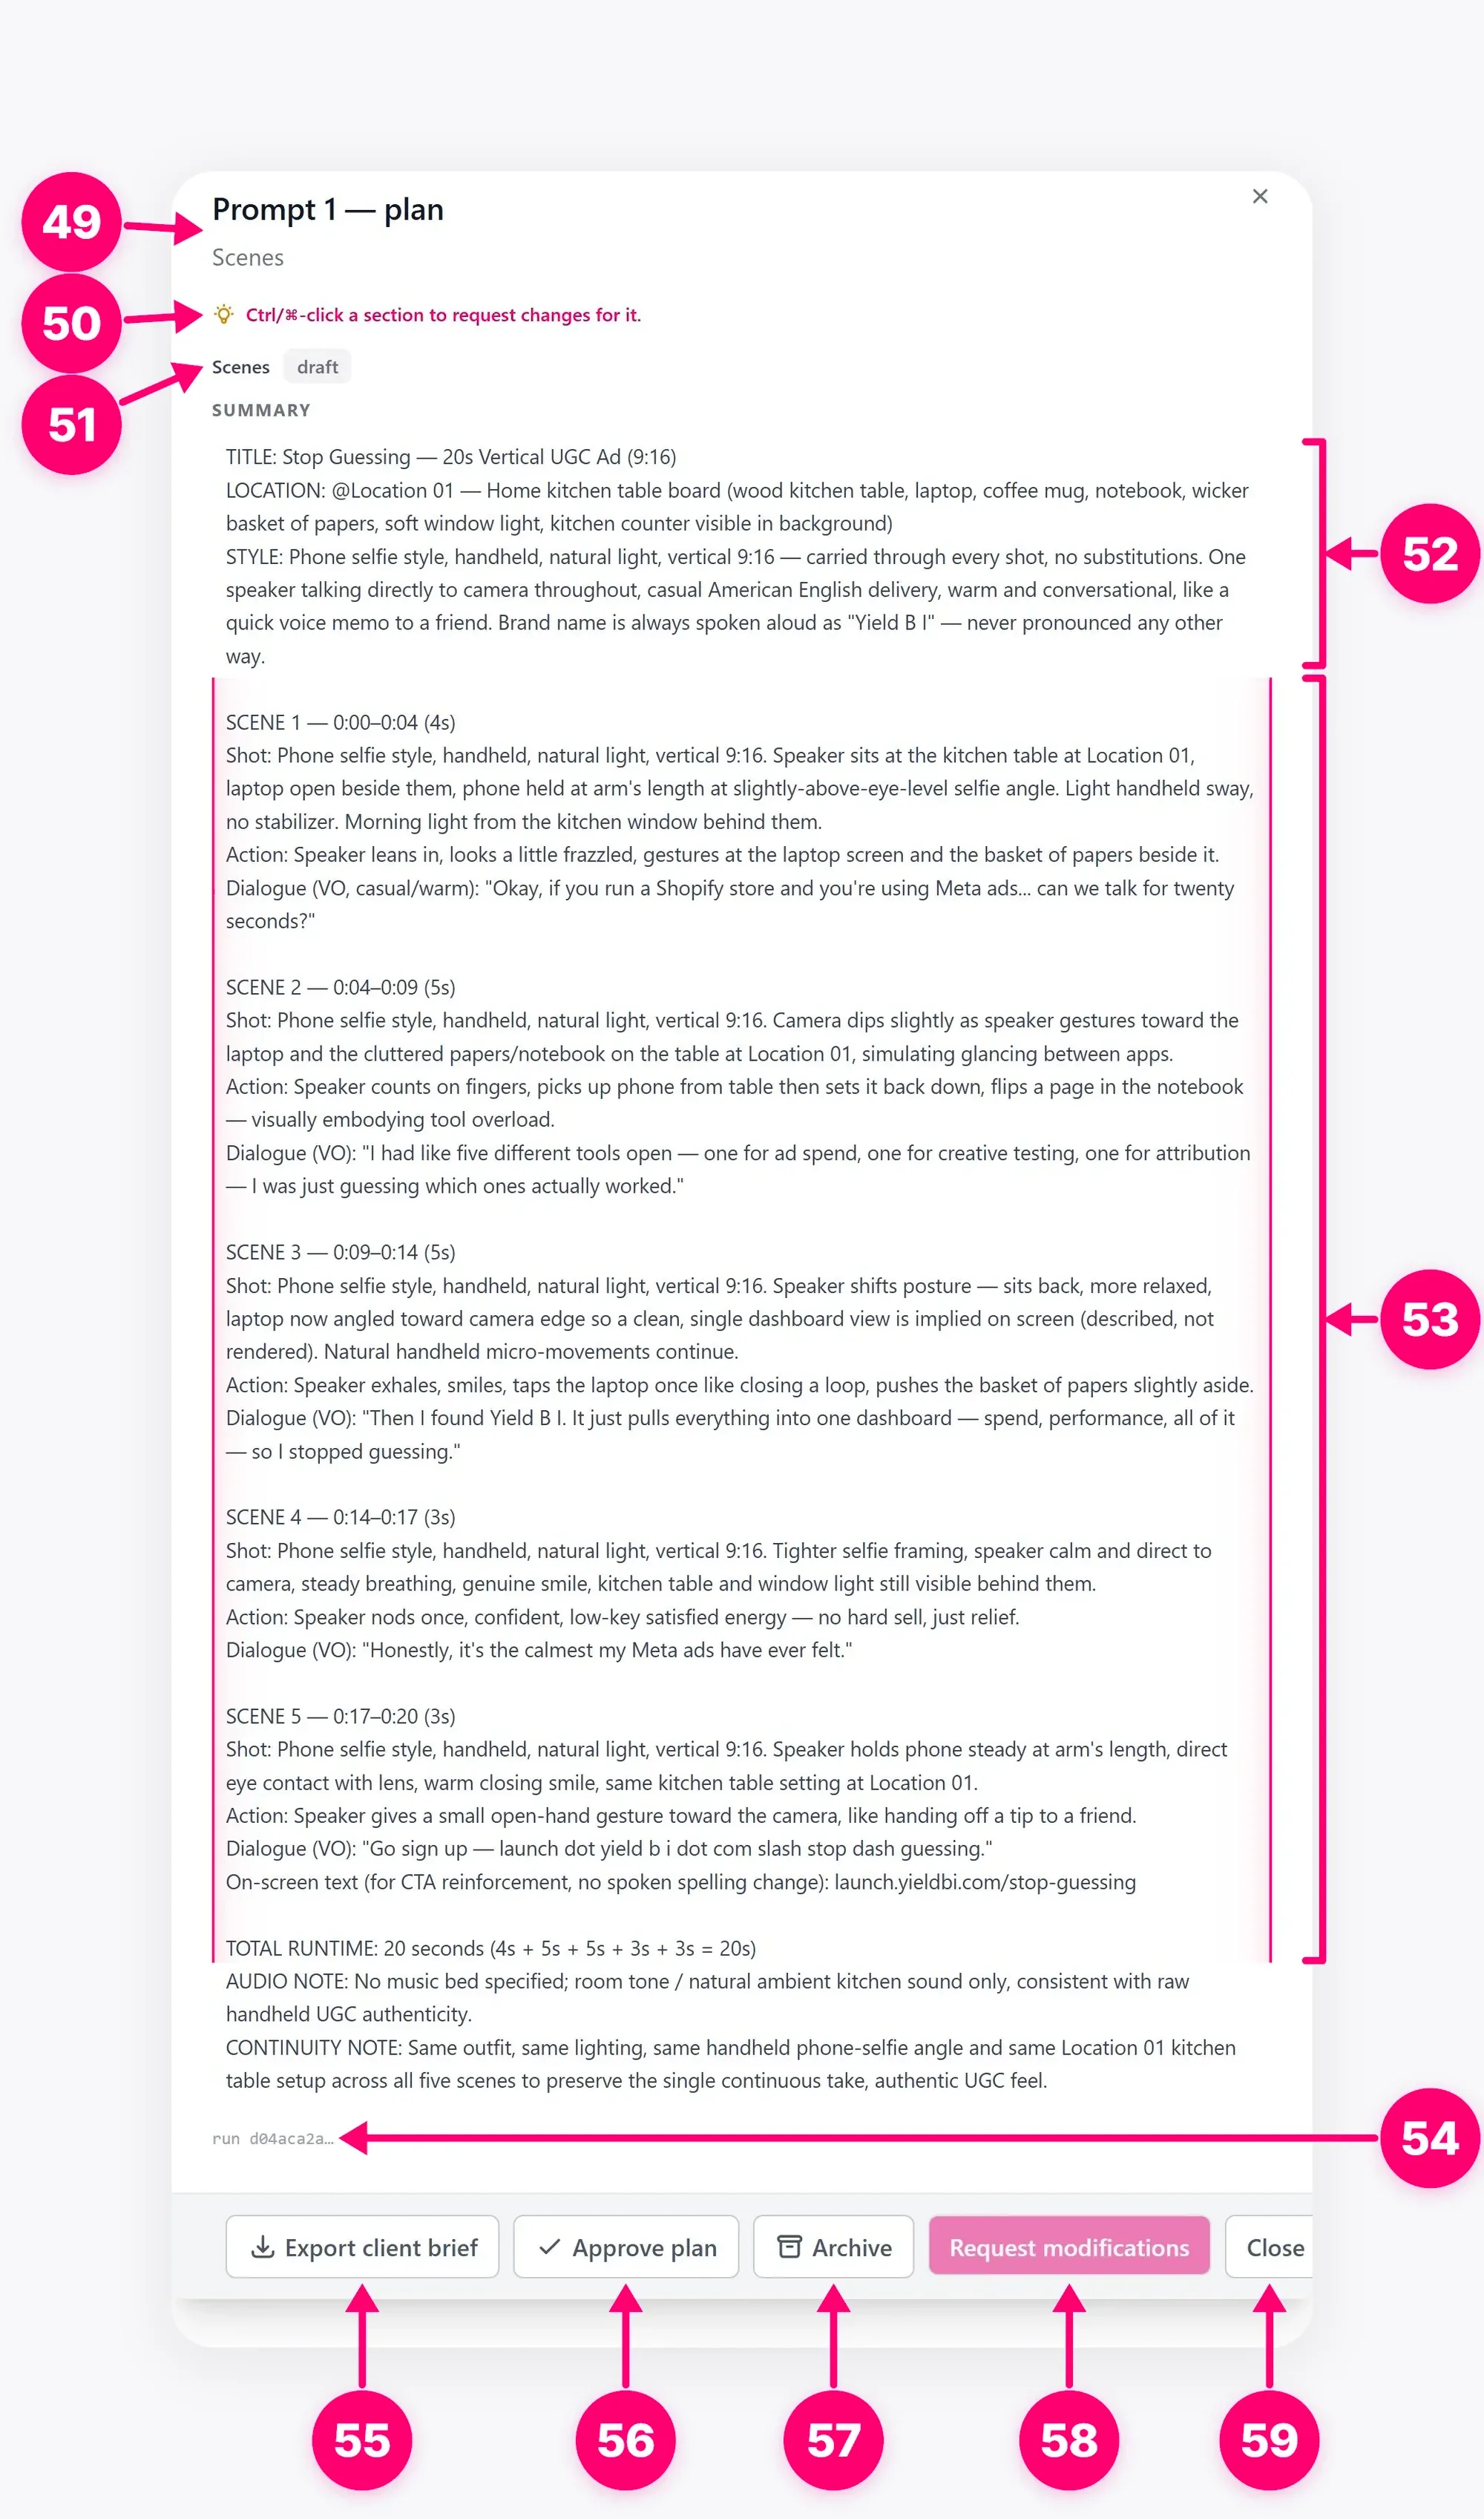
Before generating media, verify that the plan’s timing, product facts, CTA, and selected sources agree with the intended campaign. A plan can organize the work, but the final creative still needs its own visual and factual review.
Lecturas relacionadas
Conoce los controles de Media Studio para crear tableros, reutilizar plantillas, cargar medios guardados y elegir los nodos de tu próxima creación.
Getting StartedConnect source assets, choose a planning model, write a storyboard brief, and generate visual frames for every selected shot.
Getting StartedCompose a static ad from selected references, review the draft, approve it, download it, or send its image to Asset Manager.