 English
 Français
 Deutsch
 Español
Este artículo aún no está disponible en tu idioma. Se muestra la versión en inglés.
Getting Started
Media Studio: create a Cast actor
Create a reusable Cast actor, set appearance and voice metadata, render a reference sheet, and use the result in Media Studio.
YieldBI TeamGrowth ResearchActualizado oct 2026
En esta página
A Cast node holds a person or character you want to use across creative work. You can describe the actor in a prompt alone or use the Appearance settings to specify individual traits. Both paths lead to the same rendering and review steps. These screenshots show one example actor; generated appearance can still vary in downstream images or video.
1. Add a Cast actor and write the prompt
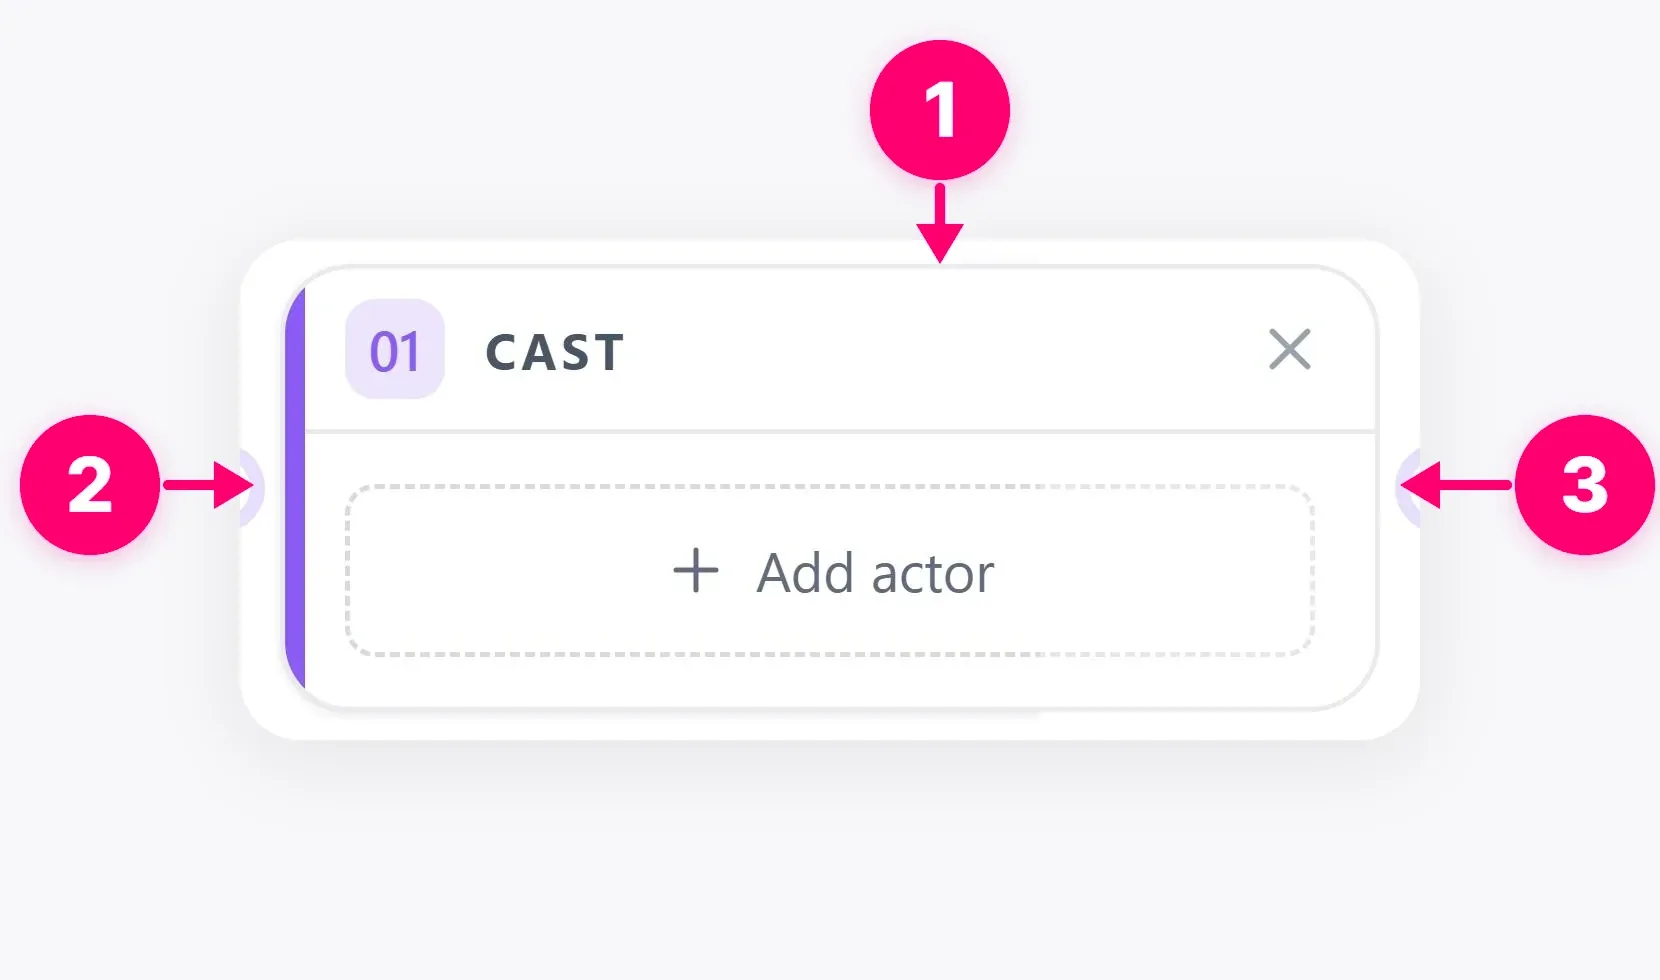
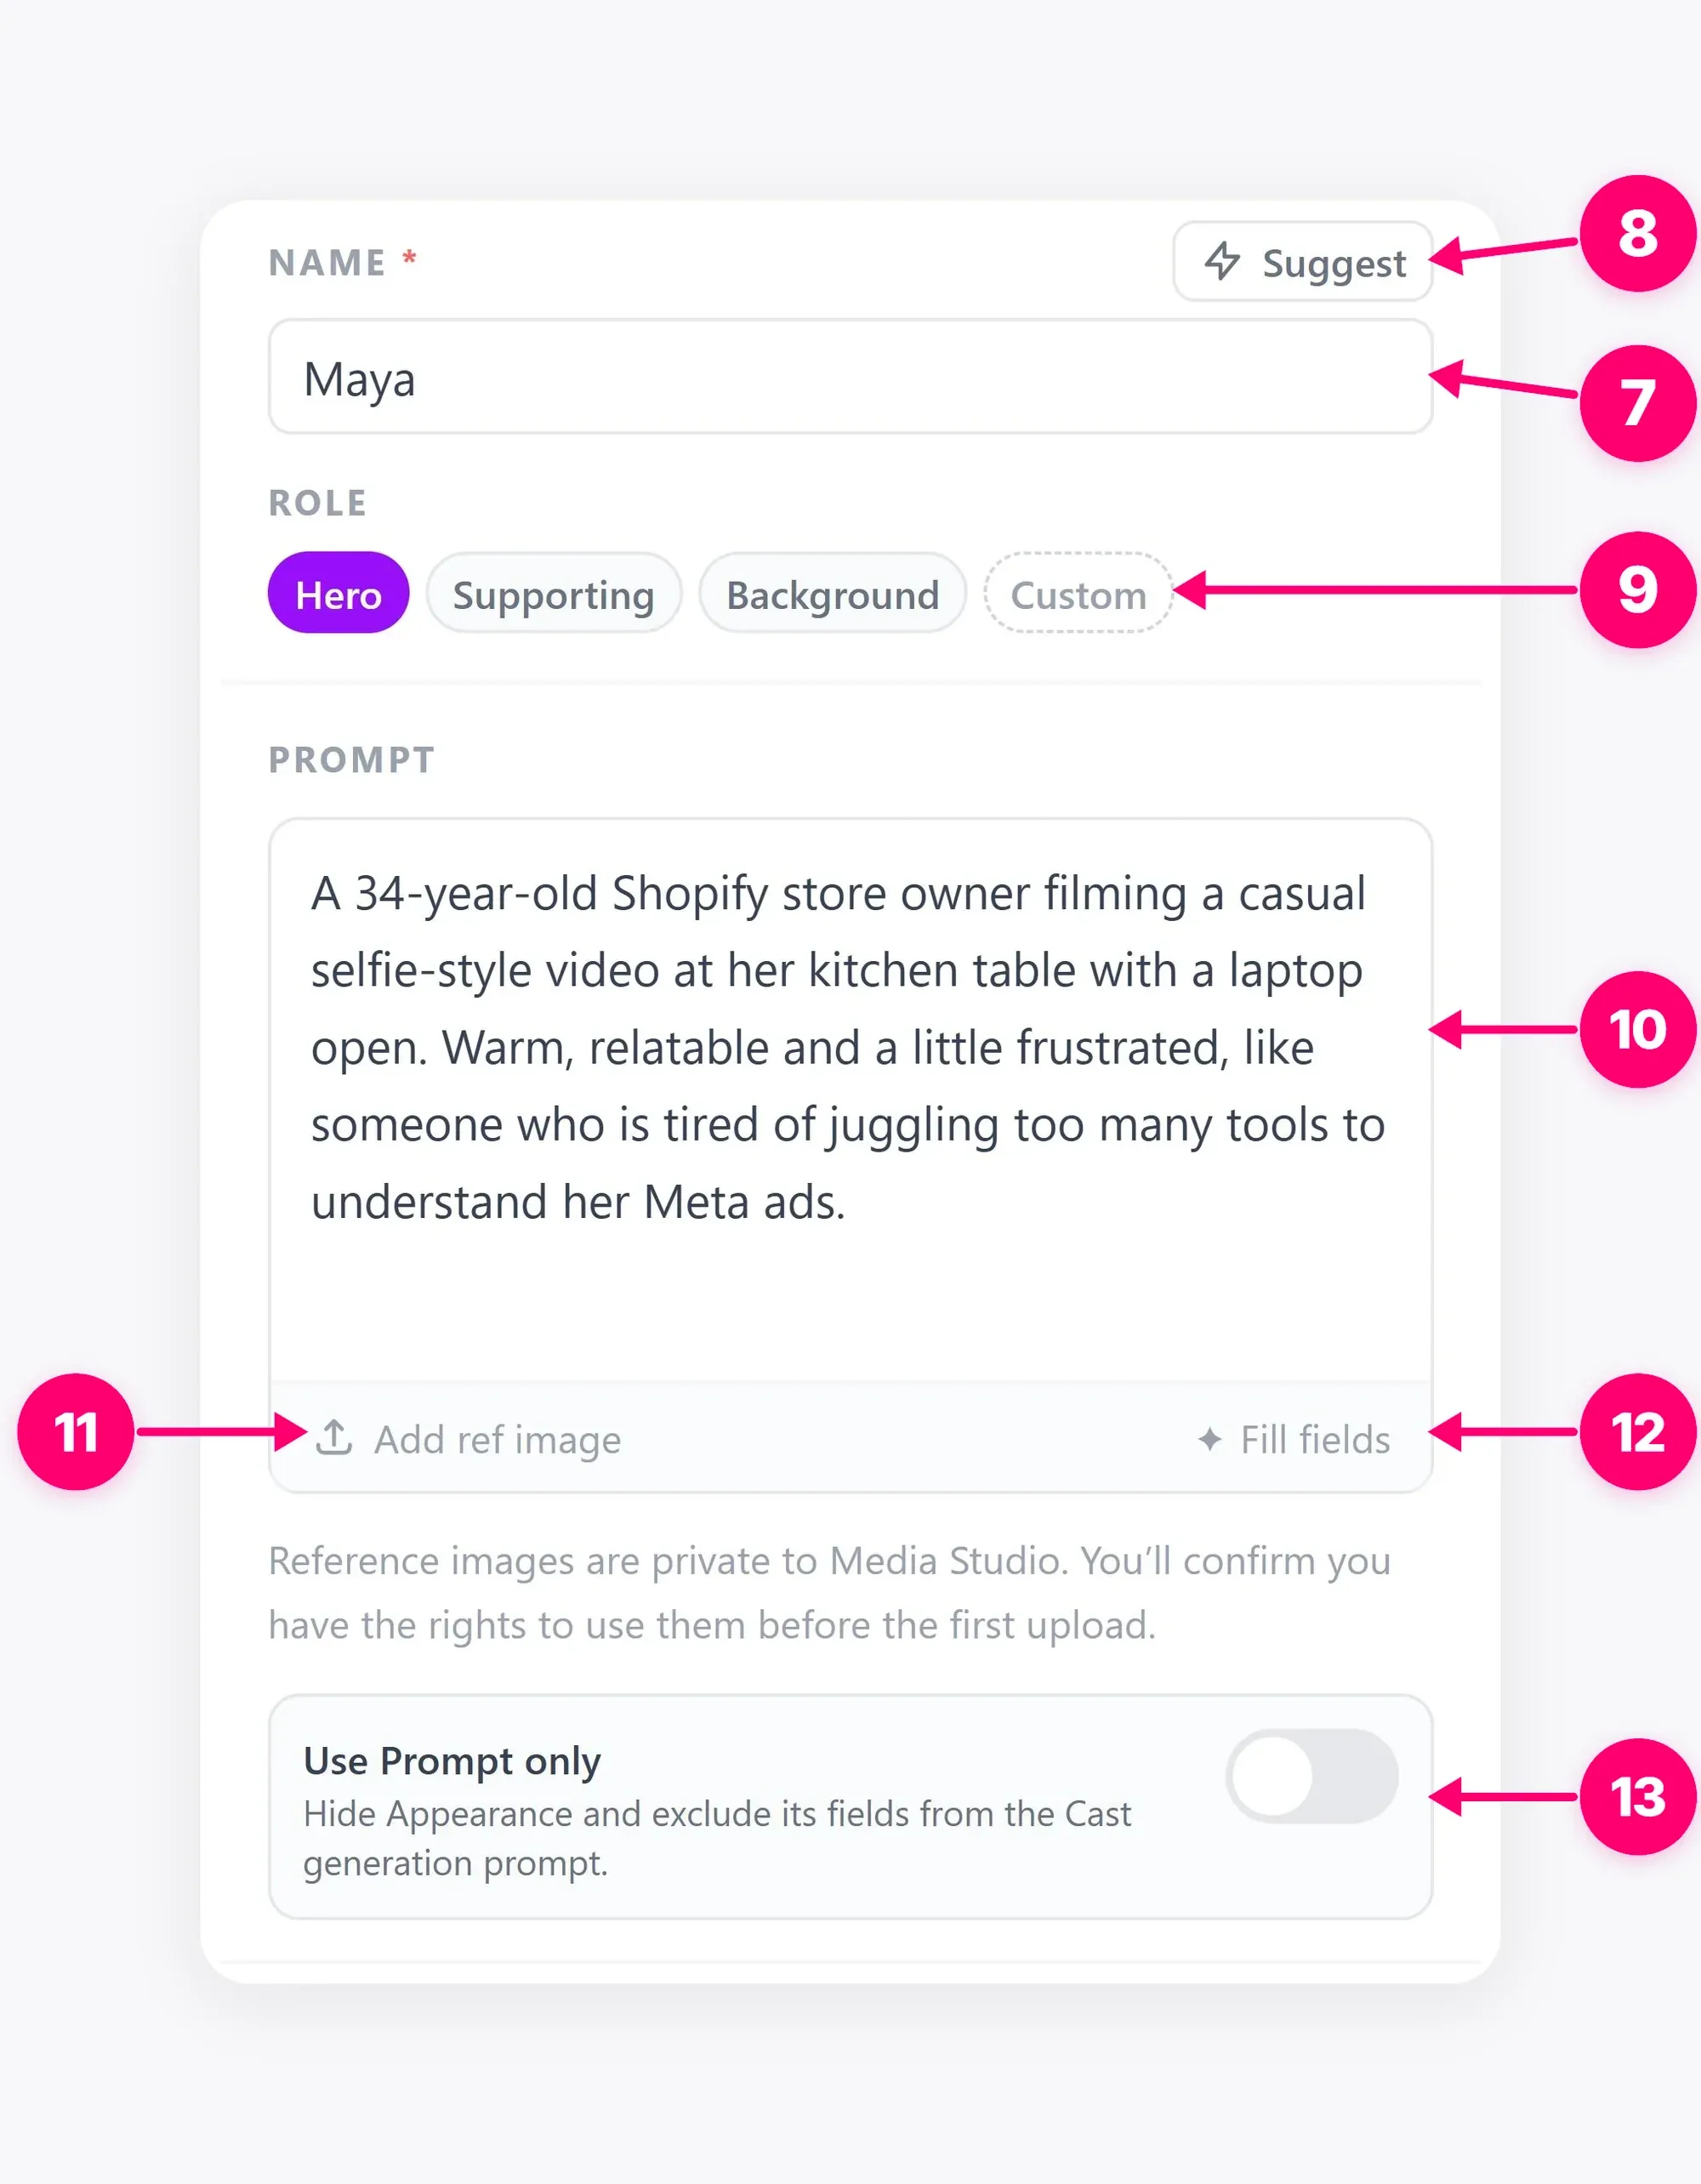
Open your Cast node. For board setup, see Add a node to the board. Create an actor, give it a clear name, and describe who should appear in the Prompt. Include the features that matter to the creative. You can also add reference images when you have the rights to use them.
2. Choose how to define appearance
Choose one of these paths in the actor editor:
- Prompt only: Turn on Use Prompt only. Describe the character’s appearance in the Prompt. The app hides Appearance and excludes its structured fields from the Cast generation prompt. You can still set rendering and voice options later.
- Prompt with Appearance settings: Leave Use Prompt only off. Write the main description in the Prompt, then use Appearance for identity, face, eyes, skin, hair, and build. Keep the fields consistent with what you wrote.
If you add reference images, the app uses them to define appearance and hides the structured Appearance section. Describe any changes you want in the Prompt. Expression, outfit, action, and pose controls may still help with the intended sheet.
The screenshot below shows the Appearance settings path. With Use Prompt only on, this section is hidden.
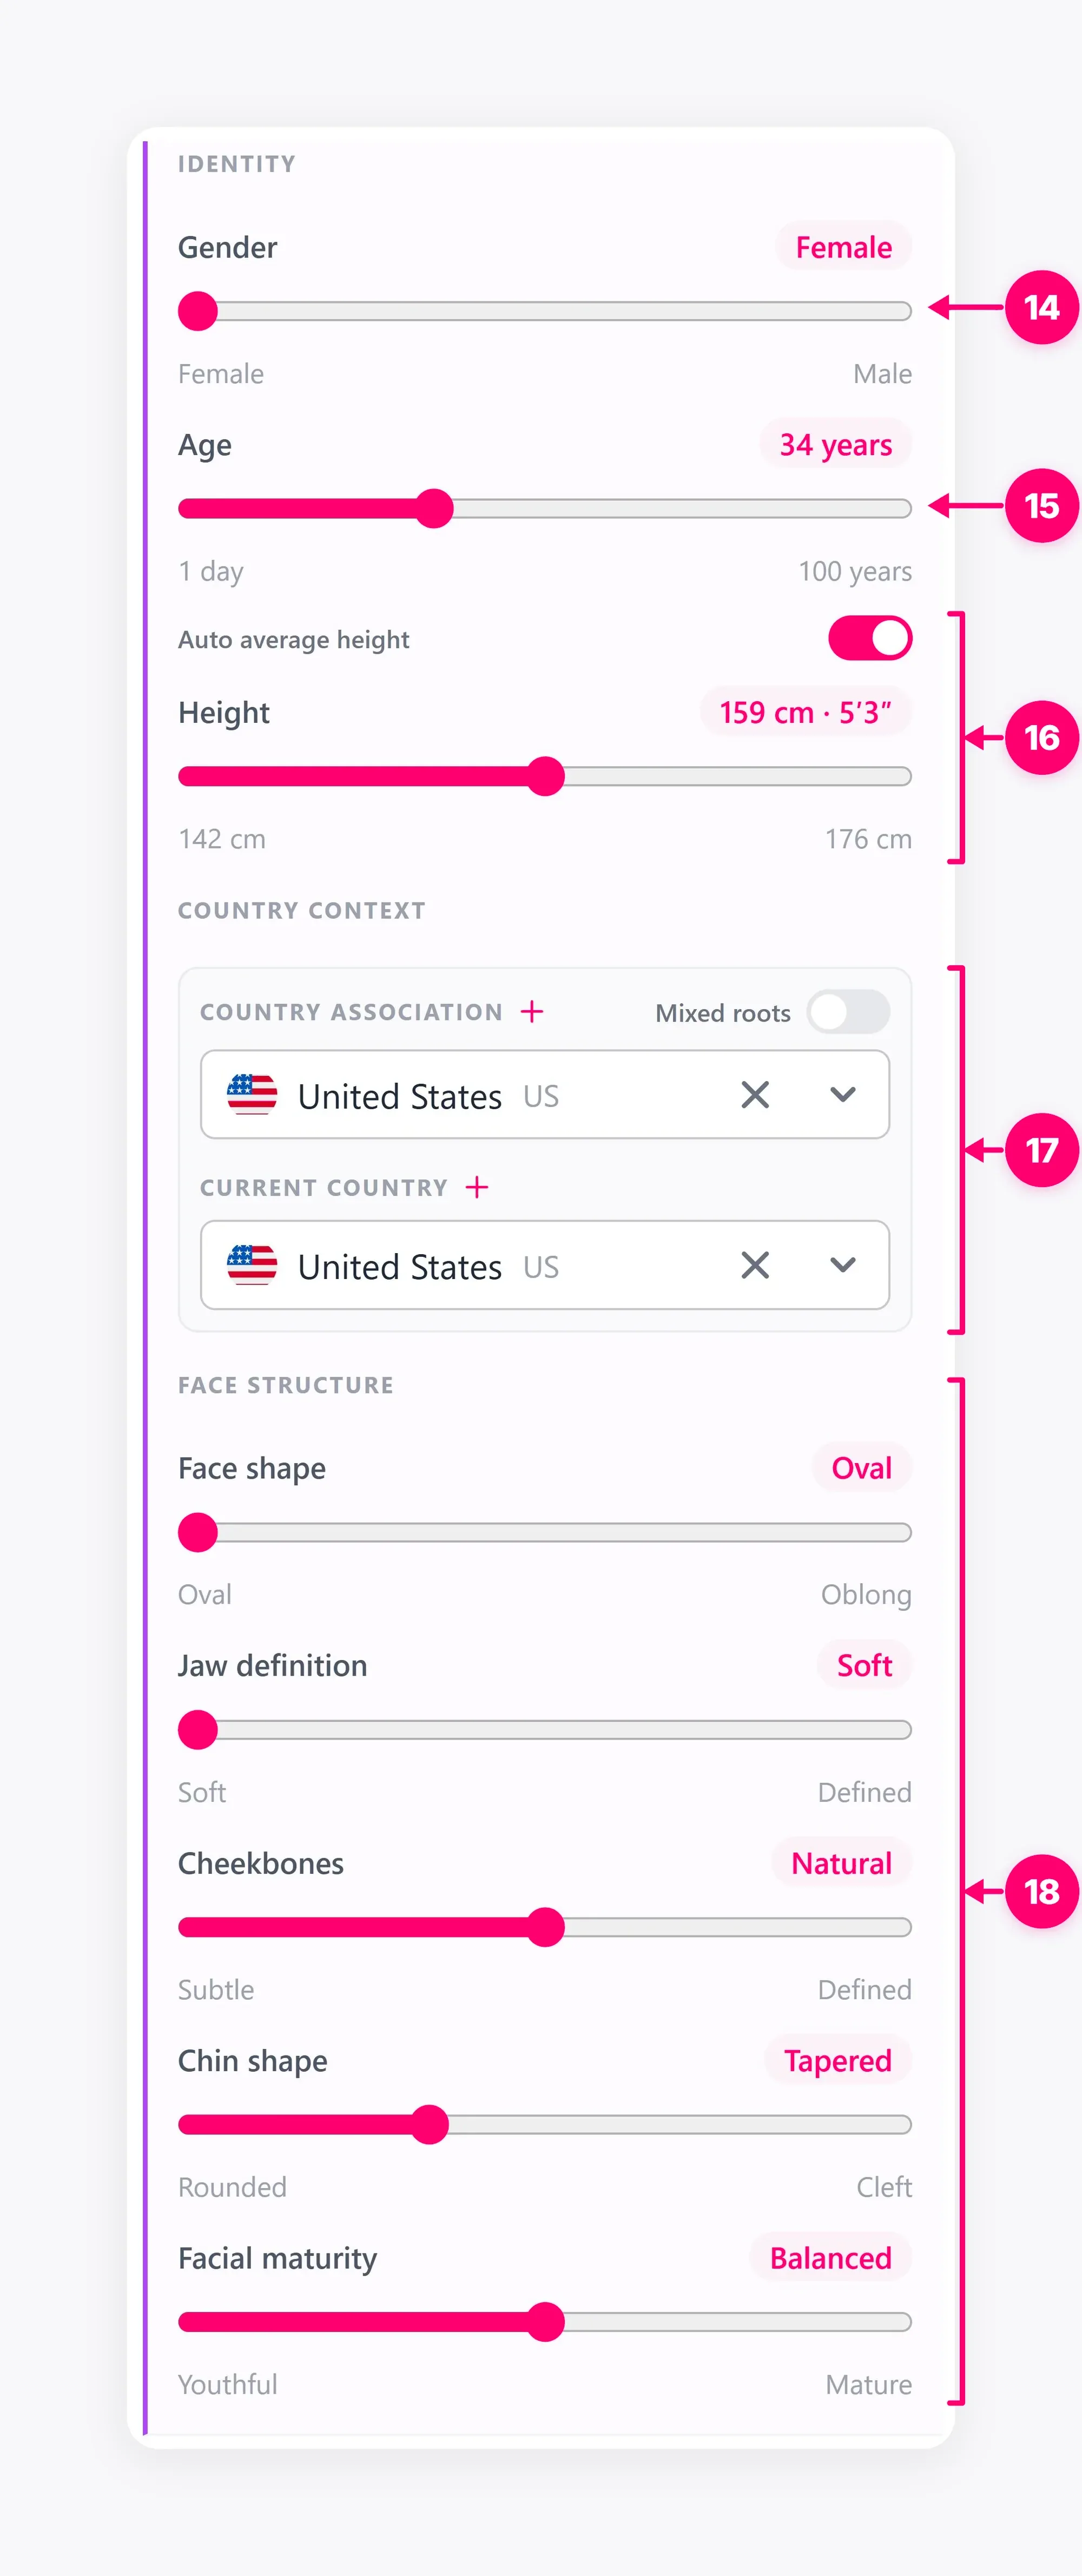
Before rendering, review whichever inputs you chose. Avoid conflicting instructions between the Prompt, references, and settings. The rendered sheet is the result to inspect for facial features, hands, clothing, and unwanted artifacts.
3. Choose voice and rendering options
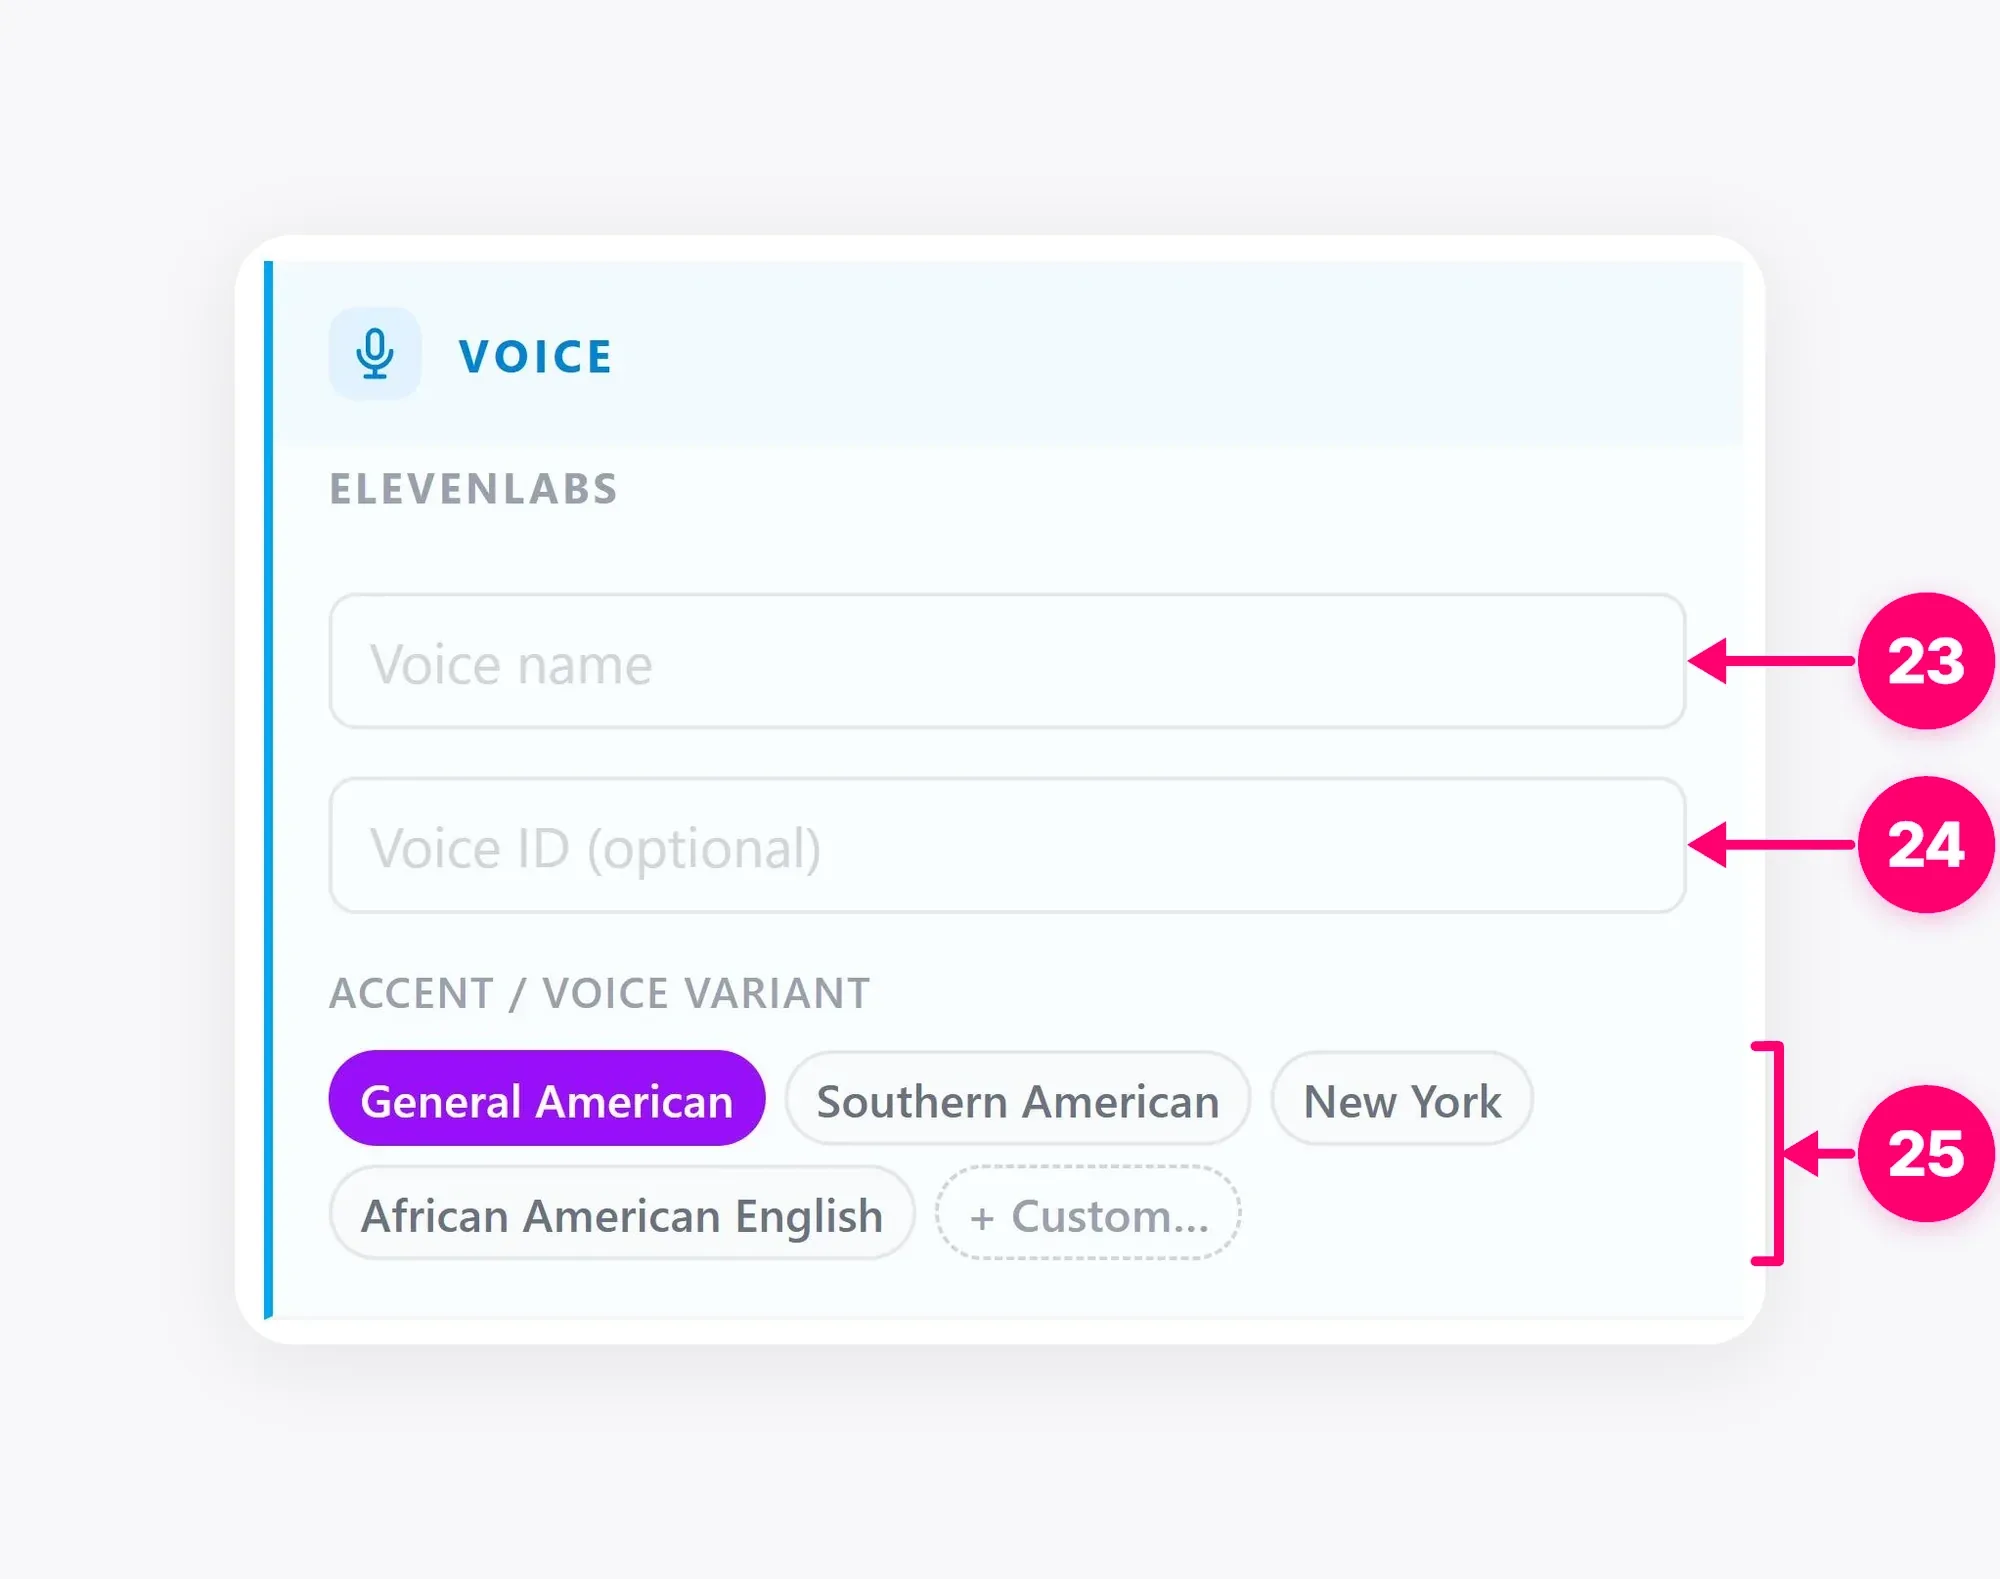
The Voice section accepts an ElevenLabs voice name, optional voice ID, and accent or variant. These are actor settings for later use. Filling them does not, by itself, create narration or a voice sample.
Choose the rendering template and modules that provide the views you need, then select an available image model. The model list and estimated cost depend on the current account and capability catalog; the names and numbers in the screenshot are examples. Review the estimate before starting generation.
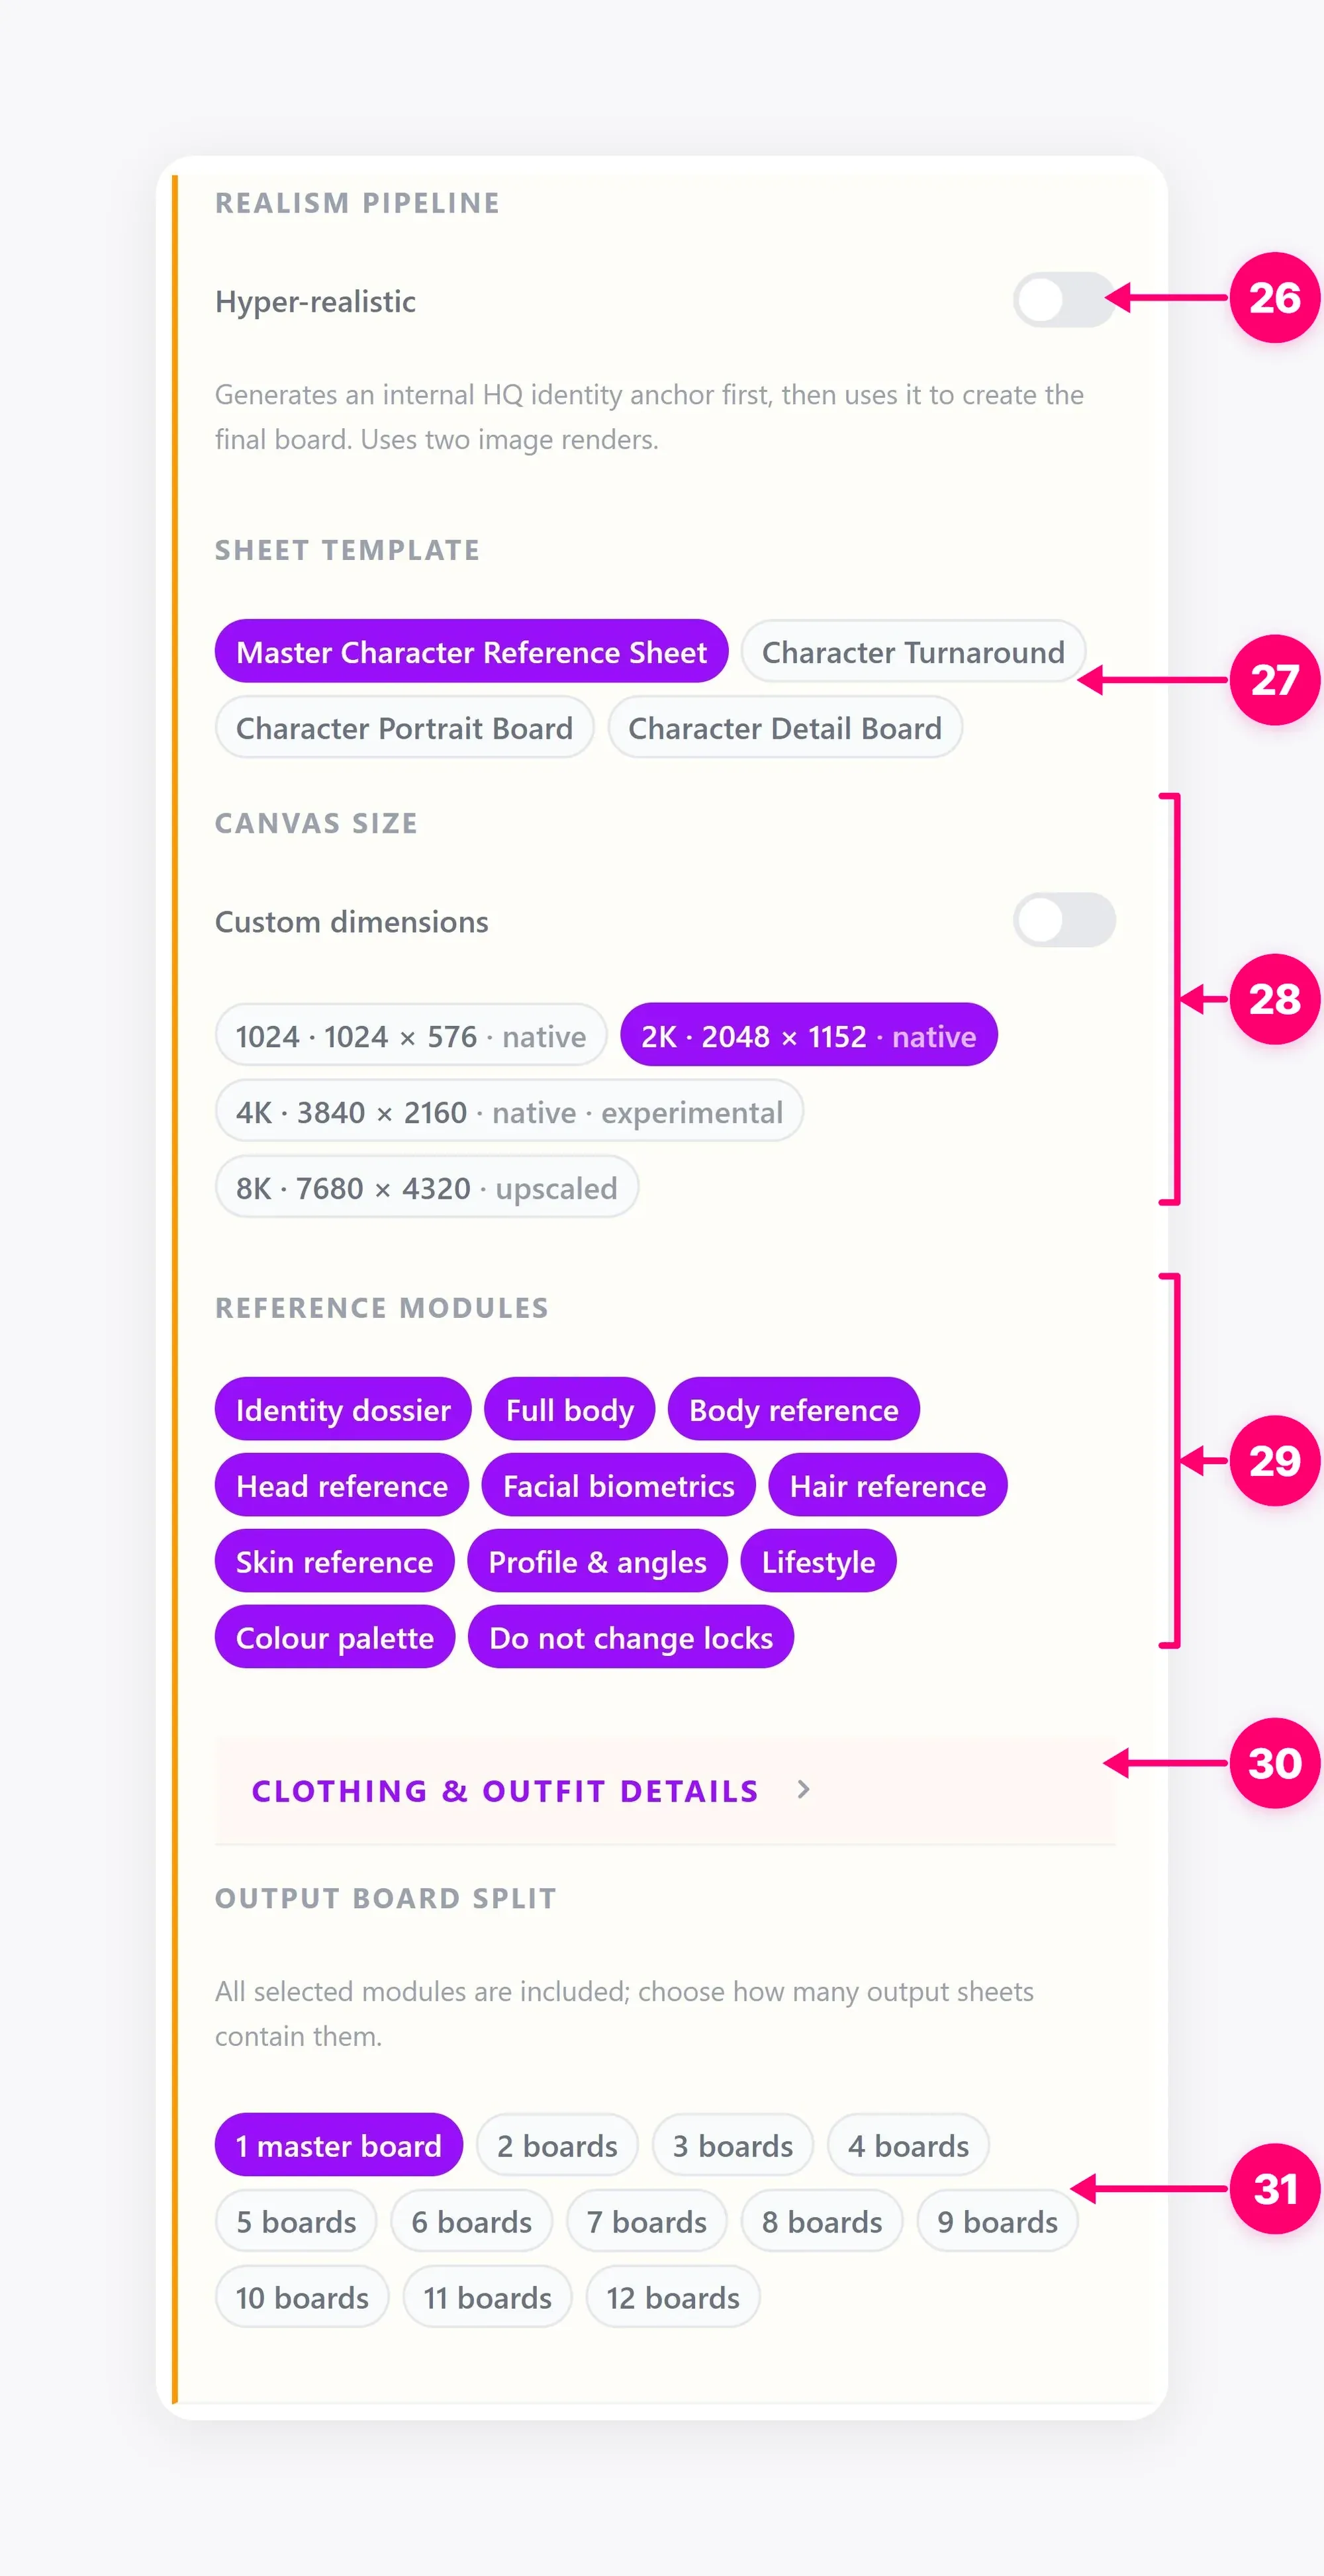
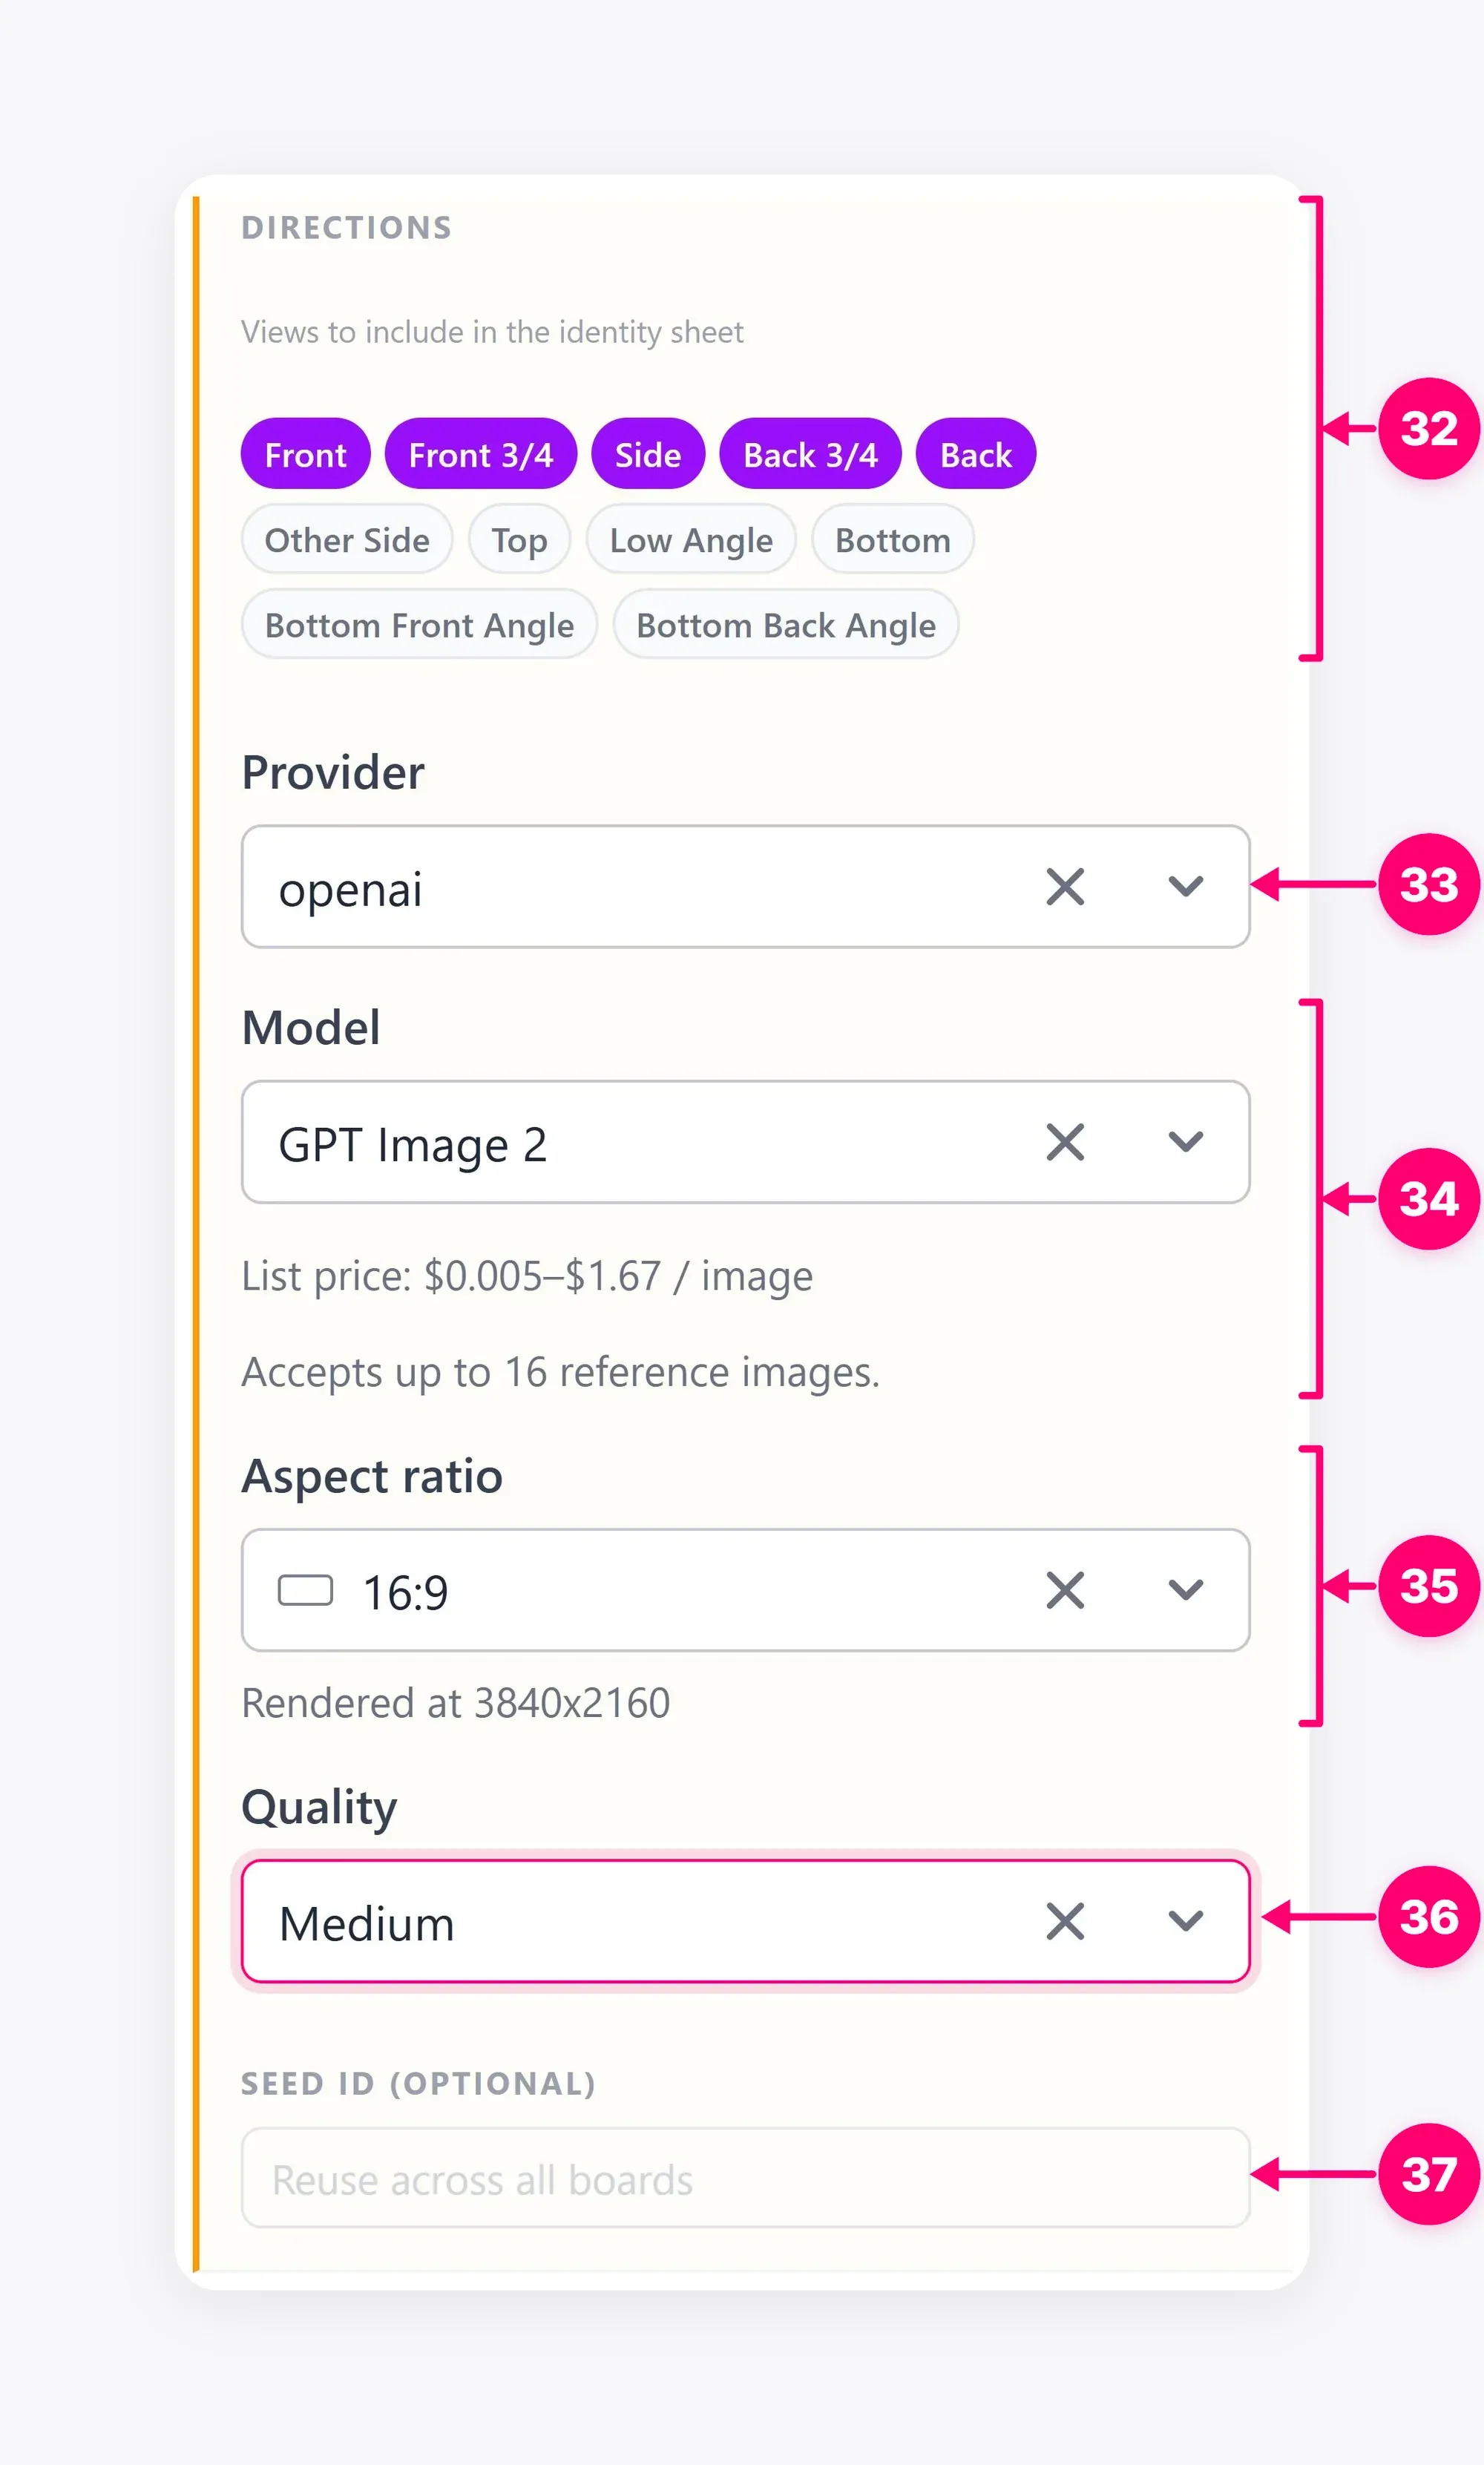
4. Review and reuse the actor
When generation finishes, open the sheet and inspect each view. If the actor does not match the intended brief, revise the source details and render again. Save a suitable result, then connect the Cast node to the next stage. For a clothing sheet tied to this person, follow the Clothes & Props guide. For a planned sequence, follow the Storyboard guide.
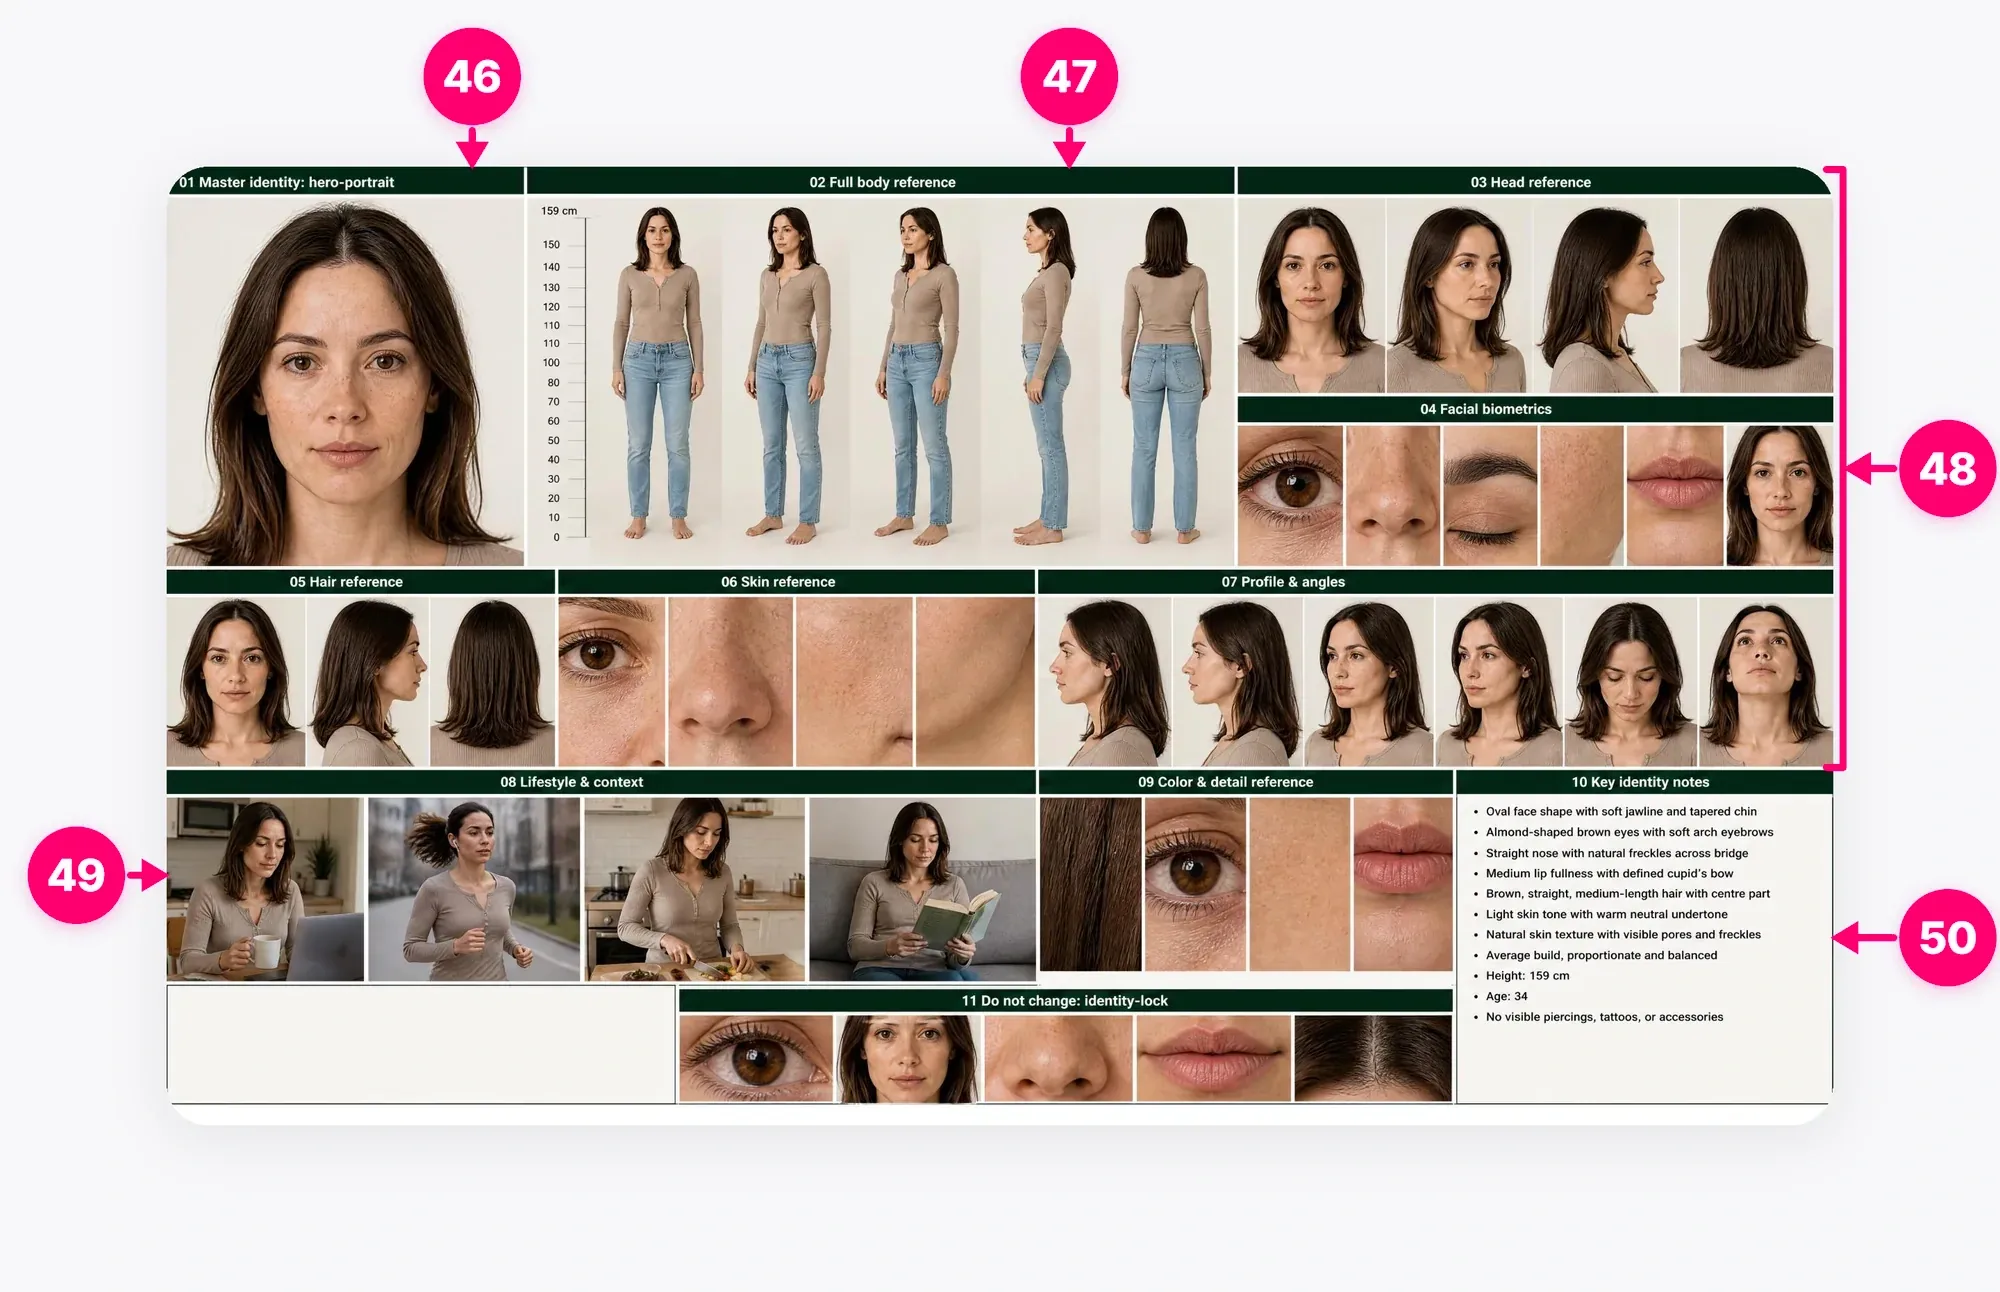
Keep the source prompt and final sheet together so collaborators can tell which actor version a later creative uses. Before approving an ad, check that the actor is represented as intended in the final output rather than assuming the original sheet was followed exactly.
Lecturas relacionadas
Conoce los controles de Media Studio para crear tableros, reutilizar plantillas, cargar medios guardados y elegir los nodos de tu próxima creación.
Getting StartedCreate an outfit or prop sheet in Media Studio, choose a presentation mode, and link an outfit to a Cast actor when needed.
Getting StartedCompose a static ad from selected references, review the draft, approve it, download it, or send its image to Asset Manager.