 English
 Français
 Deutsch
 Español
Cet article n'est pas encore disponible dans votre langue. Version anglaise affichée.
Getting Started
Media Studio: create a Static Ad
Compose a static ad from selected references, review the draft, approve it, download it, or send its image to Asset Manager.
YieldBI TeamGrowth ResearchMis à jour oct. 2026
Sur cette page
Use a Static Ad node to create a still image from a creative brief and source assets. You can connect a Brand Kit, Product, Cast, Location, or outfit, then decide which references should influence the composition. The generated ad starts as a draft for review. Approval and Asset Manager upload are separate actions from publishing a Meta ad.
1. Set delivery and references
Open the Static Ad node and set the delivery format for the placement you have in mind. Check aspect ratio and other output settings against the destination where you plan to use the image. The screenshot’s settings are one example and may not match every placement.
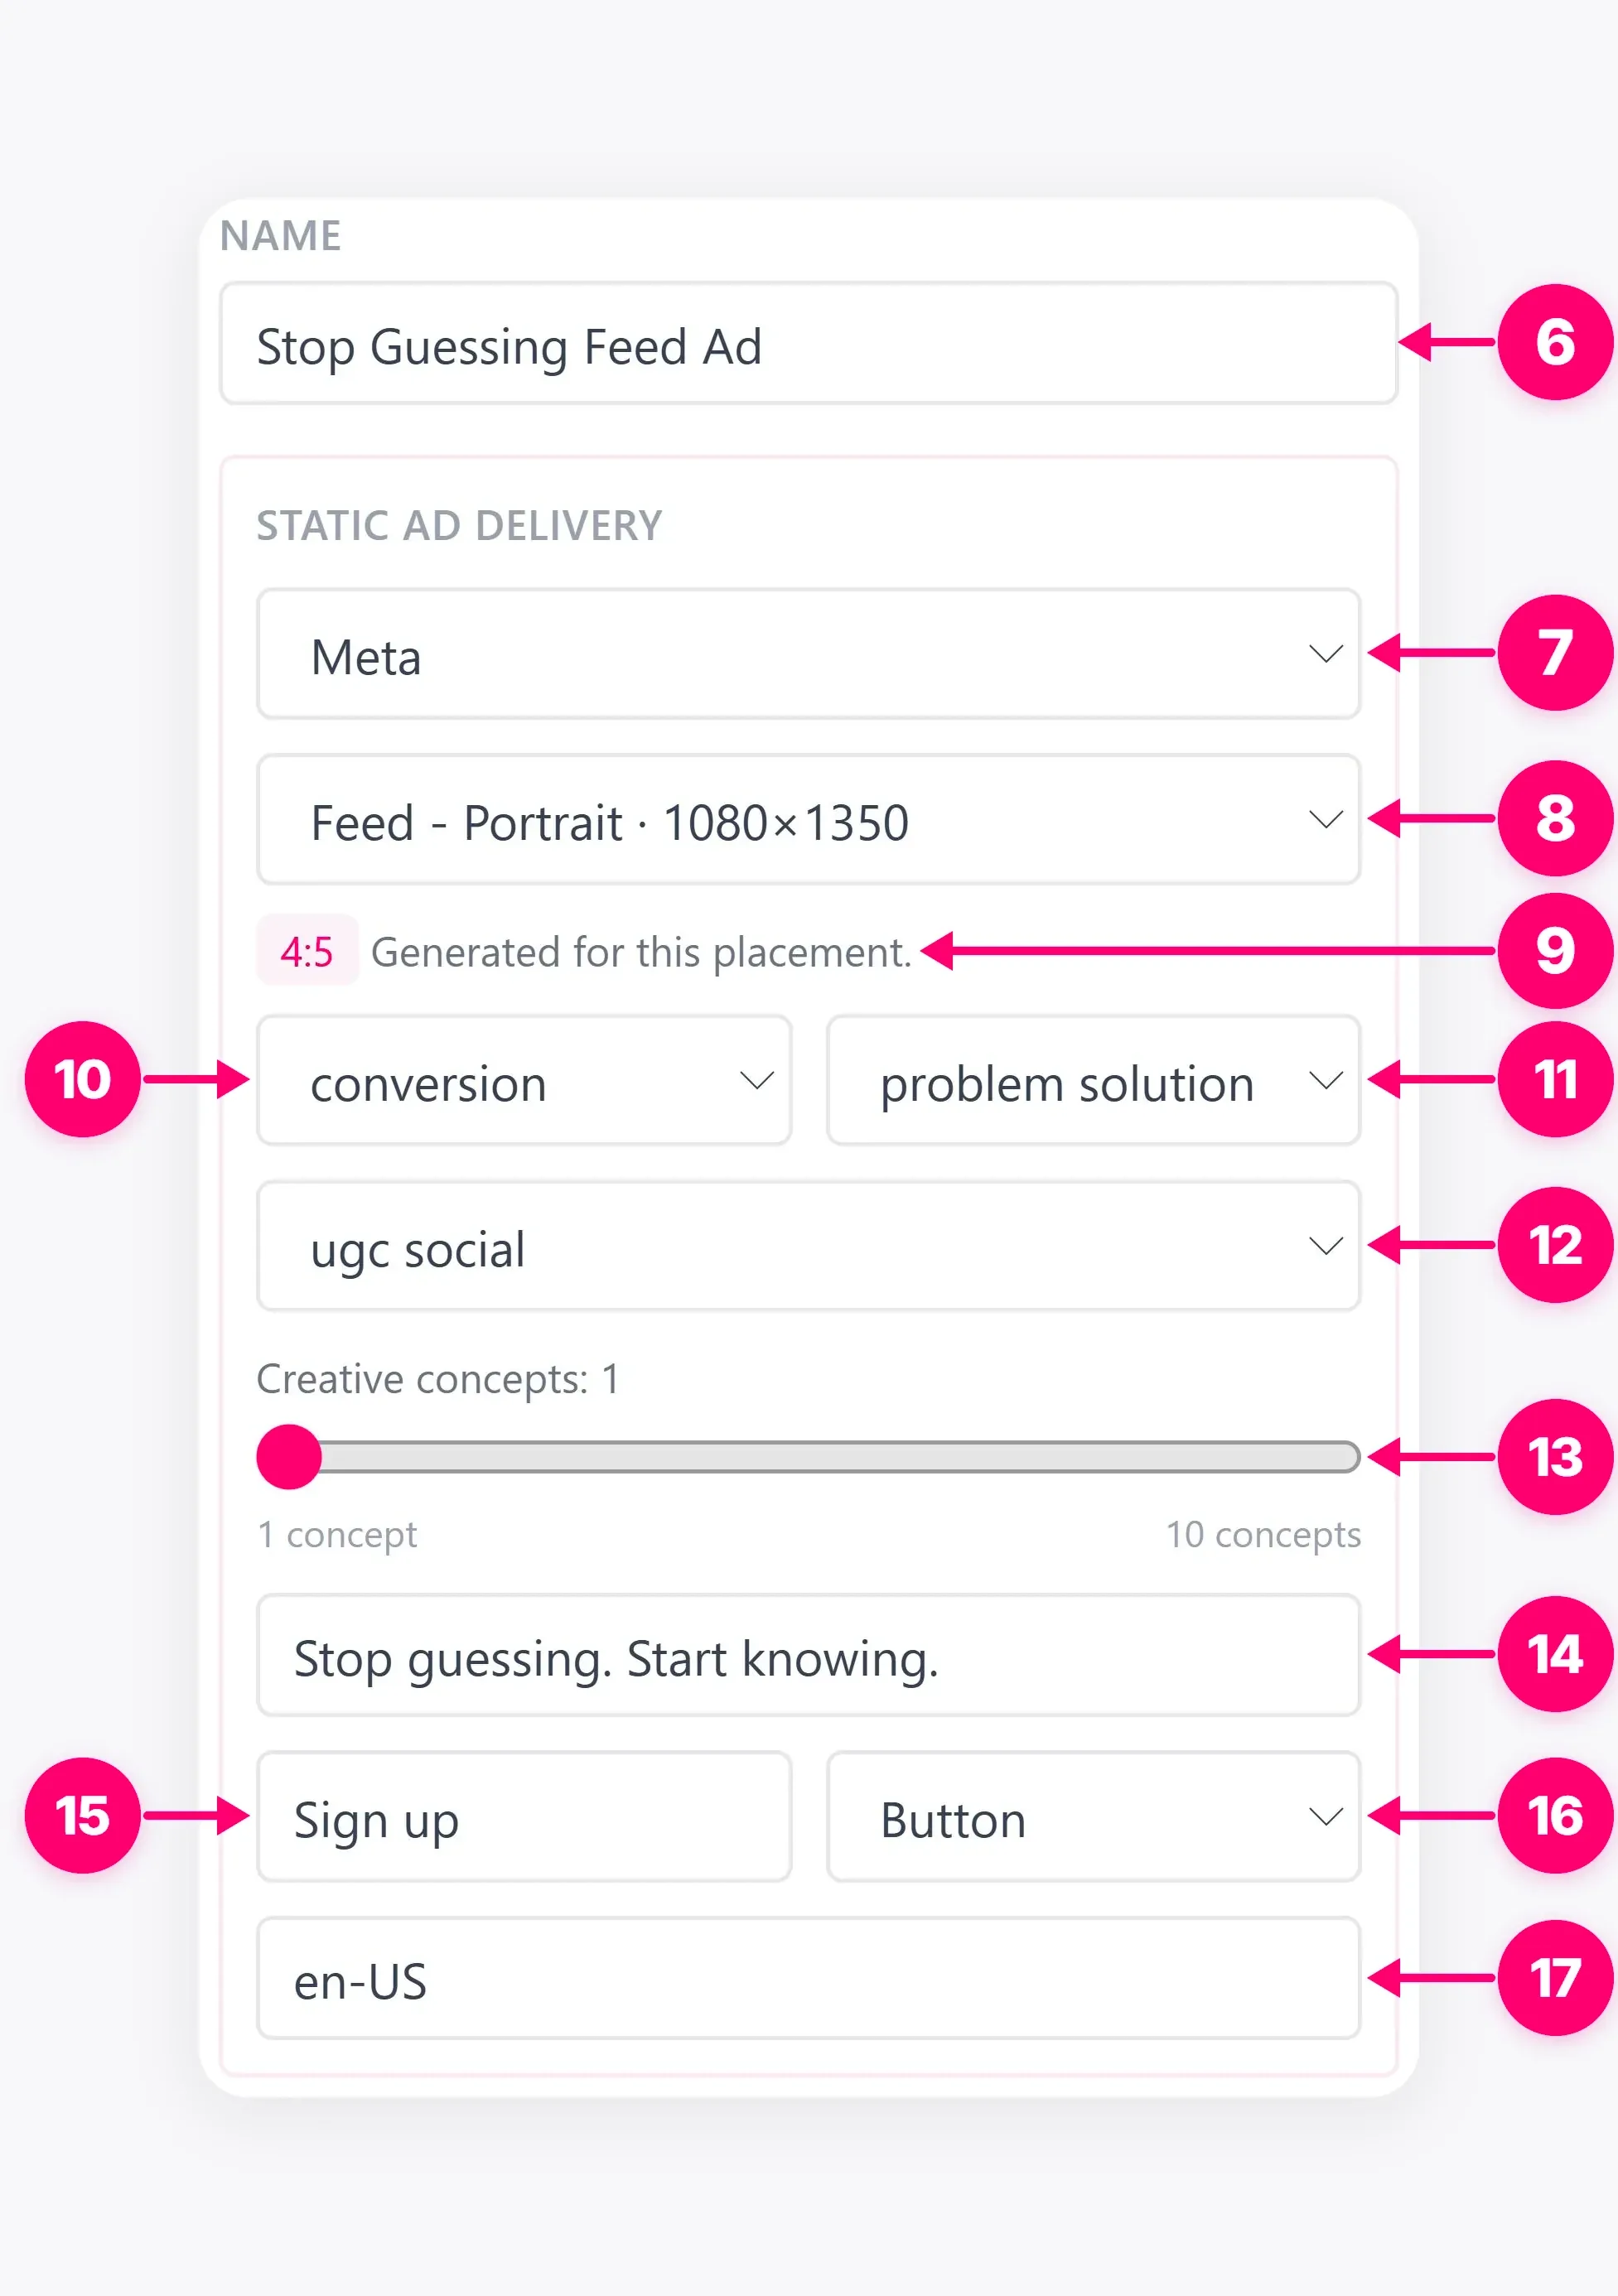
Choose colors and reference roles for the connected assets. A role marked Strict tells the generation model how strongly to use a reference. It does not guarantee an exact logo, product, face, color, or layout. Confirm that the selected output versions are the ones you approved earlier, and inspect the final image independently.
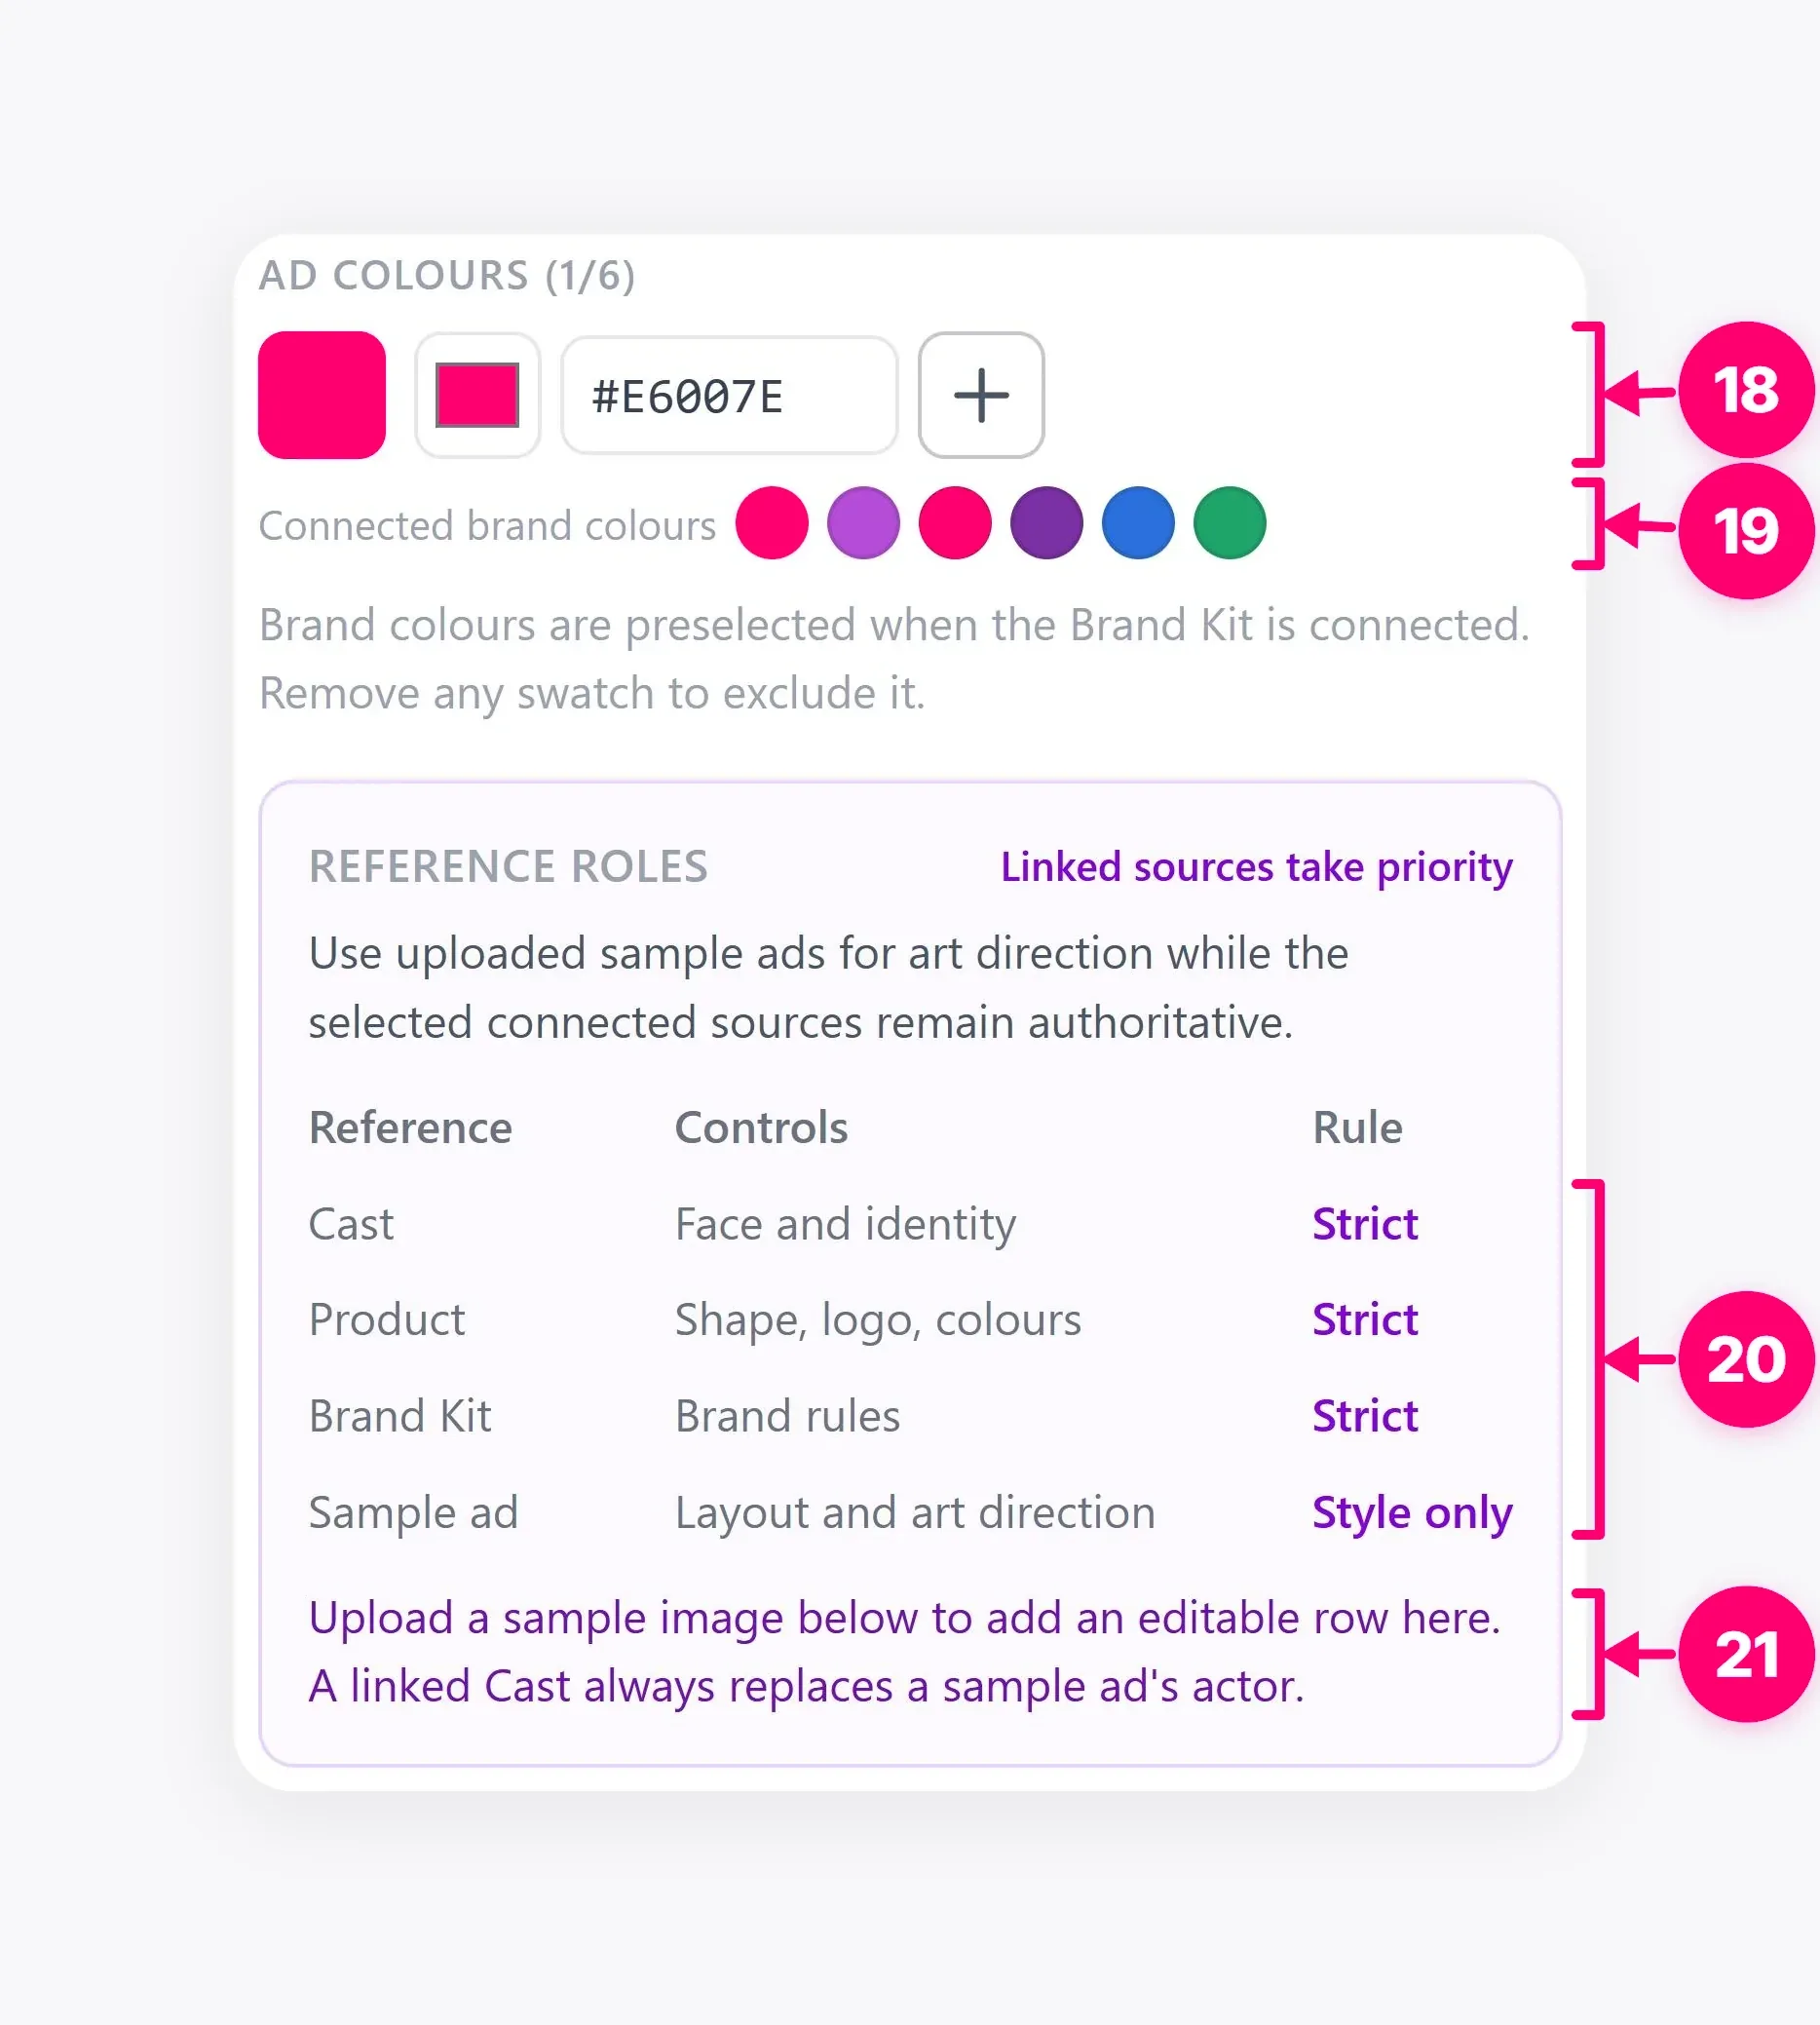
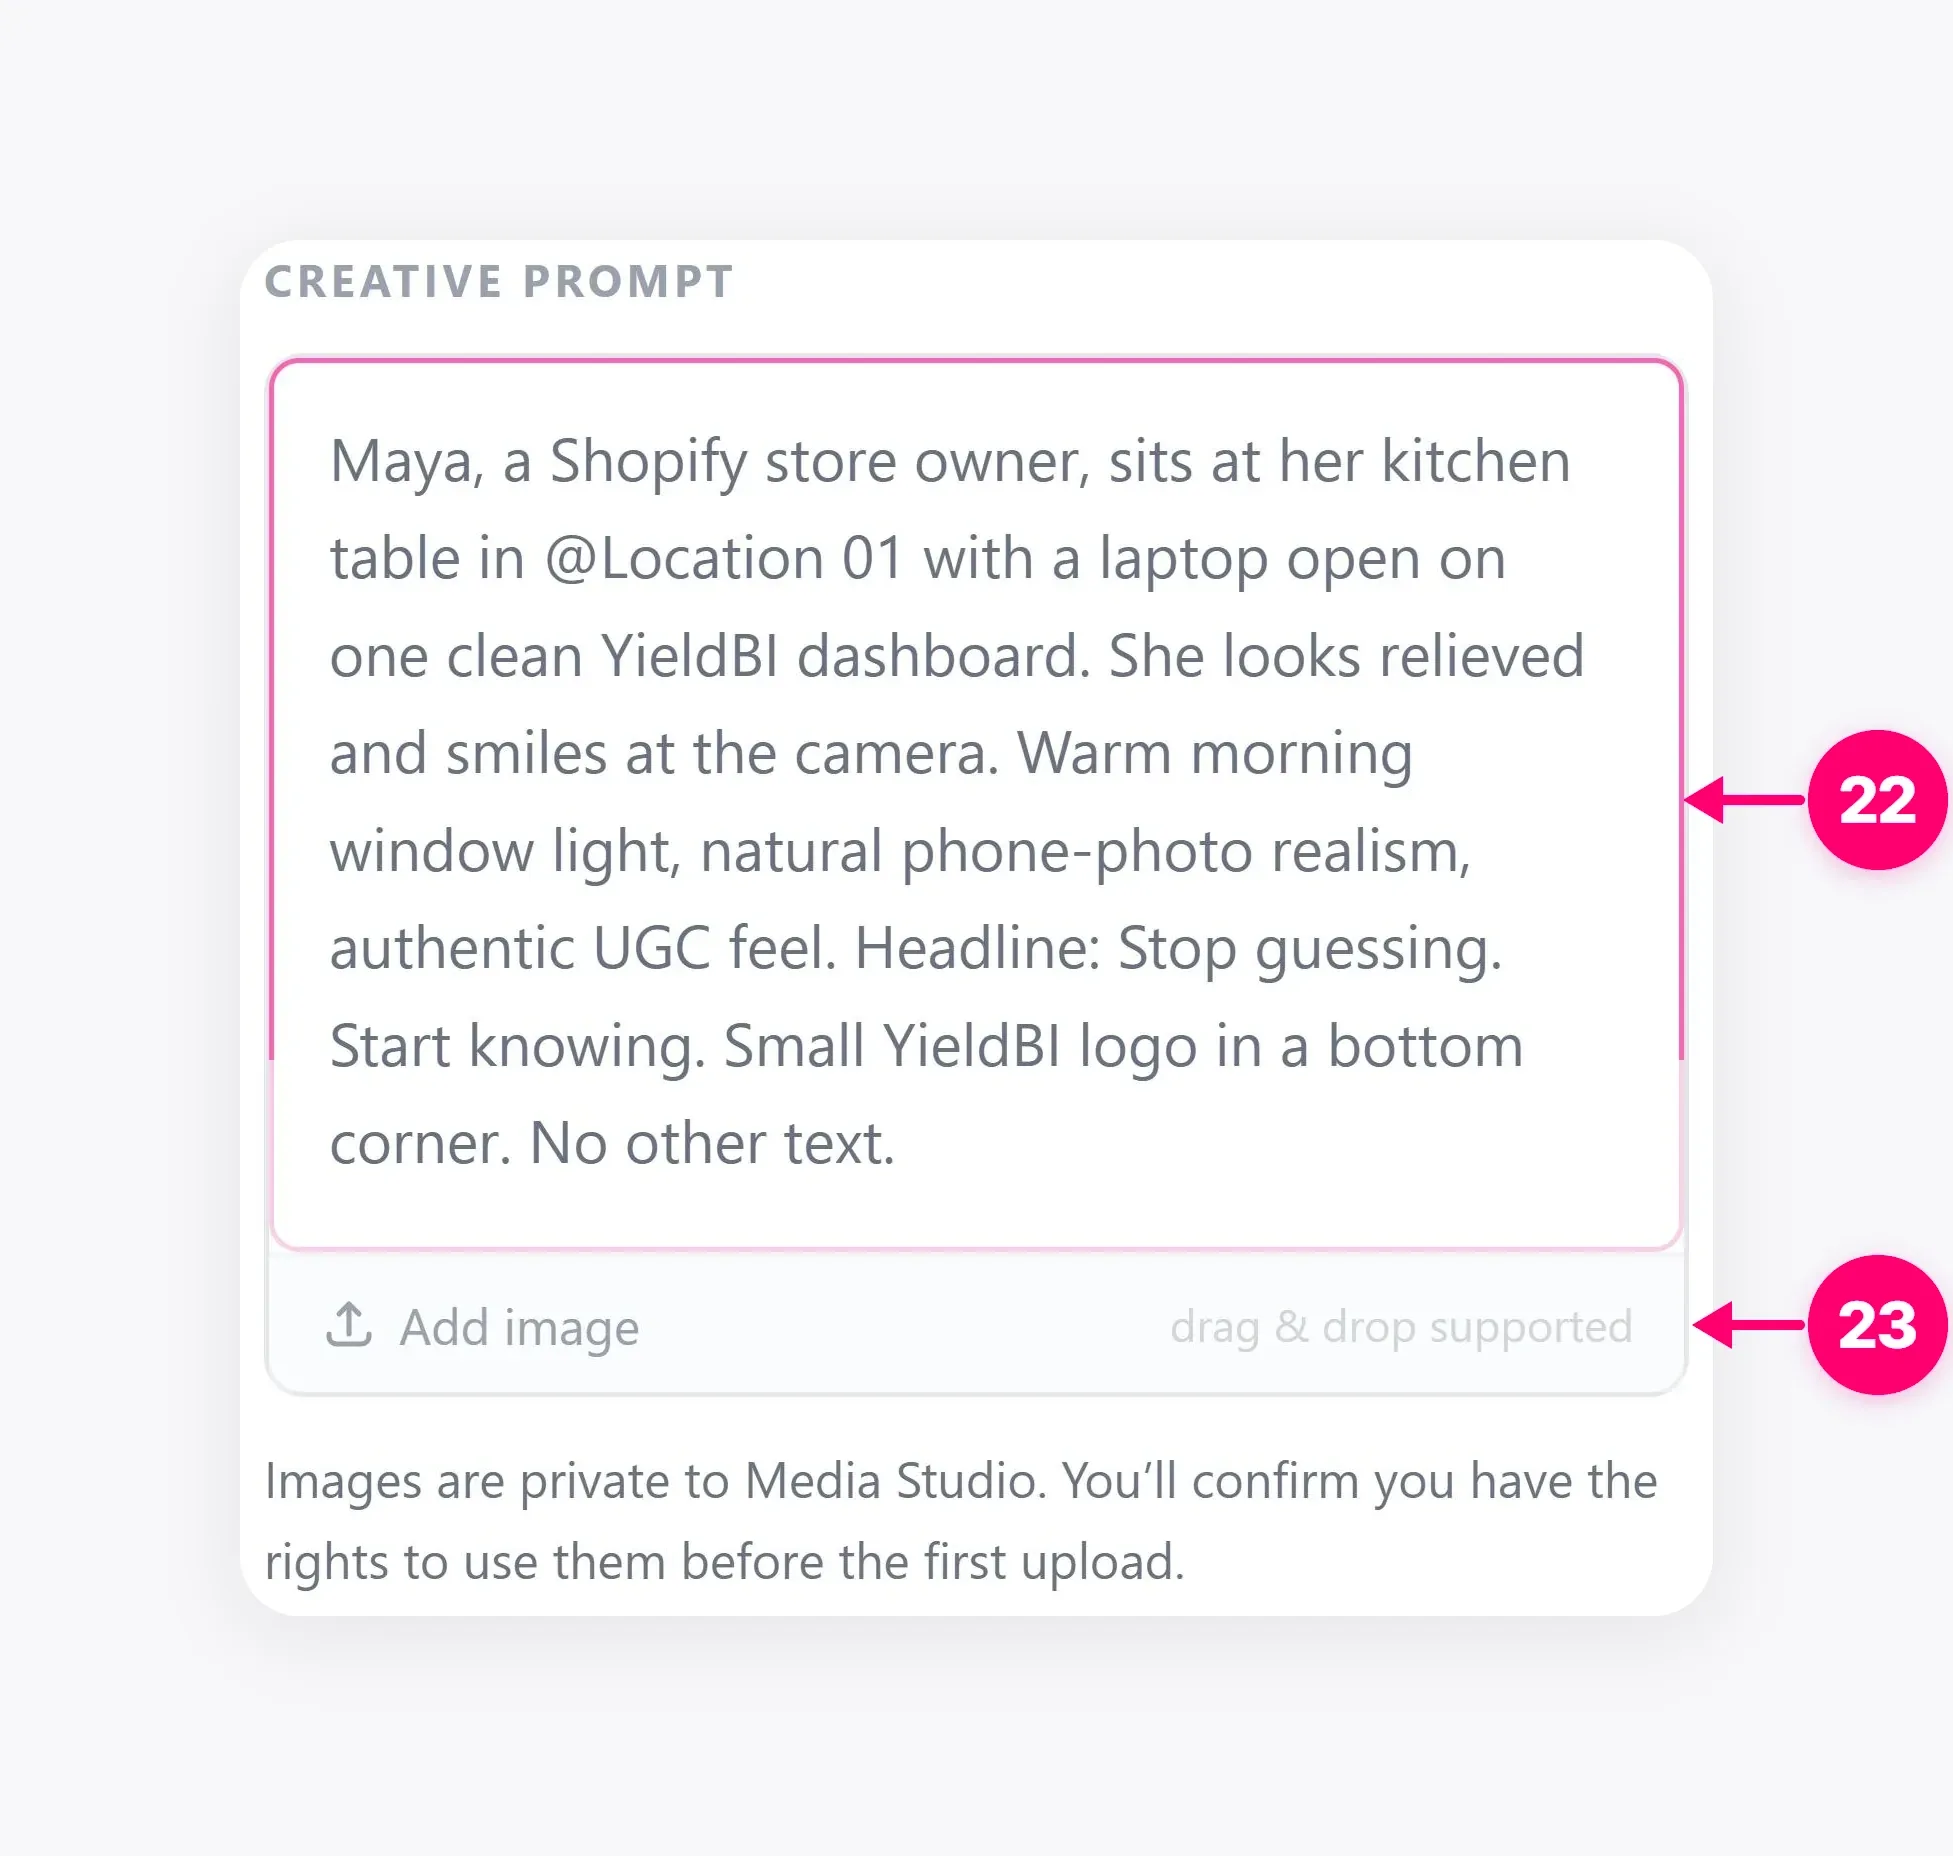
2. Write the creative prompt and compose
Describe the image you want, including the subject, composition, background, mood, and any text or CTA. Use approved product claims and a checked landing page URL. If the prompt relies on a Brain plan, verify that the plan selected the right source assets and that its timing and facts still match the campaign.
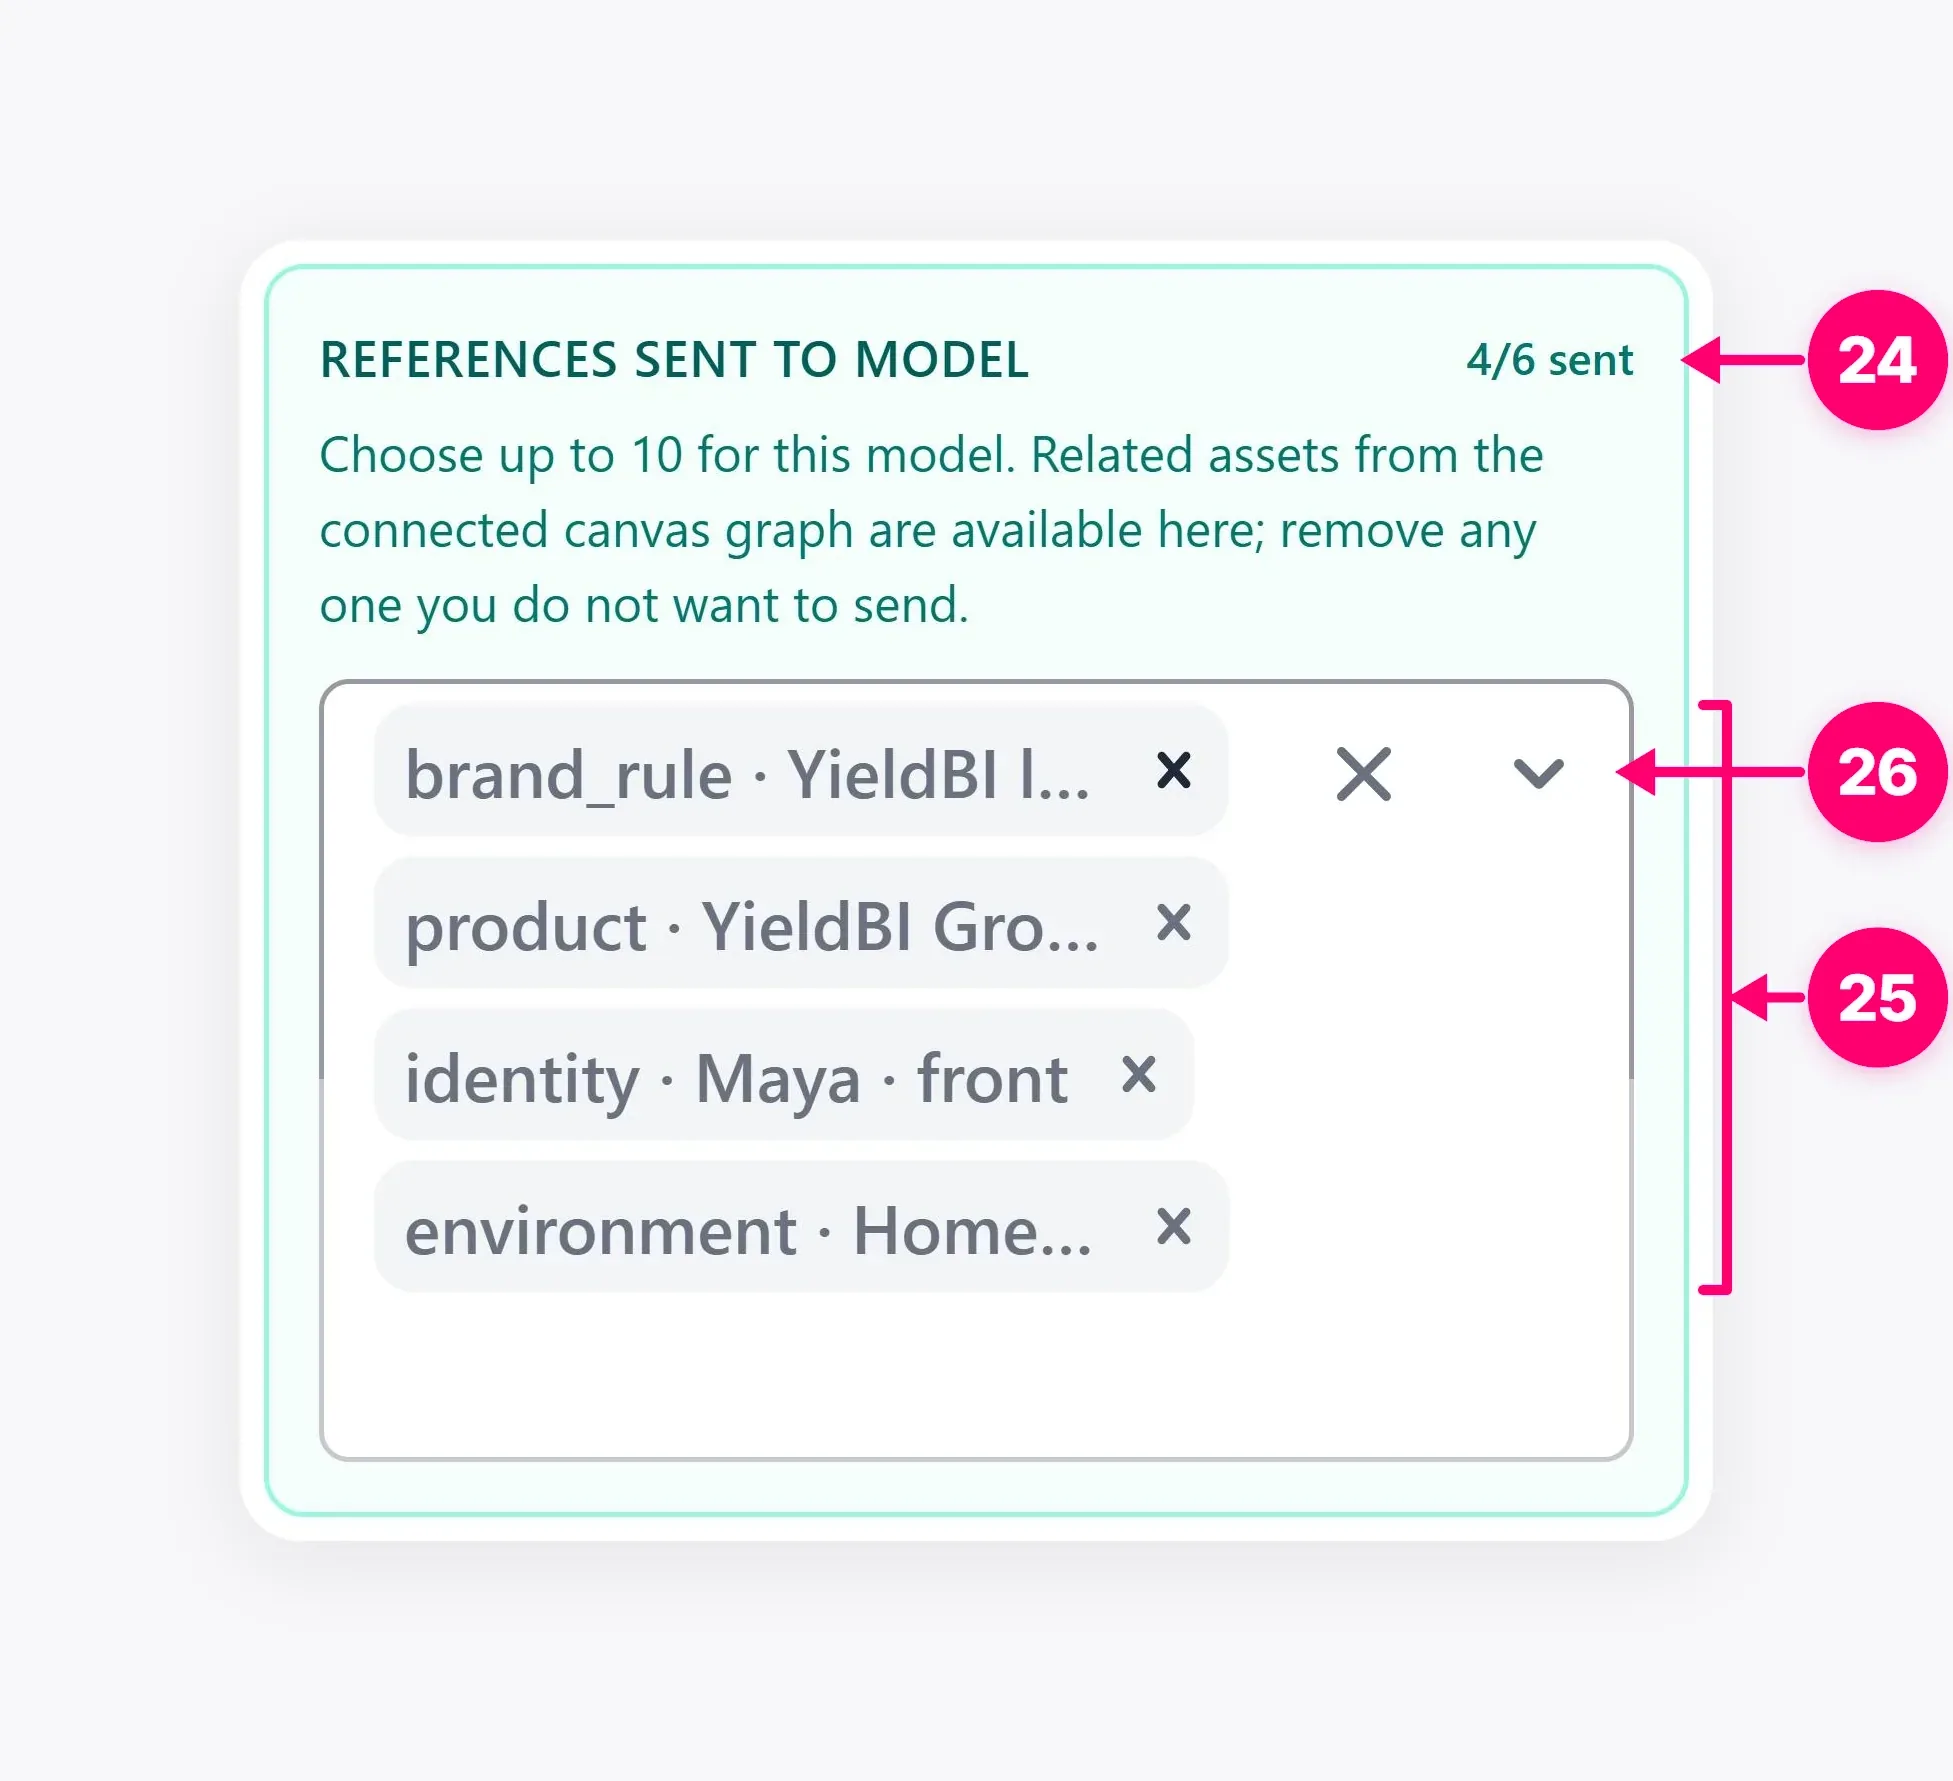
Review the references sent to the model, choose an available image model, and check the displayed estimate before composing. Available model names and prices vary by account. If the reference list omits an intended product or brand asset, fix it before spending on another generation.
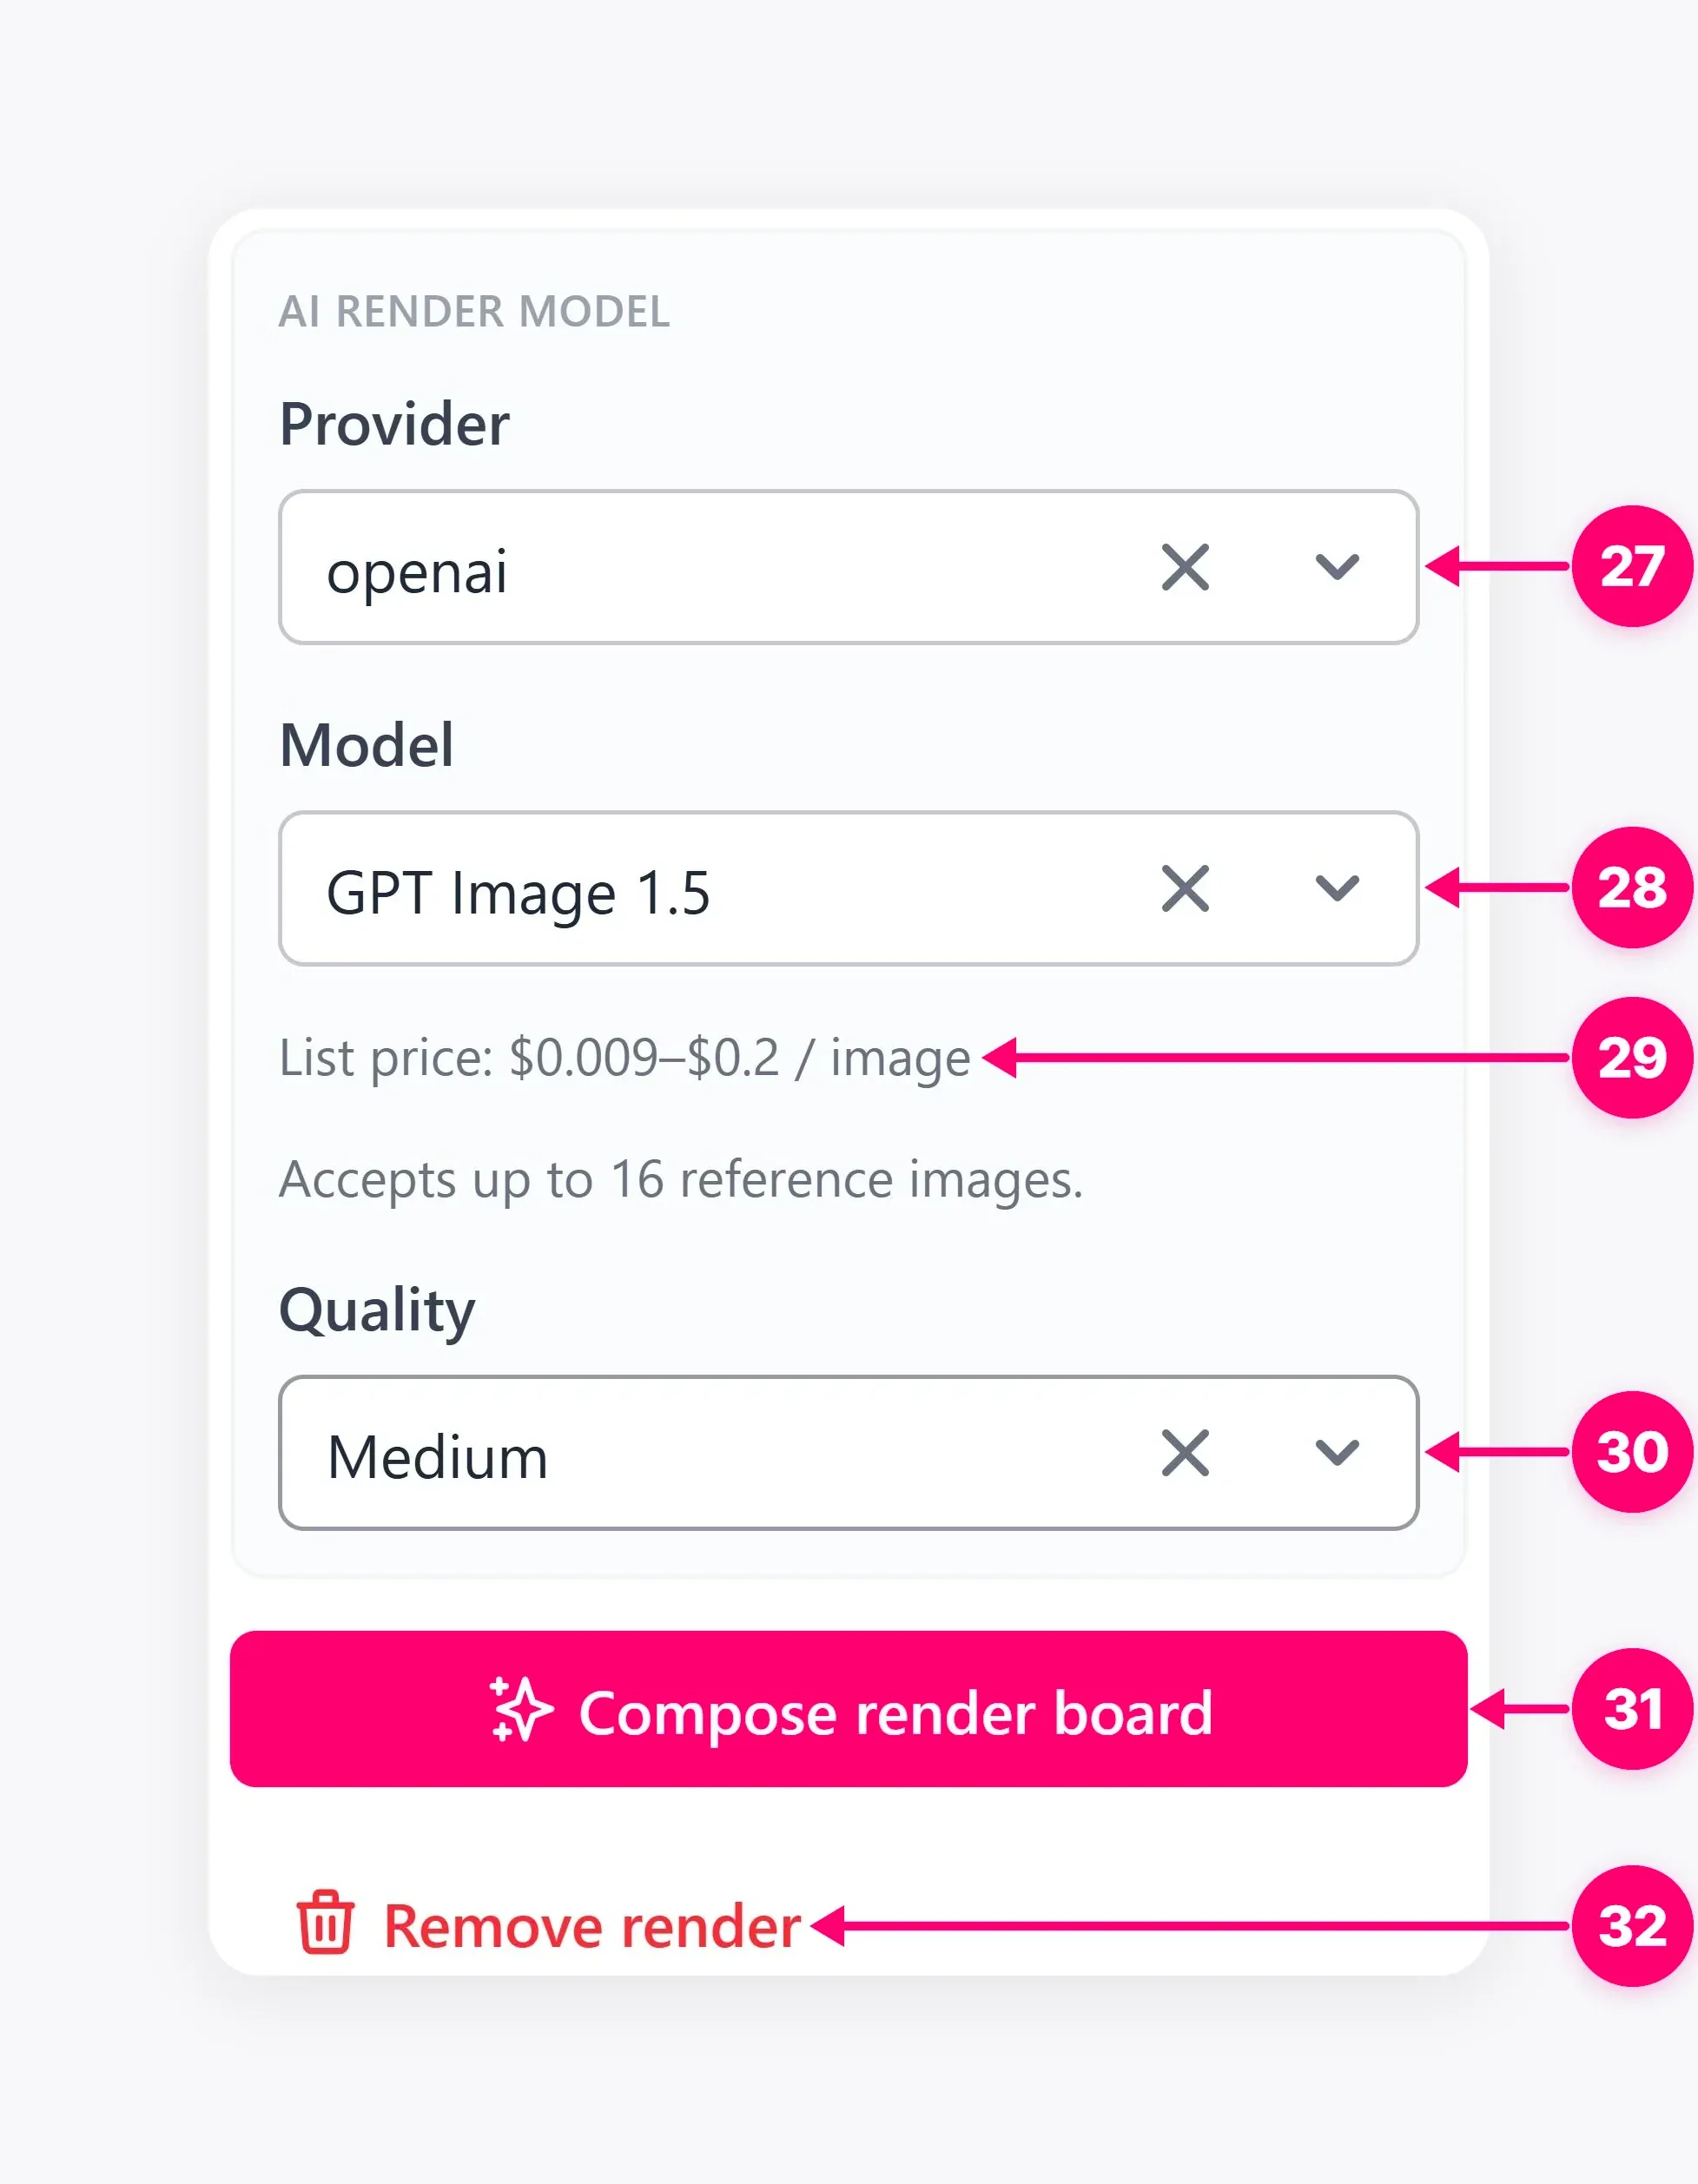
3. Inspect and approve the draft
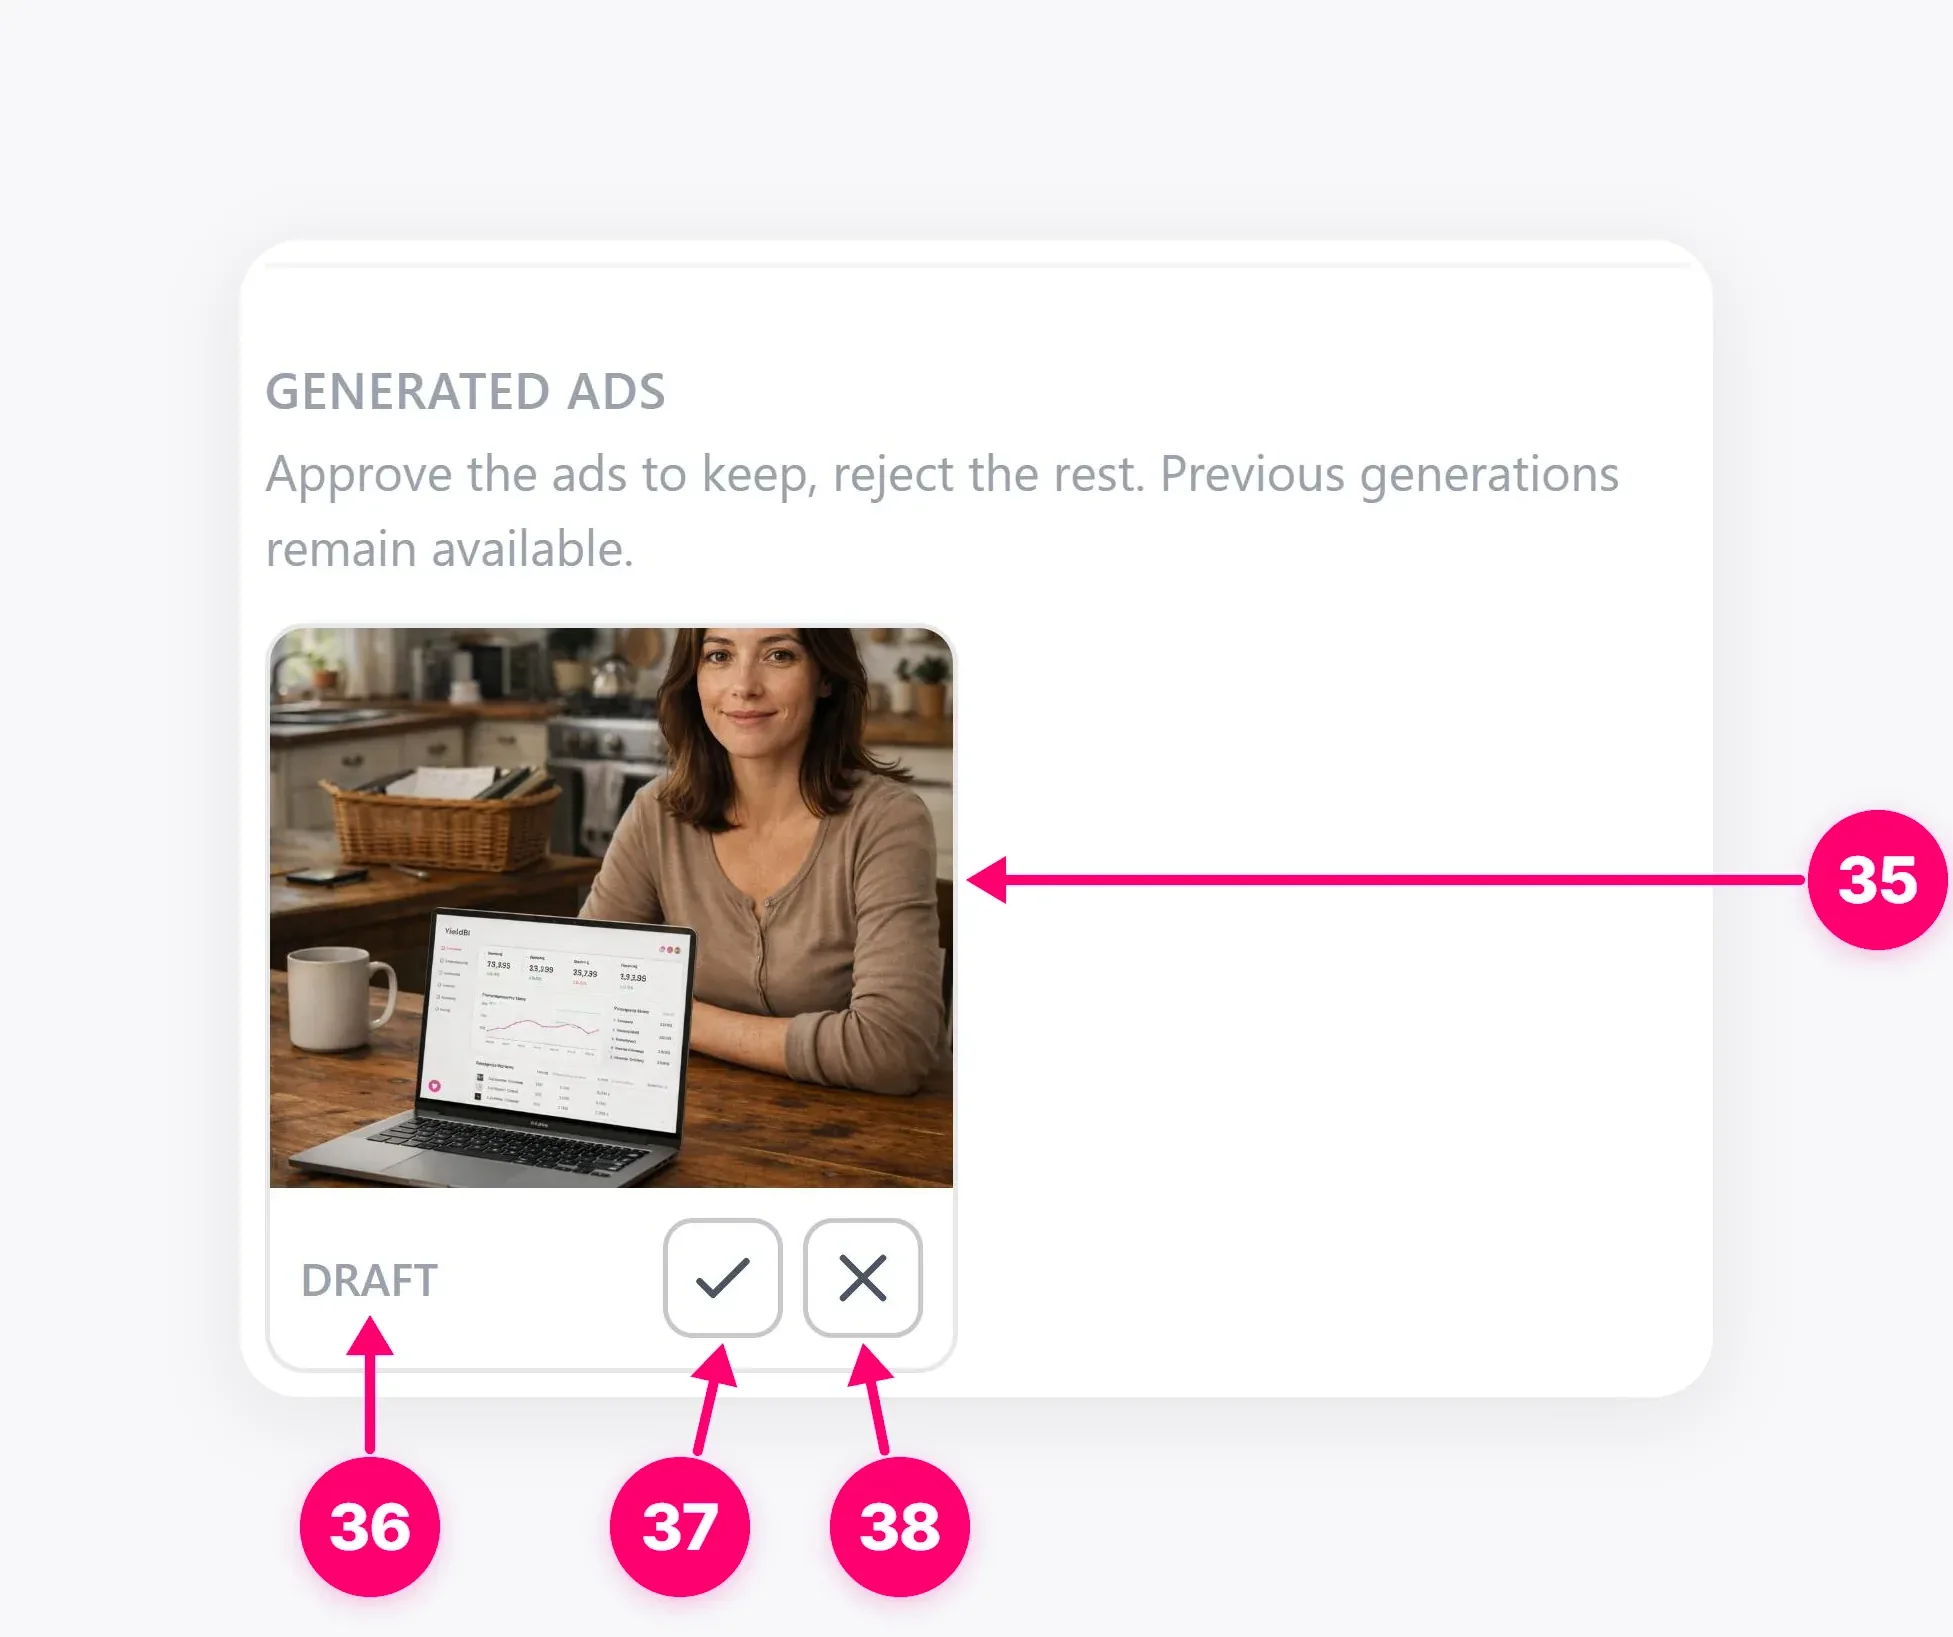
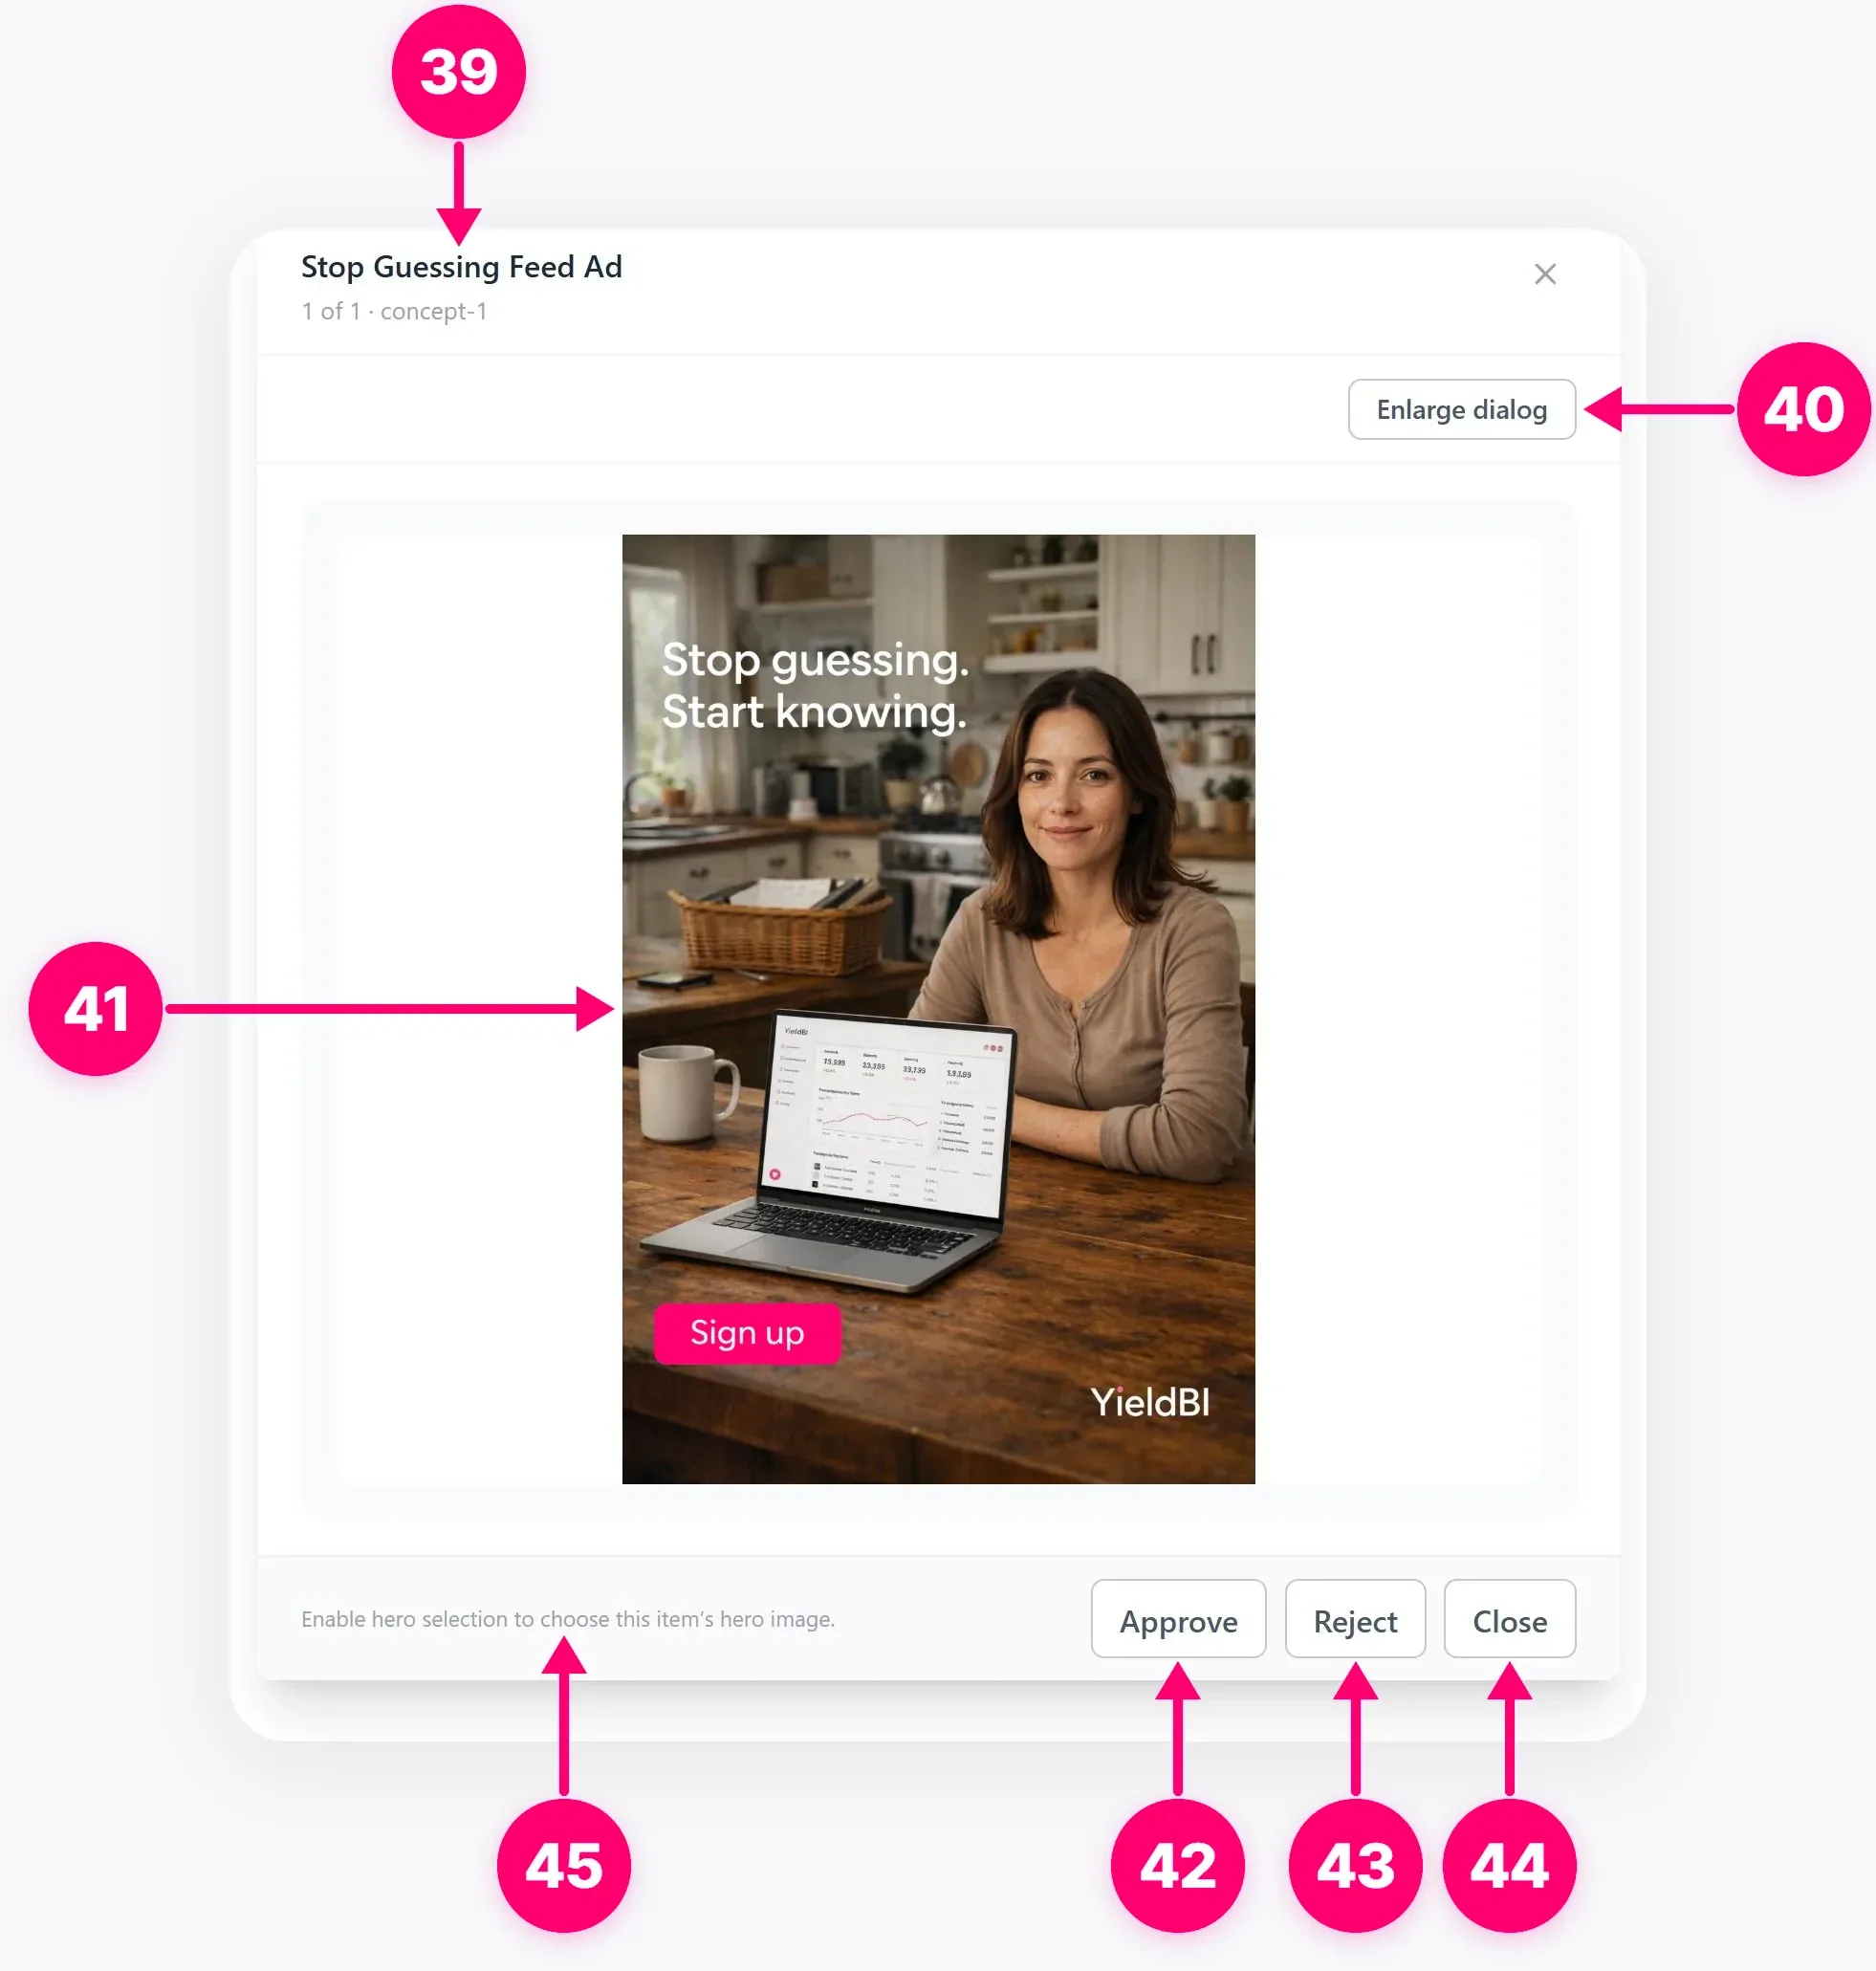
Open the generated draft in the preview. Check product details, logo, text, claims, actor likeness, color, and crop at the size the audience will actually see. Approve a suitable image or reject it and revise the prompt or sources. Approval records your review of the generated asset; it does not launch a campaign.
4. Download or send to Asset Manager
Use Download to save the chosen image. To ad Manager opens the generated ad selection and uploads selected images to the Asset Manager of the selected Meta ad account. Select the correct account and images before uploading. This step makes creative media available there; it does not create or publish a Meta ad. To run the creative, continue through the applicable campaign and ad creation workflow.
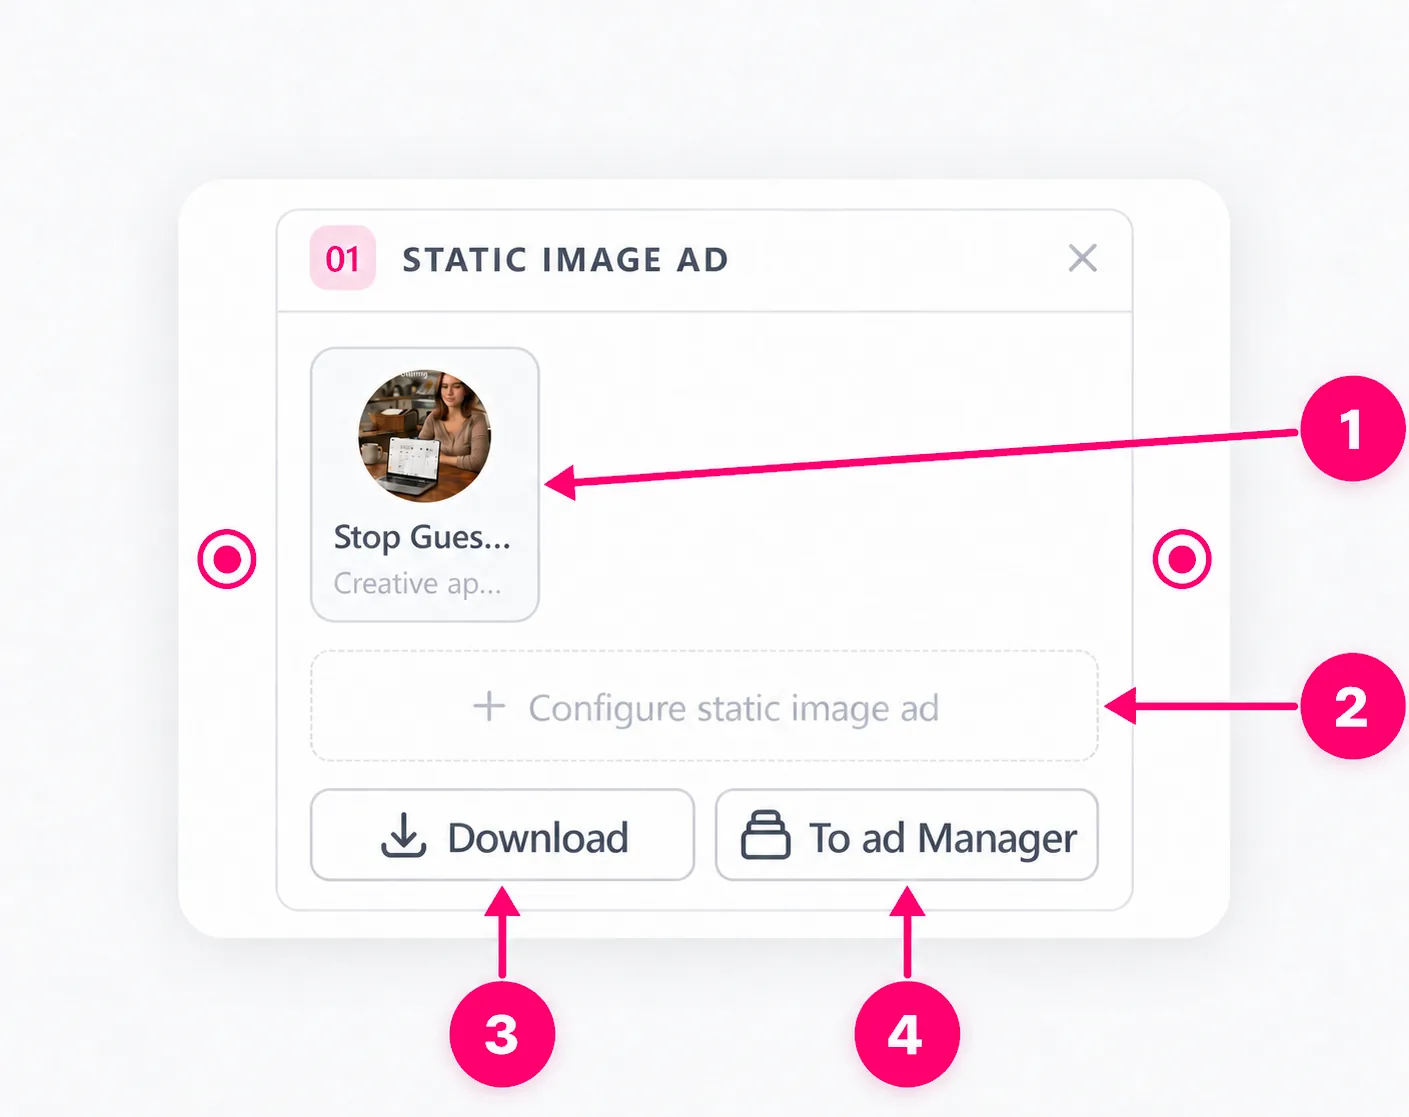
The callout numbering restarts for this image:
- Creative preview: Shows the current generated image on the approved Static Ad node.
- Configure static image ad: Opens the settings used to create or revise the image.
- Download: Saves the selected image to your device.
- To ad Manager: Uploads selected images to the Asset Manager of the selected Meta ad account.
If you have not connected the intended Meta account yet, follow Connect Meta Account. Recheck the uploaded file in Asset Manager and the final ad preview before any campaign publication.
À lire aussi
Découvrez les commandes de Media Studio pour créer un tableau, réutiliser des modèles, charger vos médias et choisir les nœuds de votre création.
Getting StartedUse the Brain node to turn a creative brief and selected source assets into a reviewable plan before generating images or video.
Pour commencerComment connecter un compte Meta Business et ses comptes publicitaires à YieldBI, quel accès est demandé, et comment corriger les échecs de connexion courants.