 English
 Français
 Deutsch
 Español
Cet article n'est pas encore disponible dans votre langue. Version anglaise affichée.
Getting Started
Media Studio: create a Location
Define a Media Studio location, add visual references, render a location set, and connect the result to a creative workflow.
YieldBI TeamGrowth ResearchMis à jour oct. 2026
Sur cette page
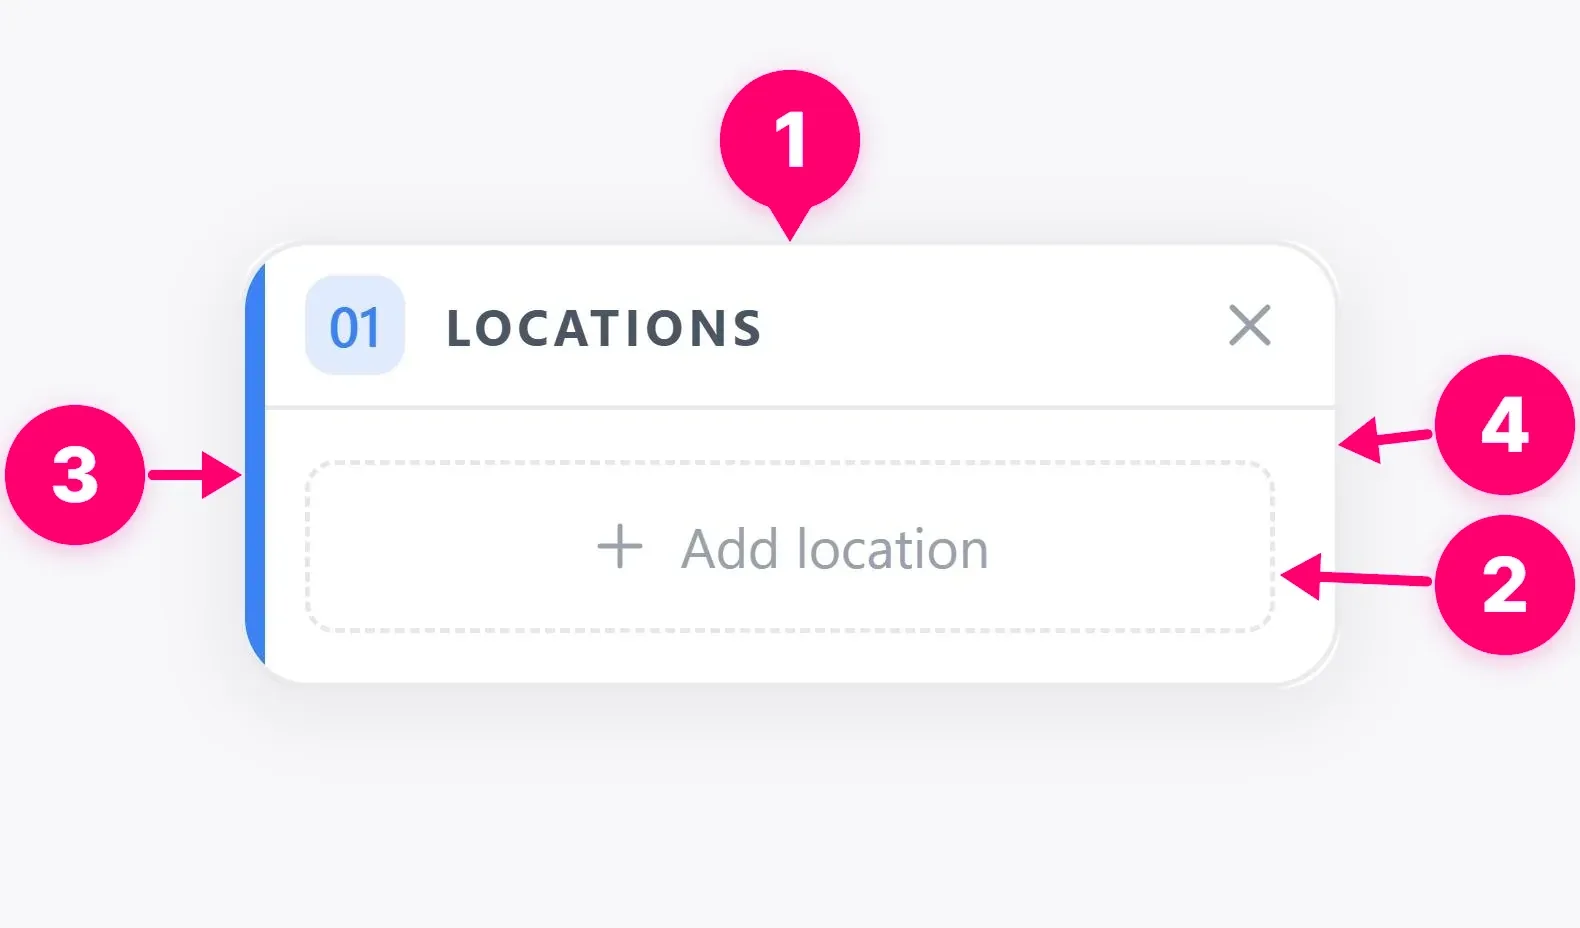
A Location node provides a visual setting for later images or scenes. It can represent an interior, exterior, studio, or another place described by your brief. Use it to establish the environment before you ask a Storyboard or Scenes node to place characters and products there.
1. Start a location
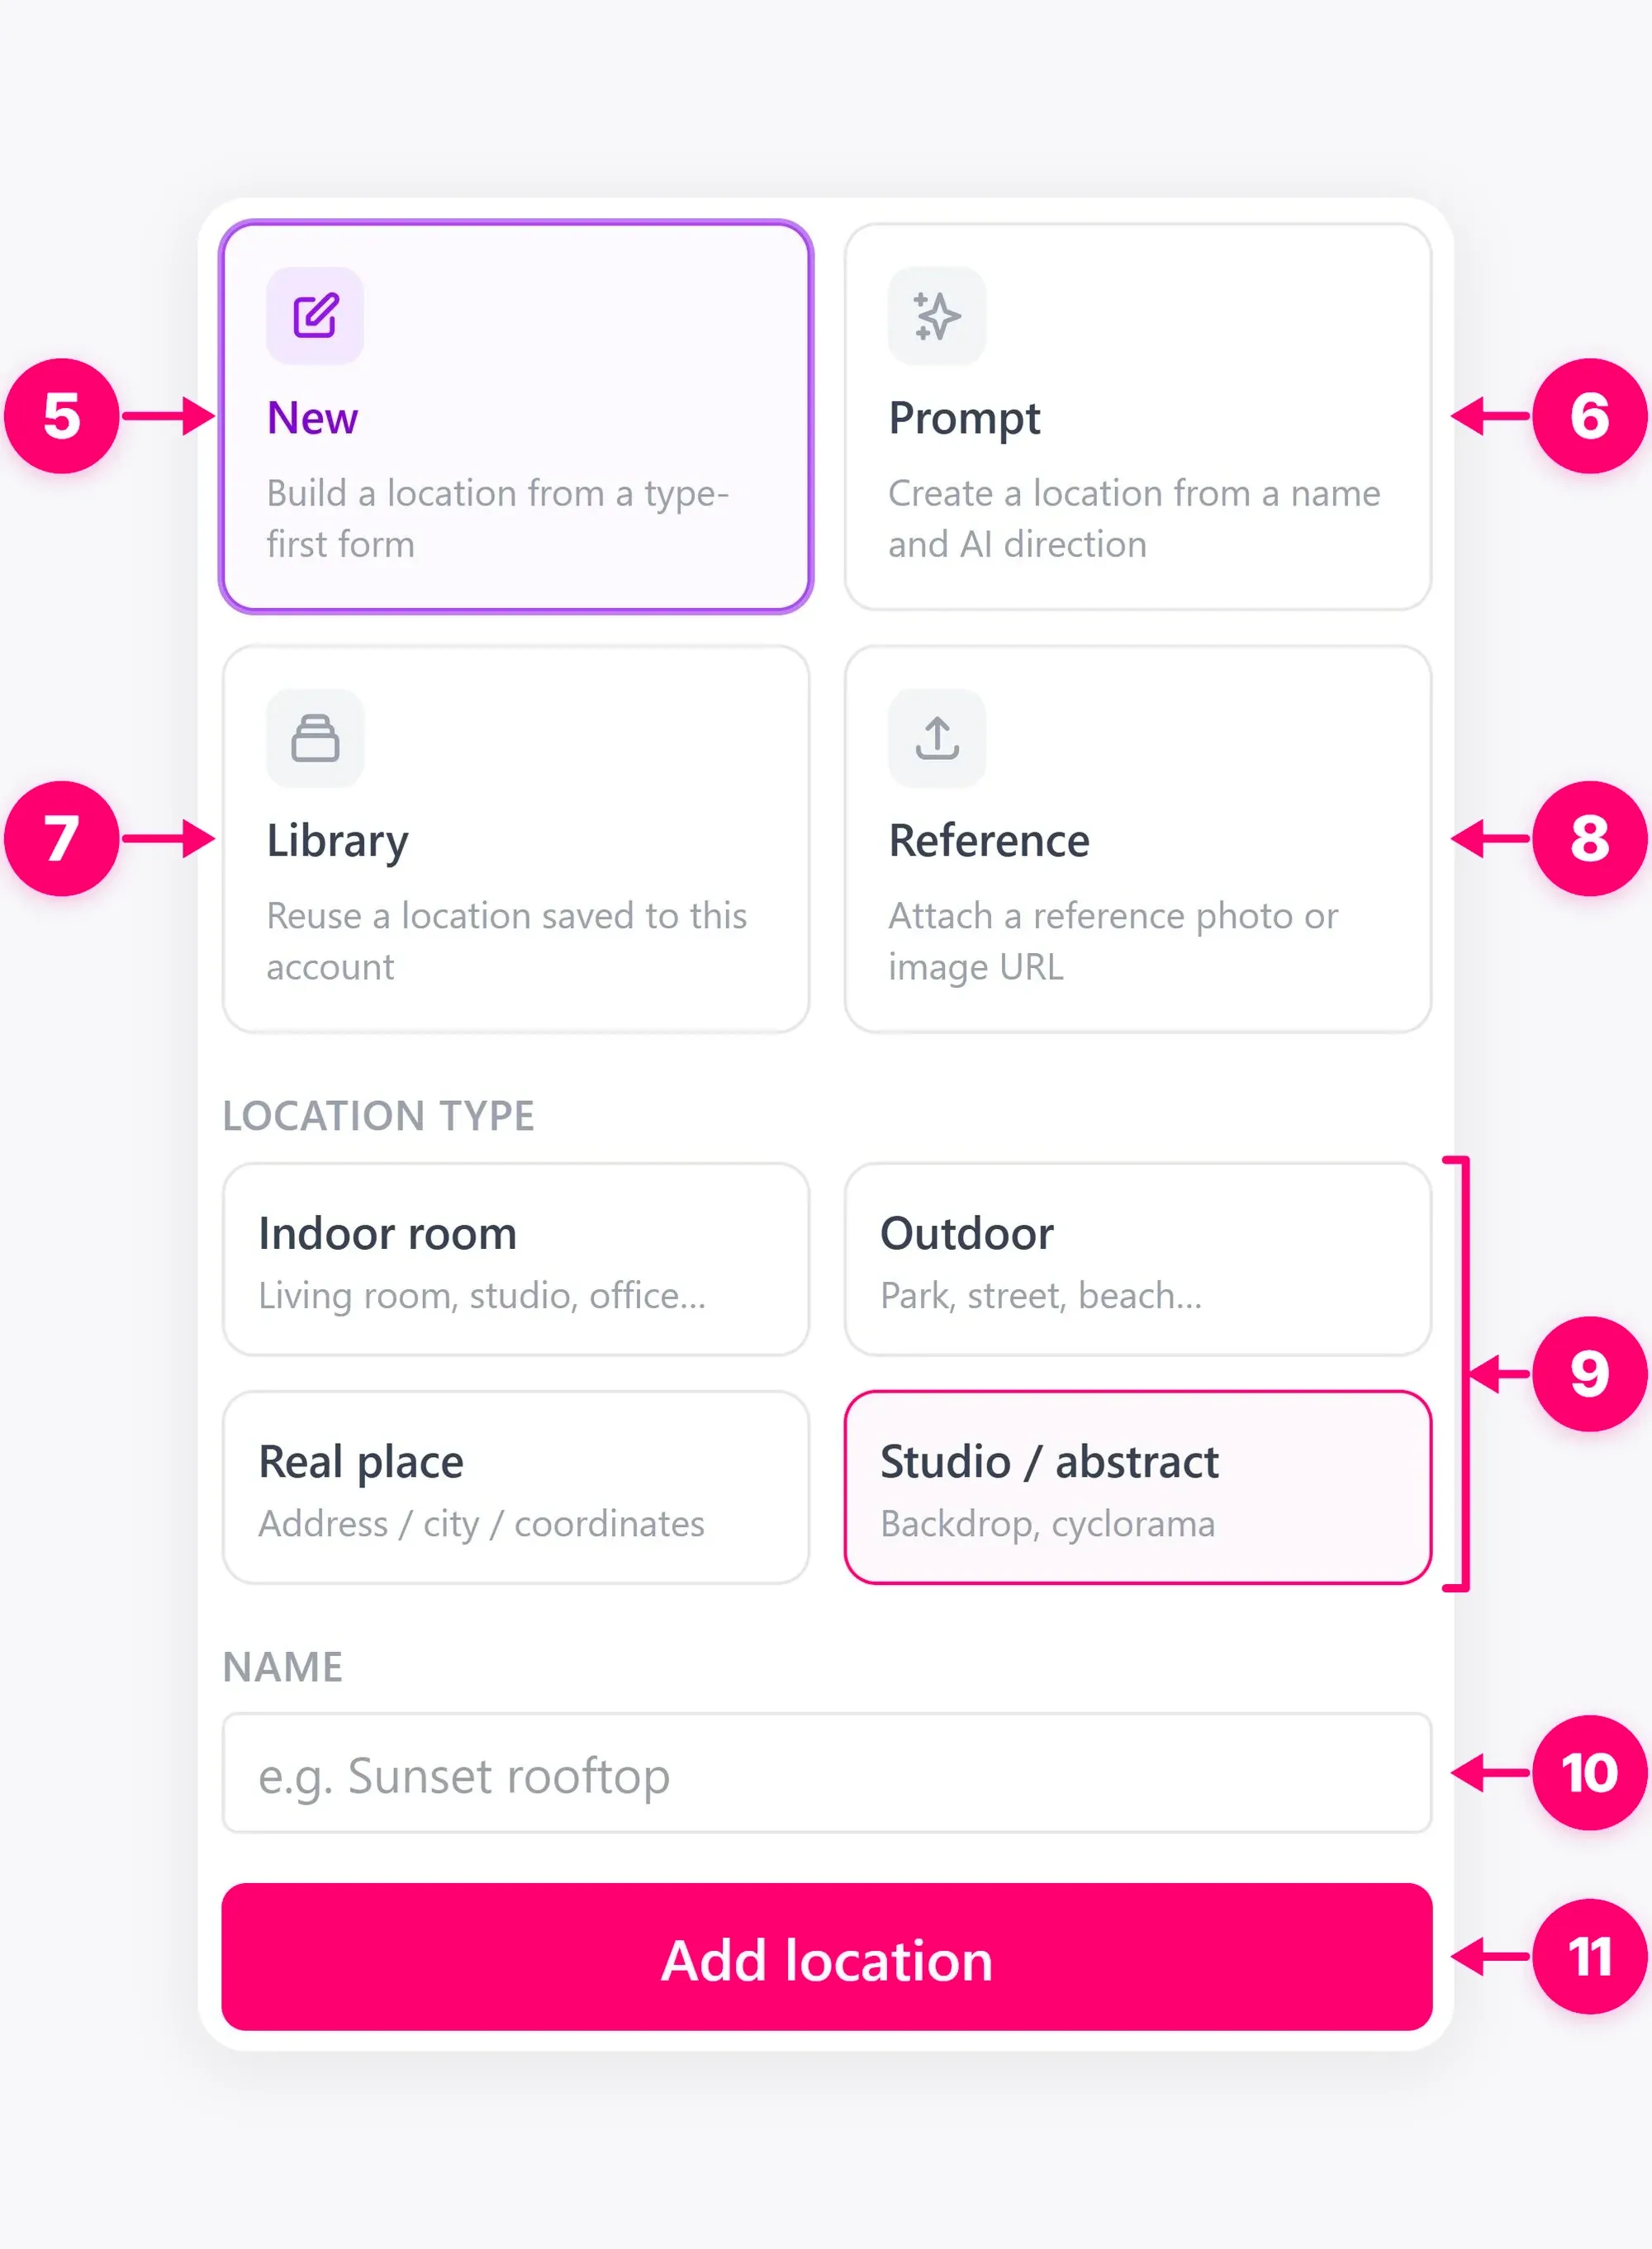
Open your Locations node. For board setup, see Add a node to the board. Choose the creation mode and location type, then give the location a short name. Write a prompt that describes visible features: architecture, surfaces, lighting, background objects, and the overall mood. A clear visual description is more useful than an abstract adjective on its own.
2. Choose prompt only or location settings
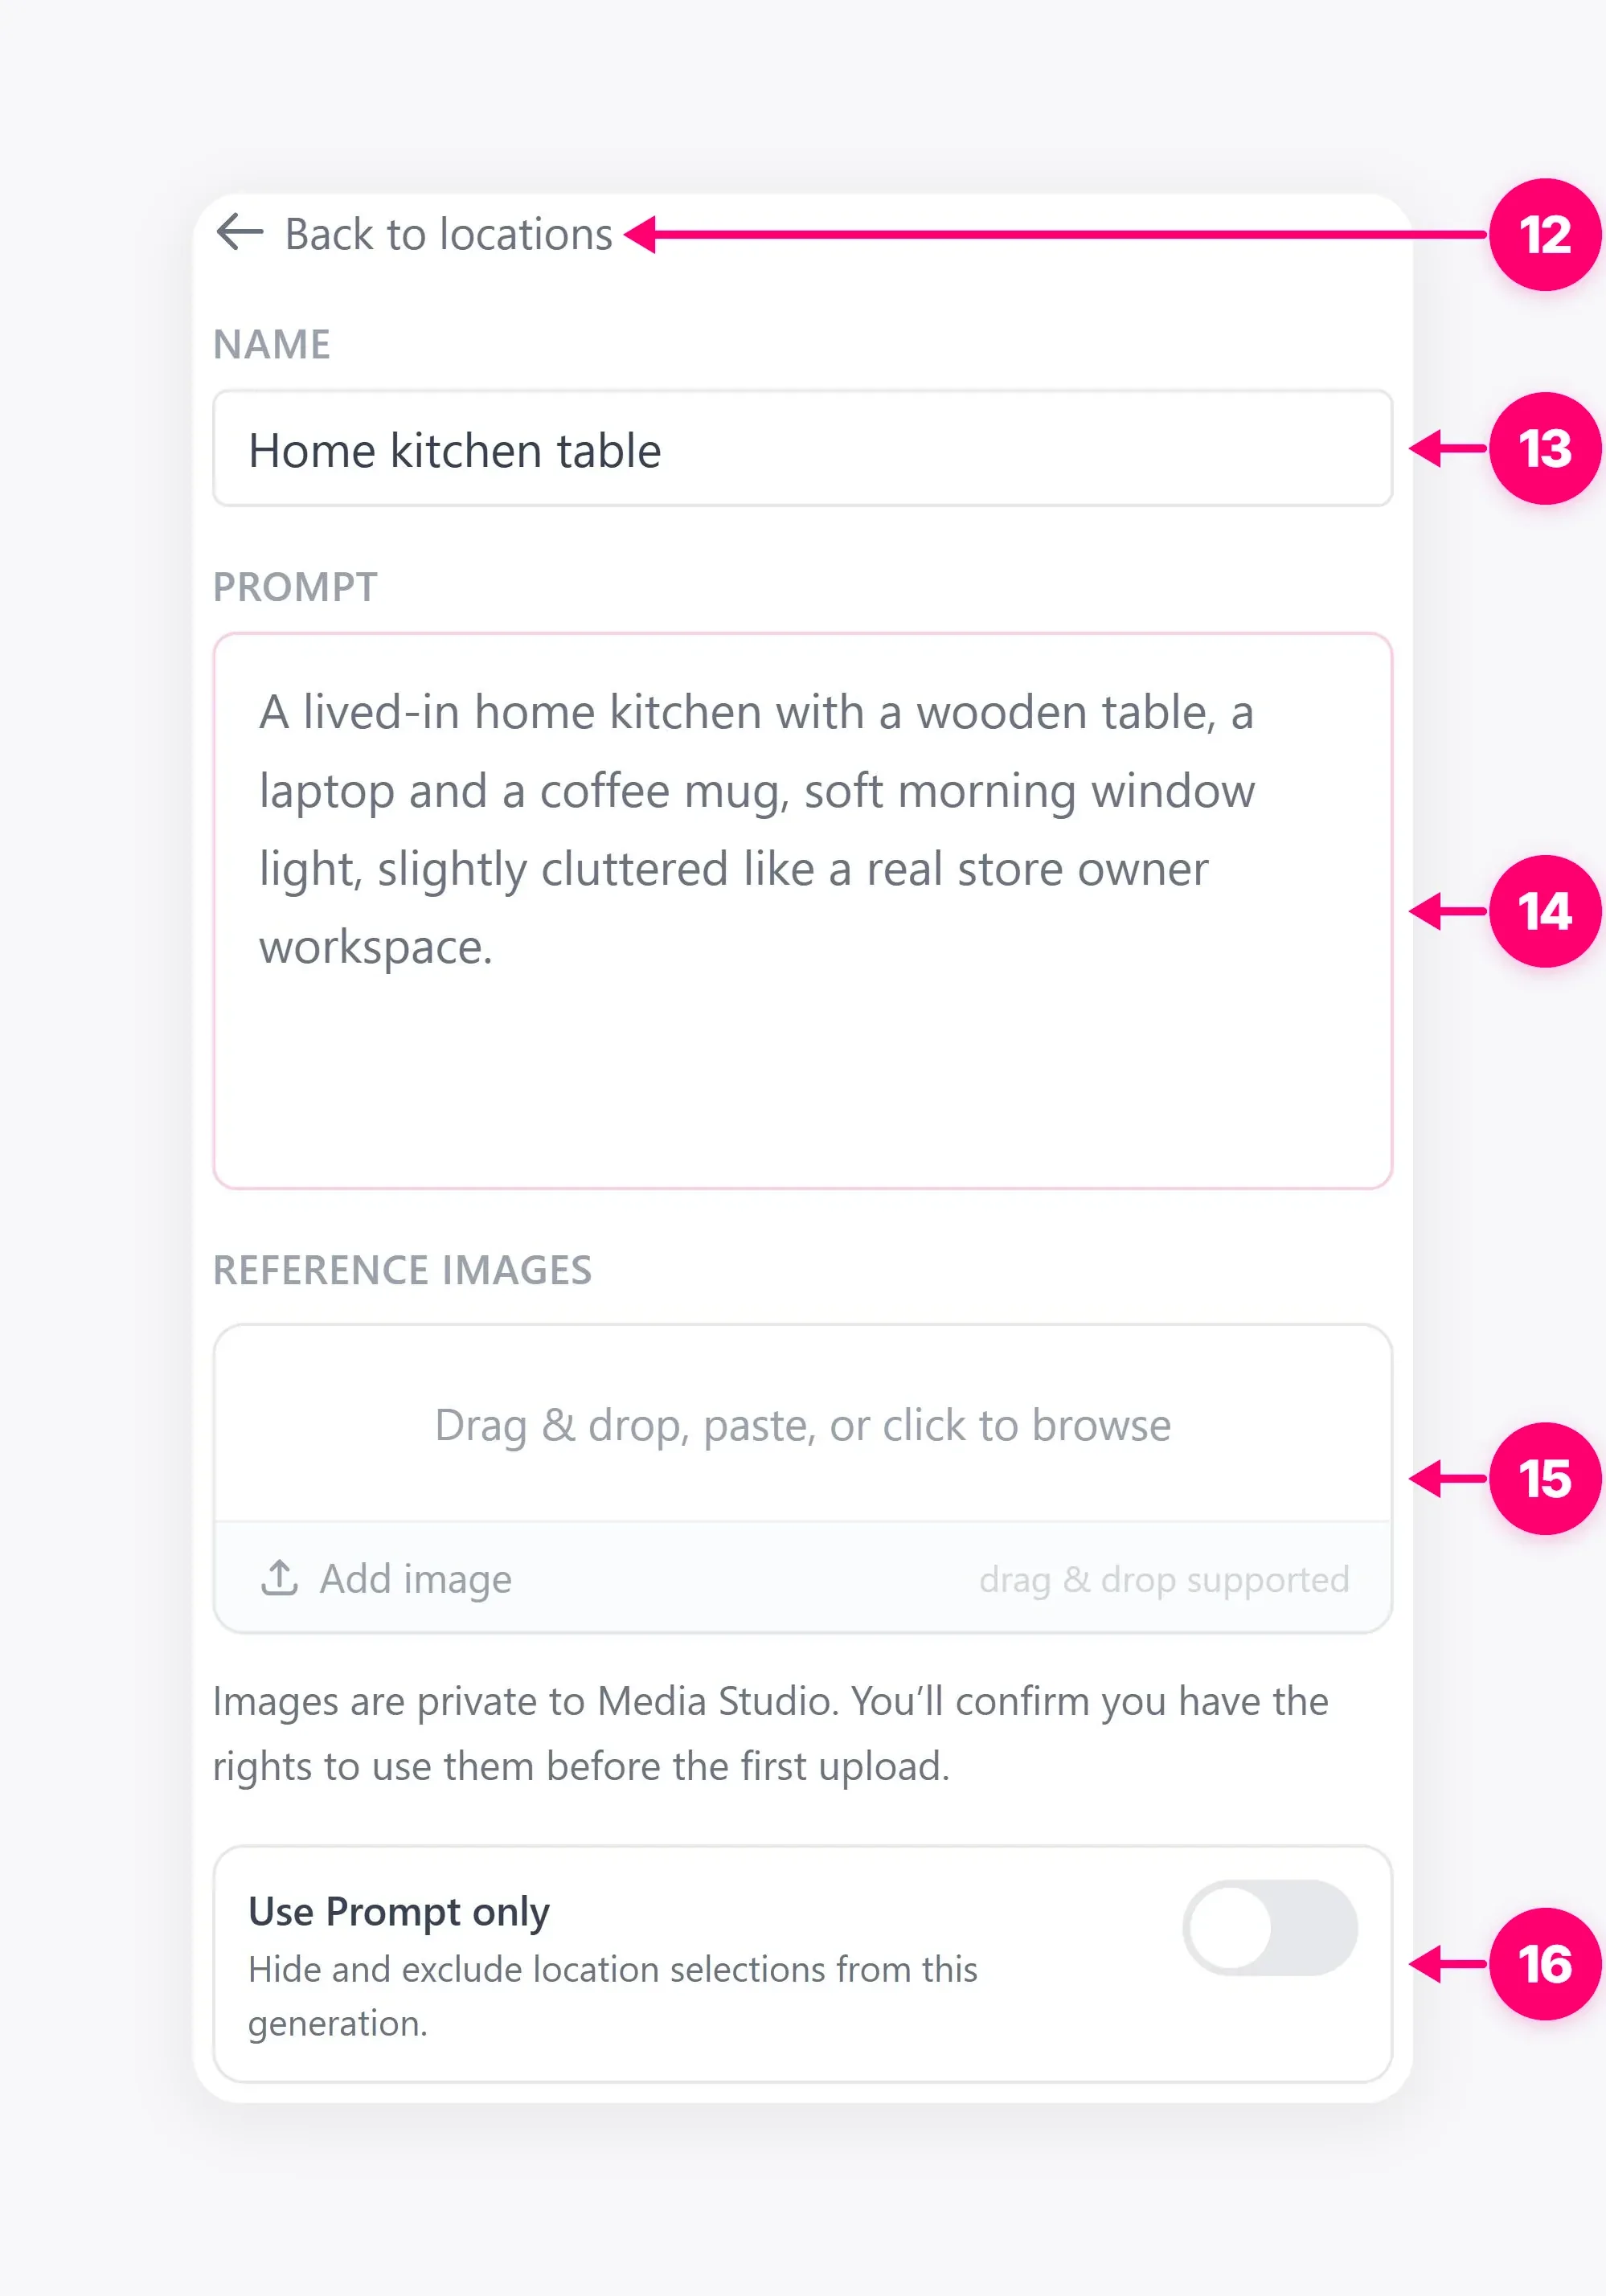
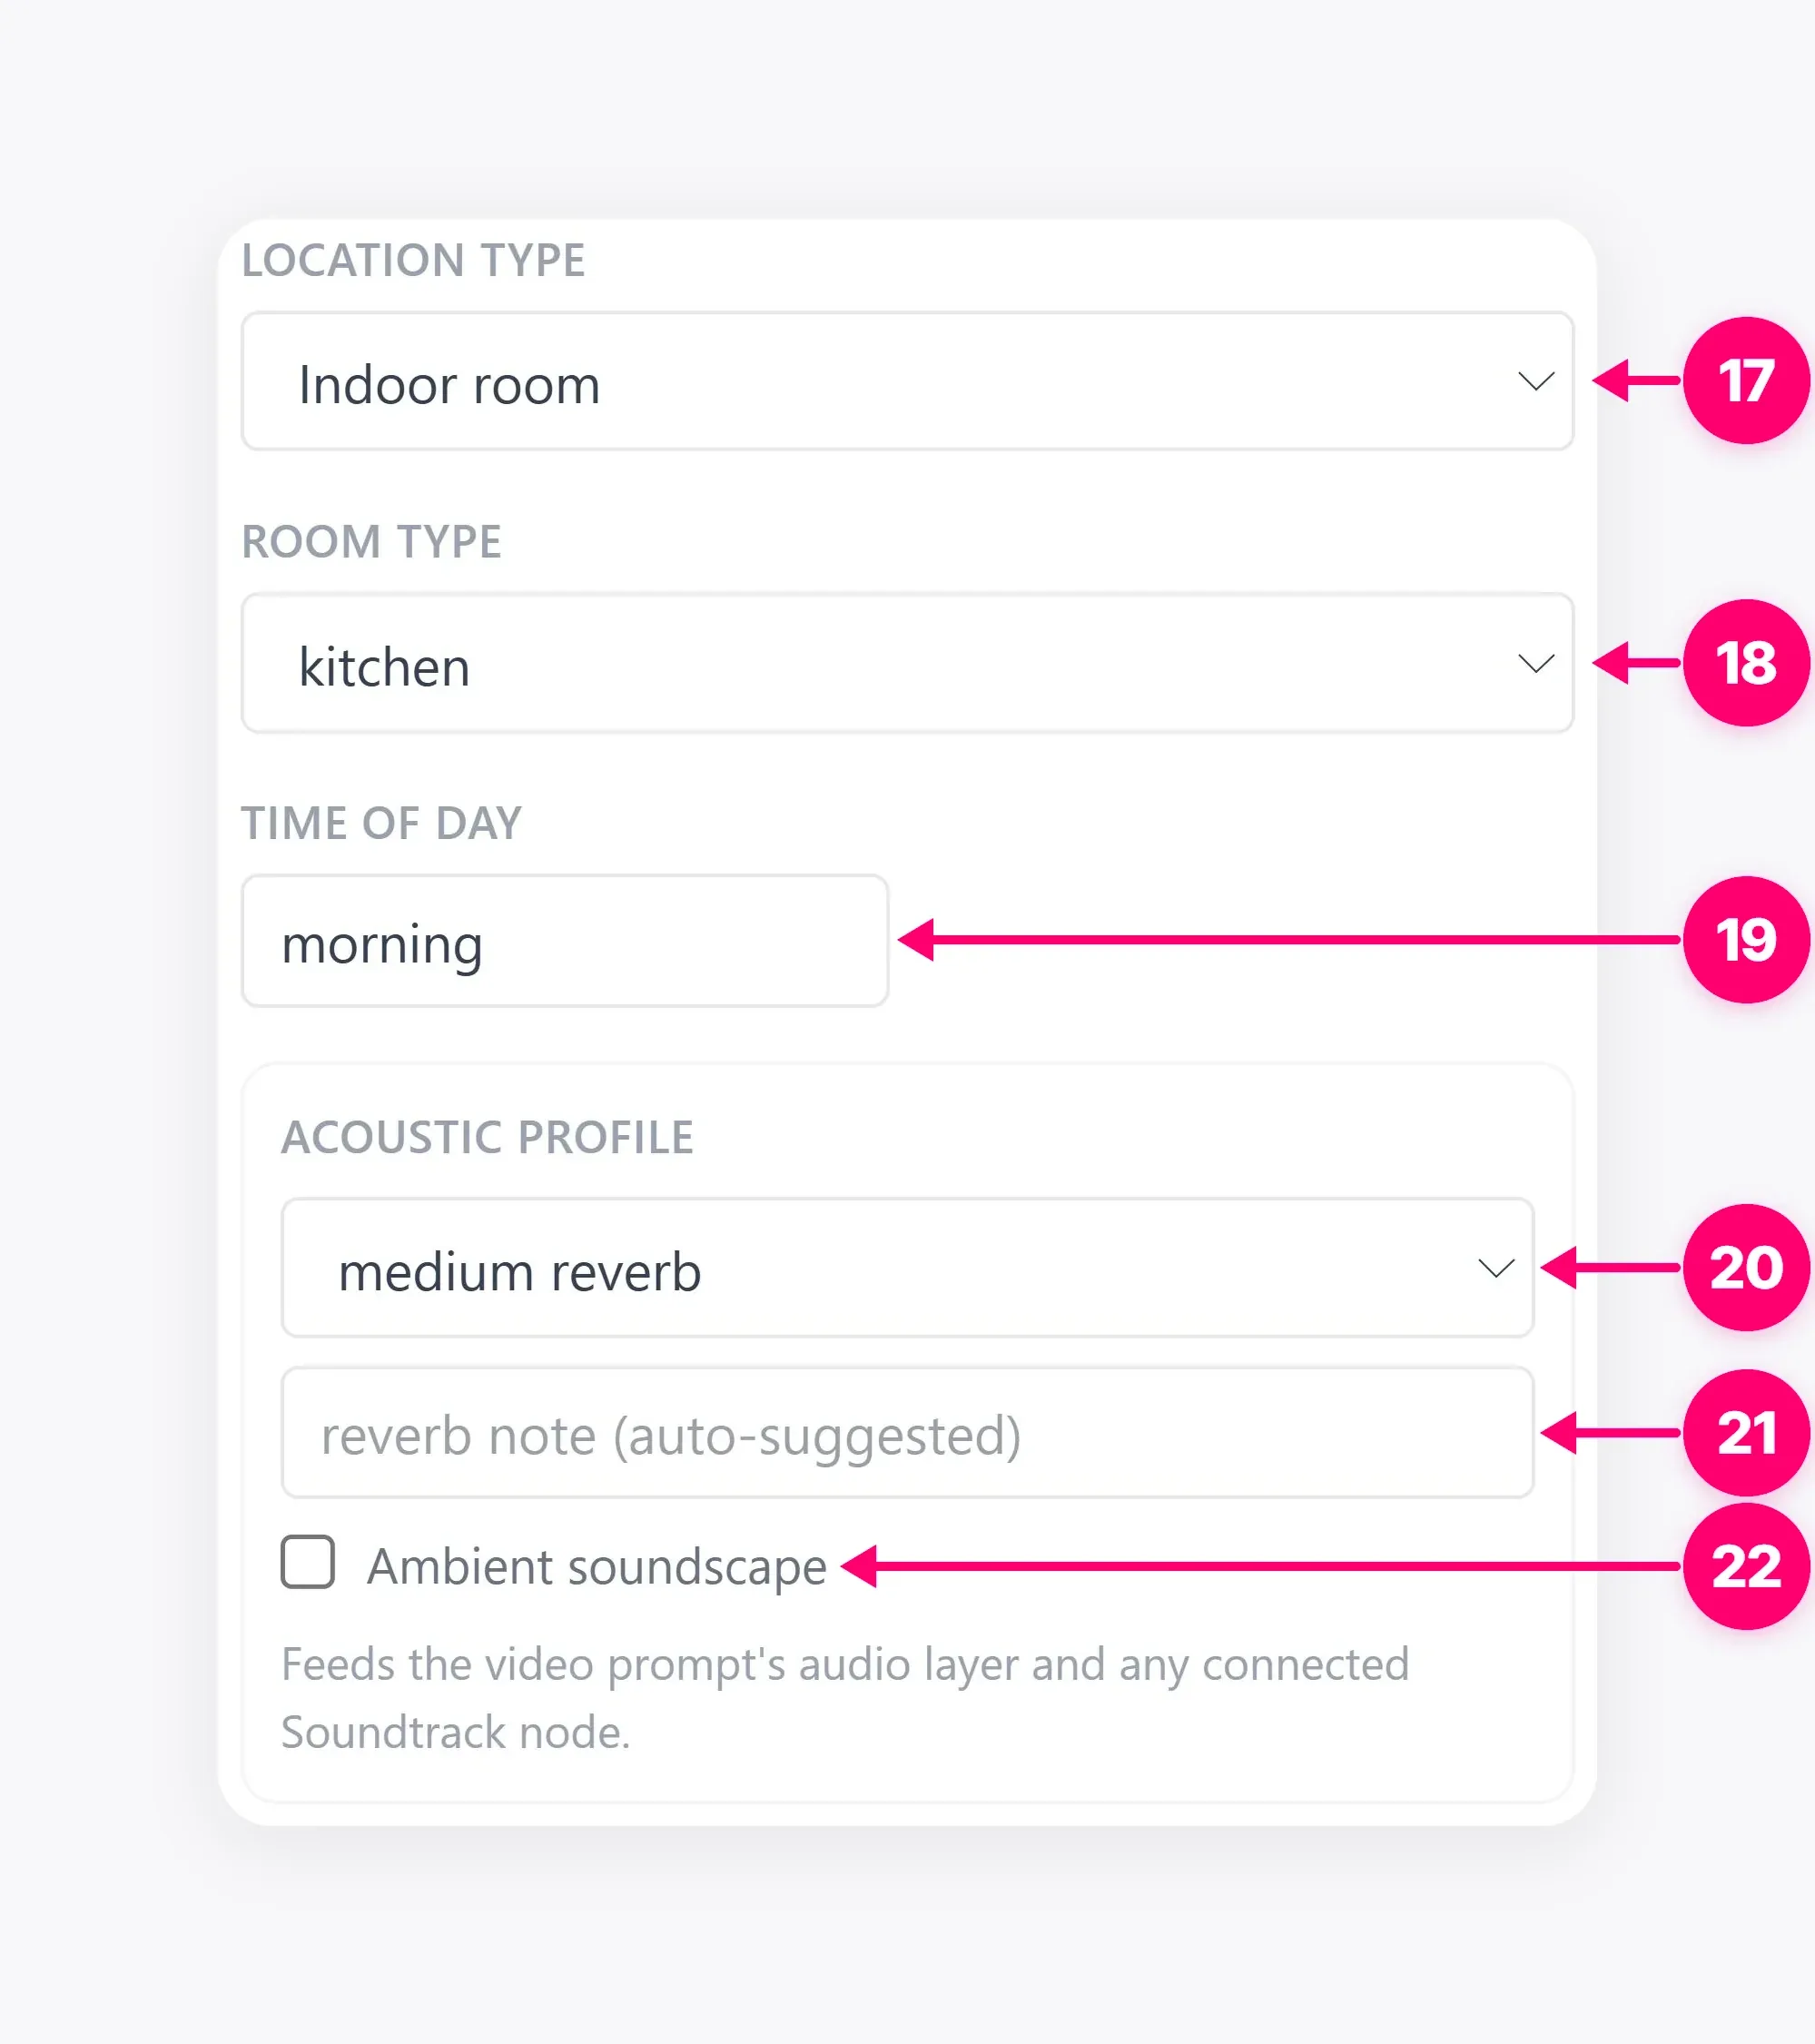
For a prompt only location, turn on Use Prompt only and describe the visible setting in the prompt. This hides and excludes the structured location selections from generation. To use the editor’s controls, leave it off and set the room or scene type, time of day, and acoustic details where relevant. Keep those choices consistent with the prompt. Acoustic information can help later video work; the location sheet itself is a visual reference.
The screenshot below shows the structured settings path.
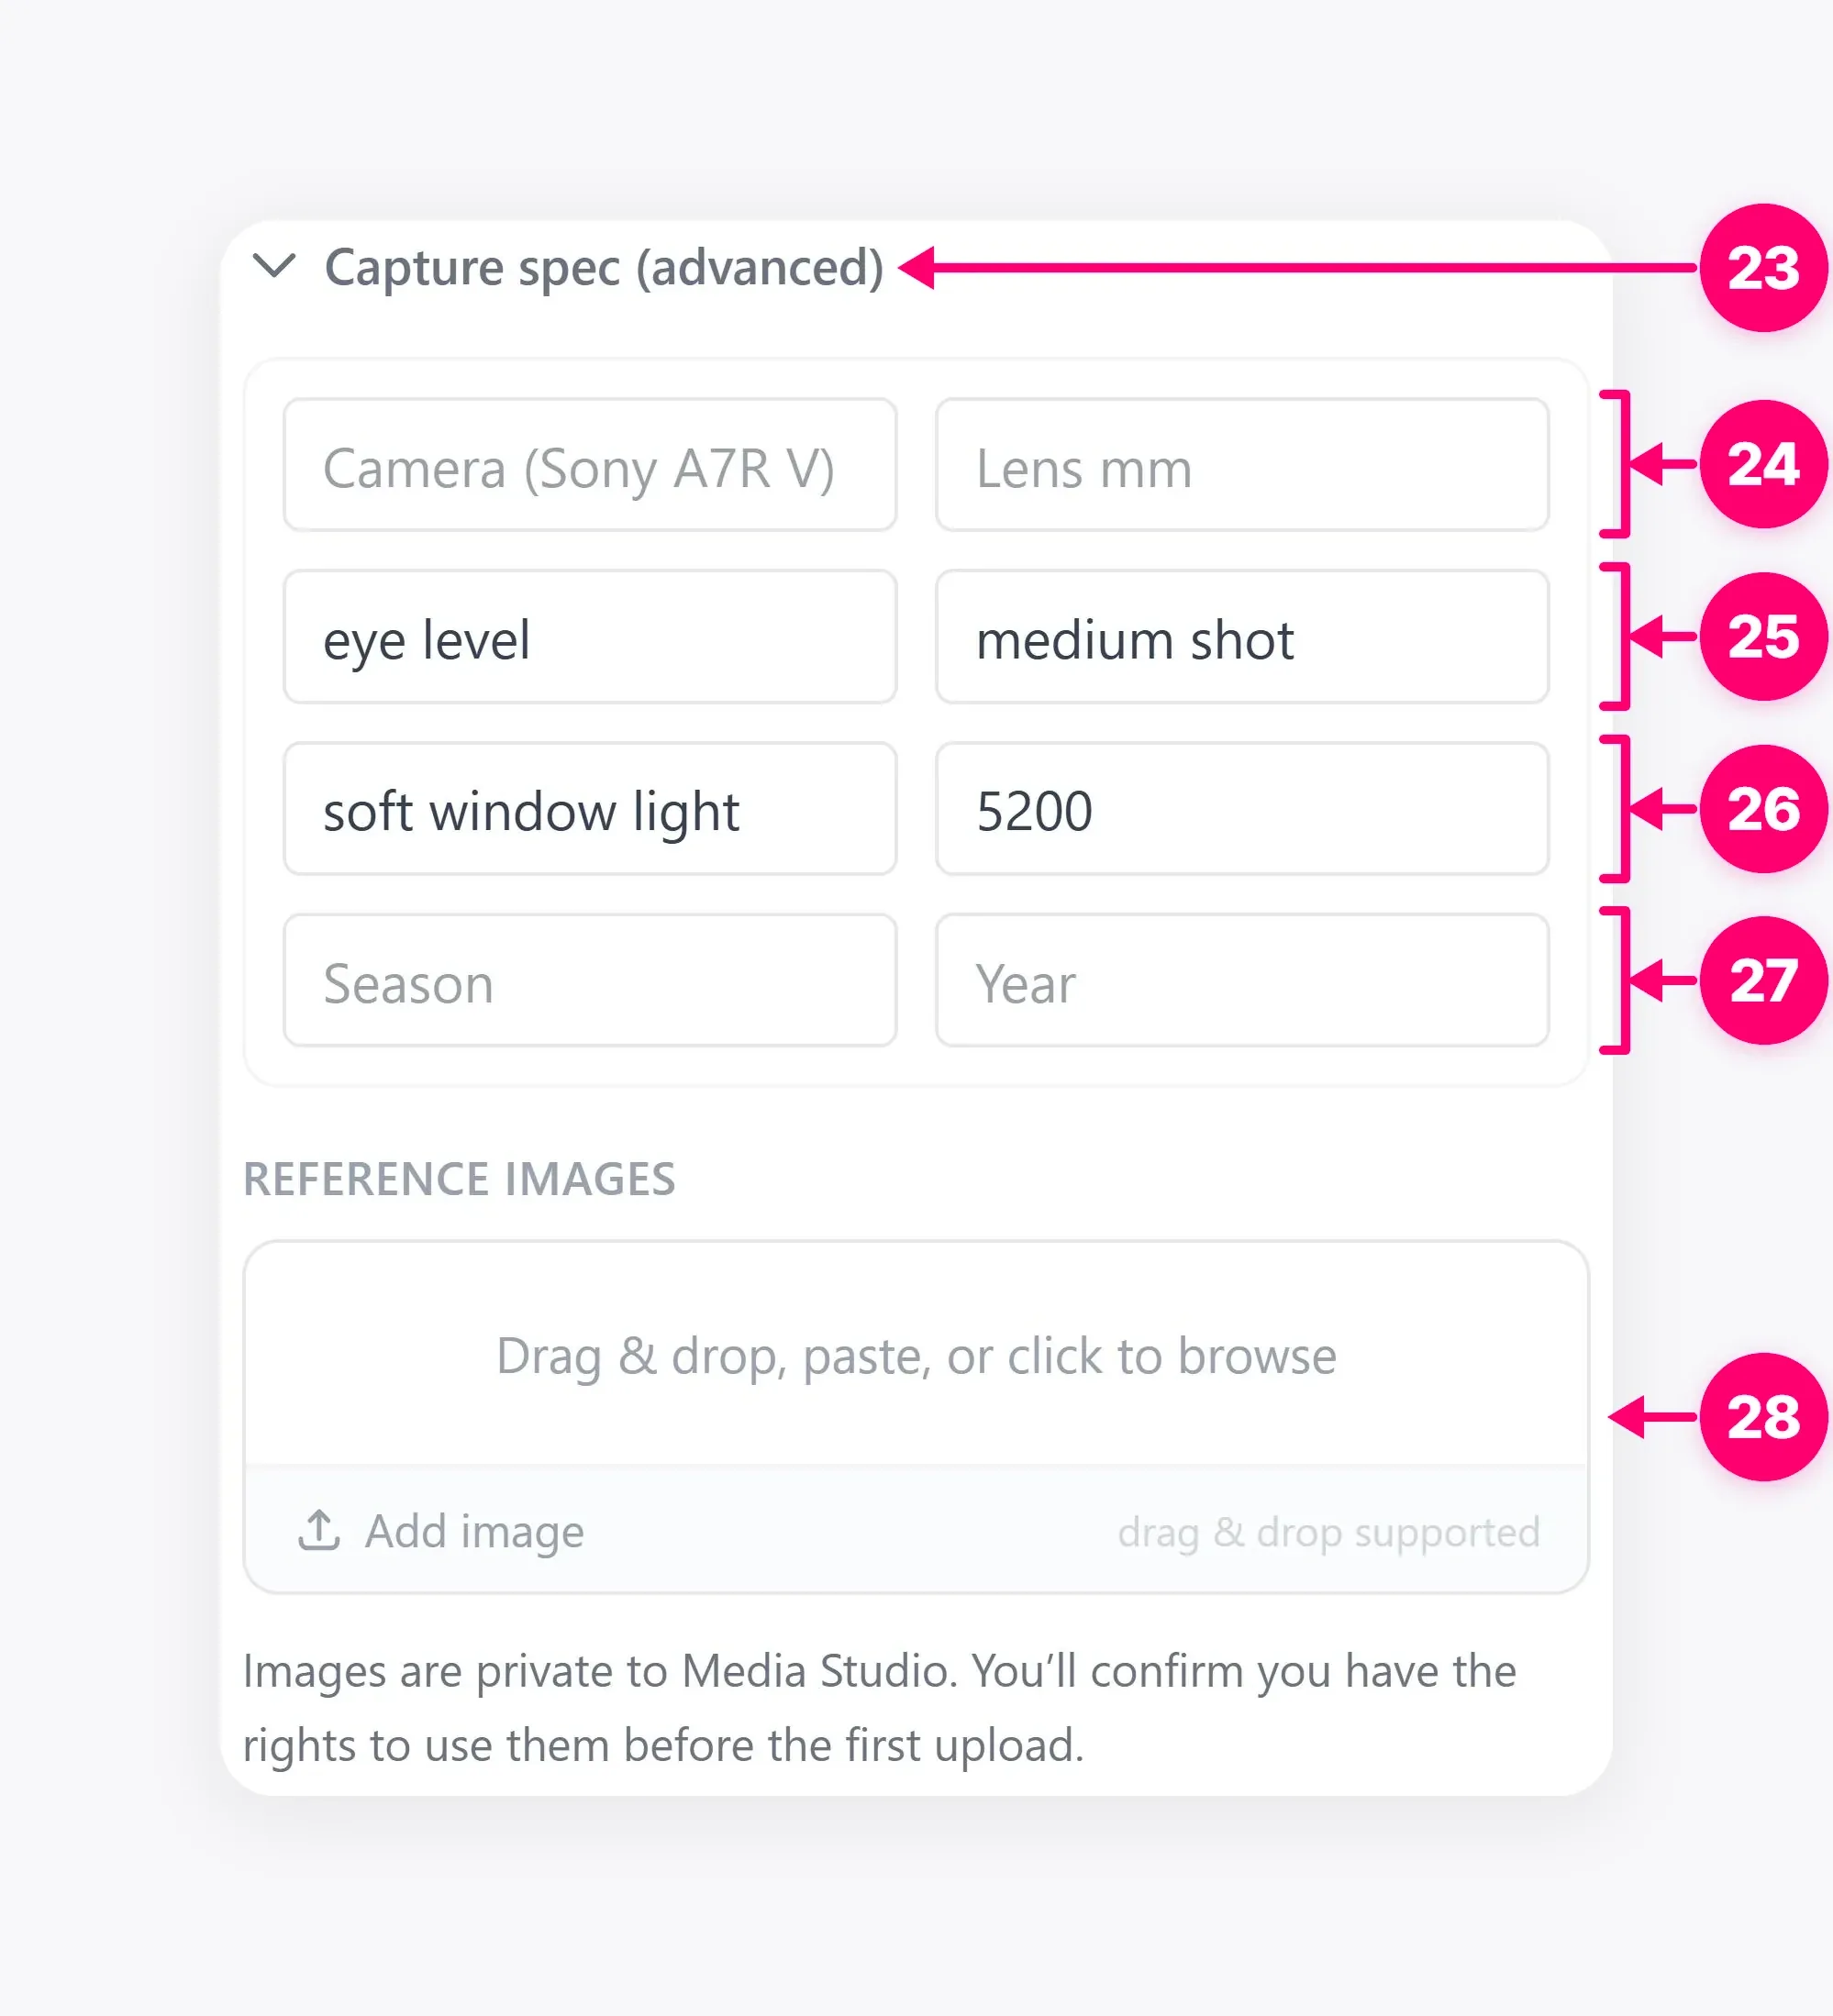
You can add reference images to anchor the setting. Confirm you have the right to upload and use each image, as the app asks you to do. A reference can improve visual direction, but generated details still require review. Avoid using imagery with logos, private spaces, or people that you do not intend to reproduce.
3. Render and inspect
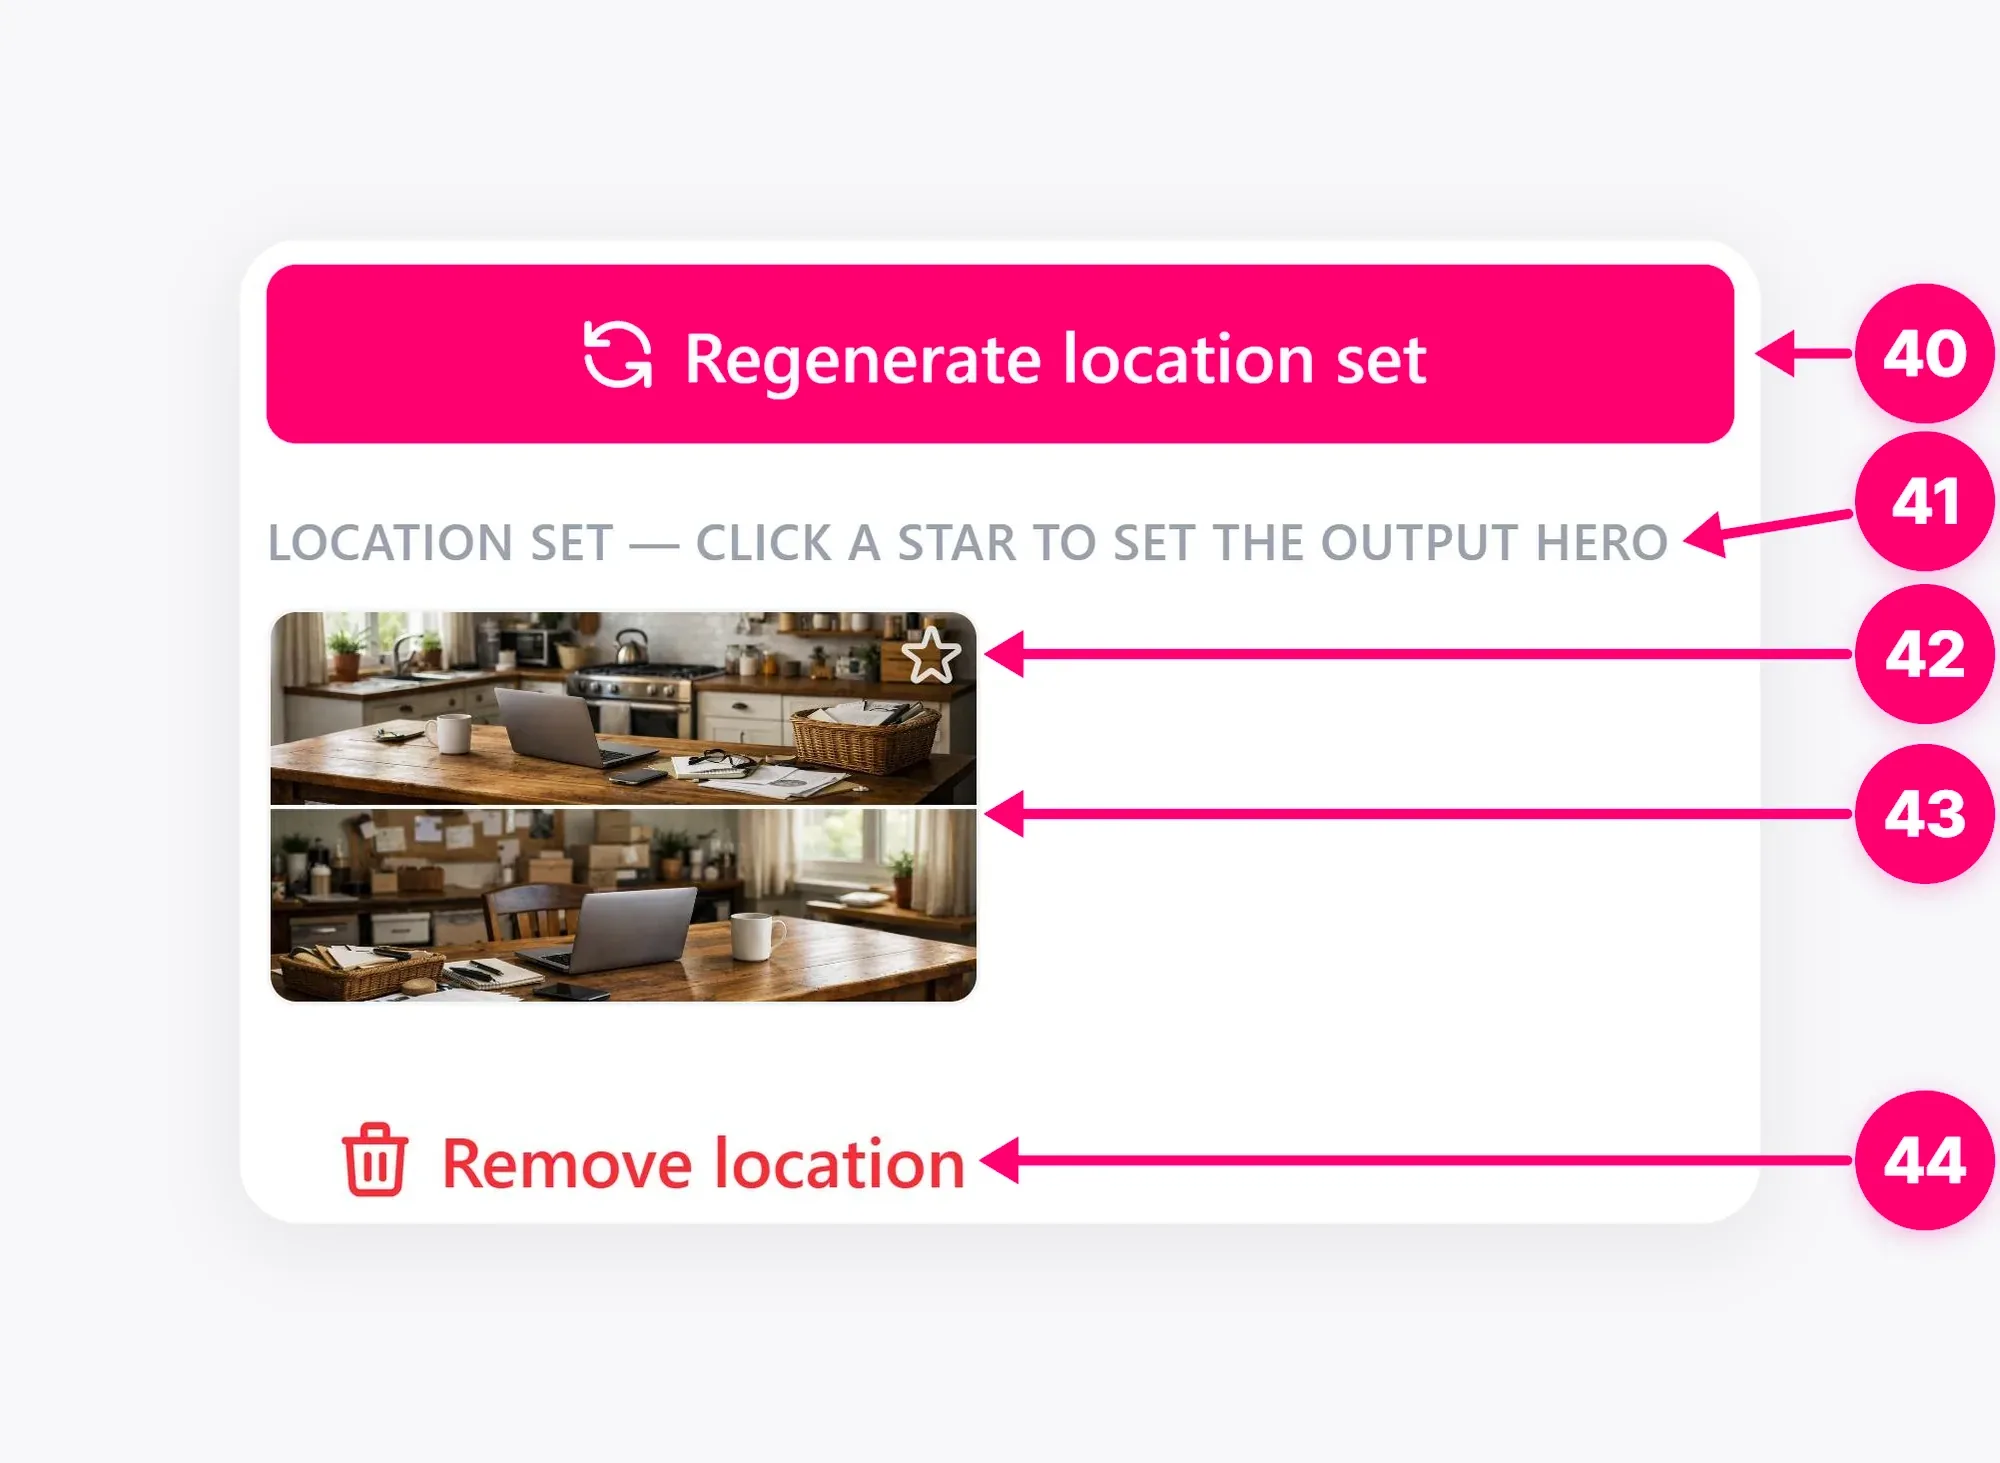
Choose an available image model, review the estimate, and generate the set. The particular models and prices in the example depend on the account and may change. When the result appears, inspect the full set for consistency of layout, light, and intended scene type. If a recurring landmark or room arrangement matters, keep only a suitable version as the reference.
4. Connect it to the next stage
Connect the Location node to a Storyboard when planning shots around that environment, or to a Static Ad when composing a still. Check the receiving node’s selected inputs or reference roles before generation. Connections make the location available; they do not automatically prove it was included in a prompt or faithfully reproduced in the final image. Keep the source location sheet available during final review so you can compare the rendered scene with the setting you approved.
À lire aussi
Découvrez les commandes de Media Studio pour créer un tableau, réutiliser des modèles, charger vos médias et choisir les nœuds de votre création.
Getting StartedConnect source assets, choose a planning model, write a storyboard brief, and generate visual frames for every selected shot.
Getting StartedCreate video scenes from selected storyboard shots, check frame prerequisites, references, durations, and render settings.