 English
 Français
 Deutsch
 Español
Dieser Artikel ist noch nicht in Ihrer Sprache verfügbar. Es wird die englische Version angezeigt.
Getting Started
Media Studio: create Clothes and Props
Create an outfit or prop sheet in Media Studio, choose a presentation mode, and link an outfit to a Cast actor when needed.
YieldBI TeamGrowth ResearchAktualisiert Okt. 2026
Auf dieser Seite
Use Clothes & Props to define the wardrobe or objects that should appear in a creative. An outfit can be shown as a standalone product-style sheet or placed on an existing Cast actor. Decide which view you need before generating: a flat lay is useful for the garment itself, while a linked actor helps you judge how it looks on the person who will appear in the ad.
1. Choose what to create
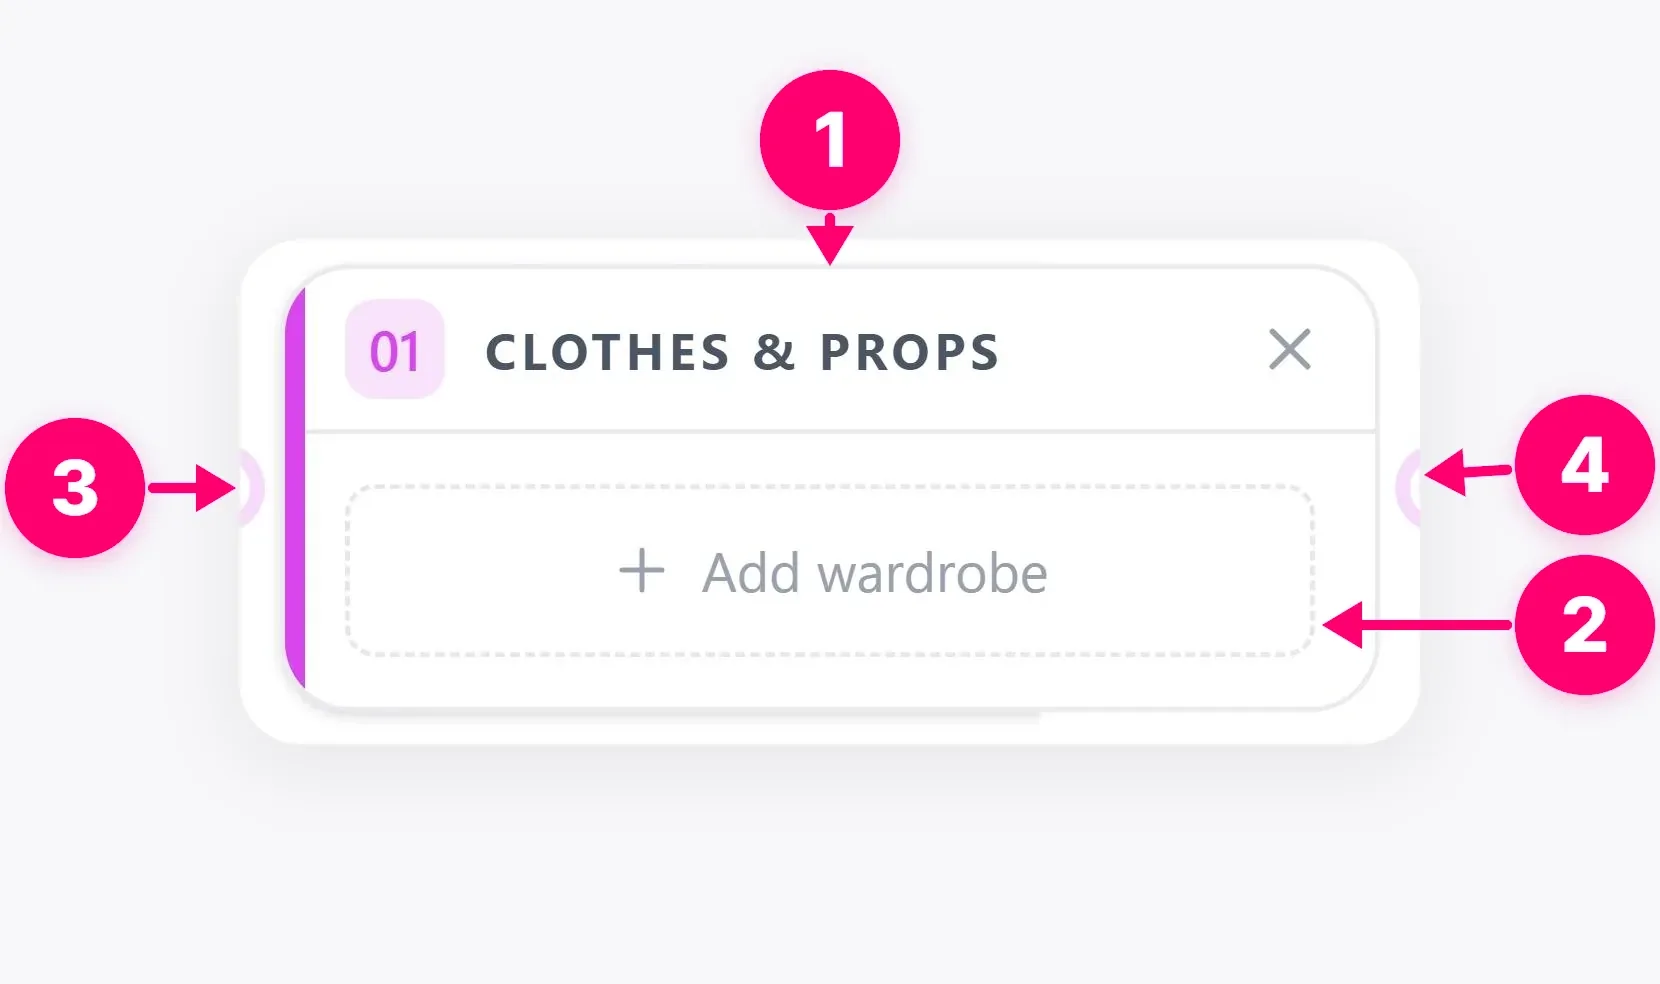
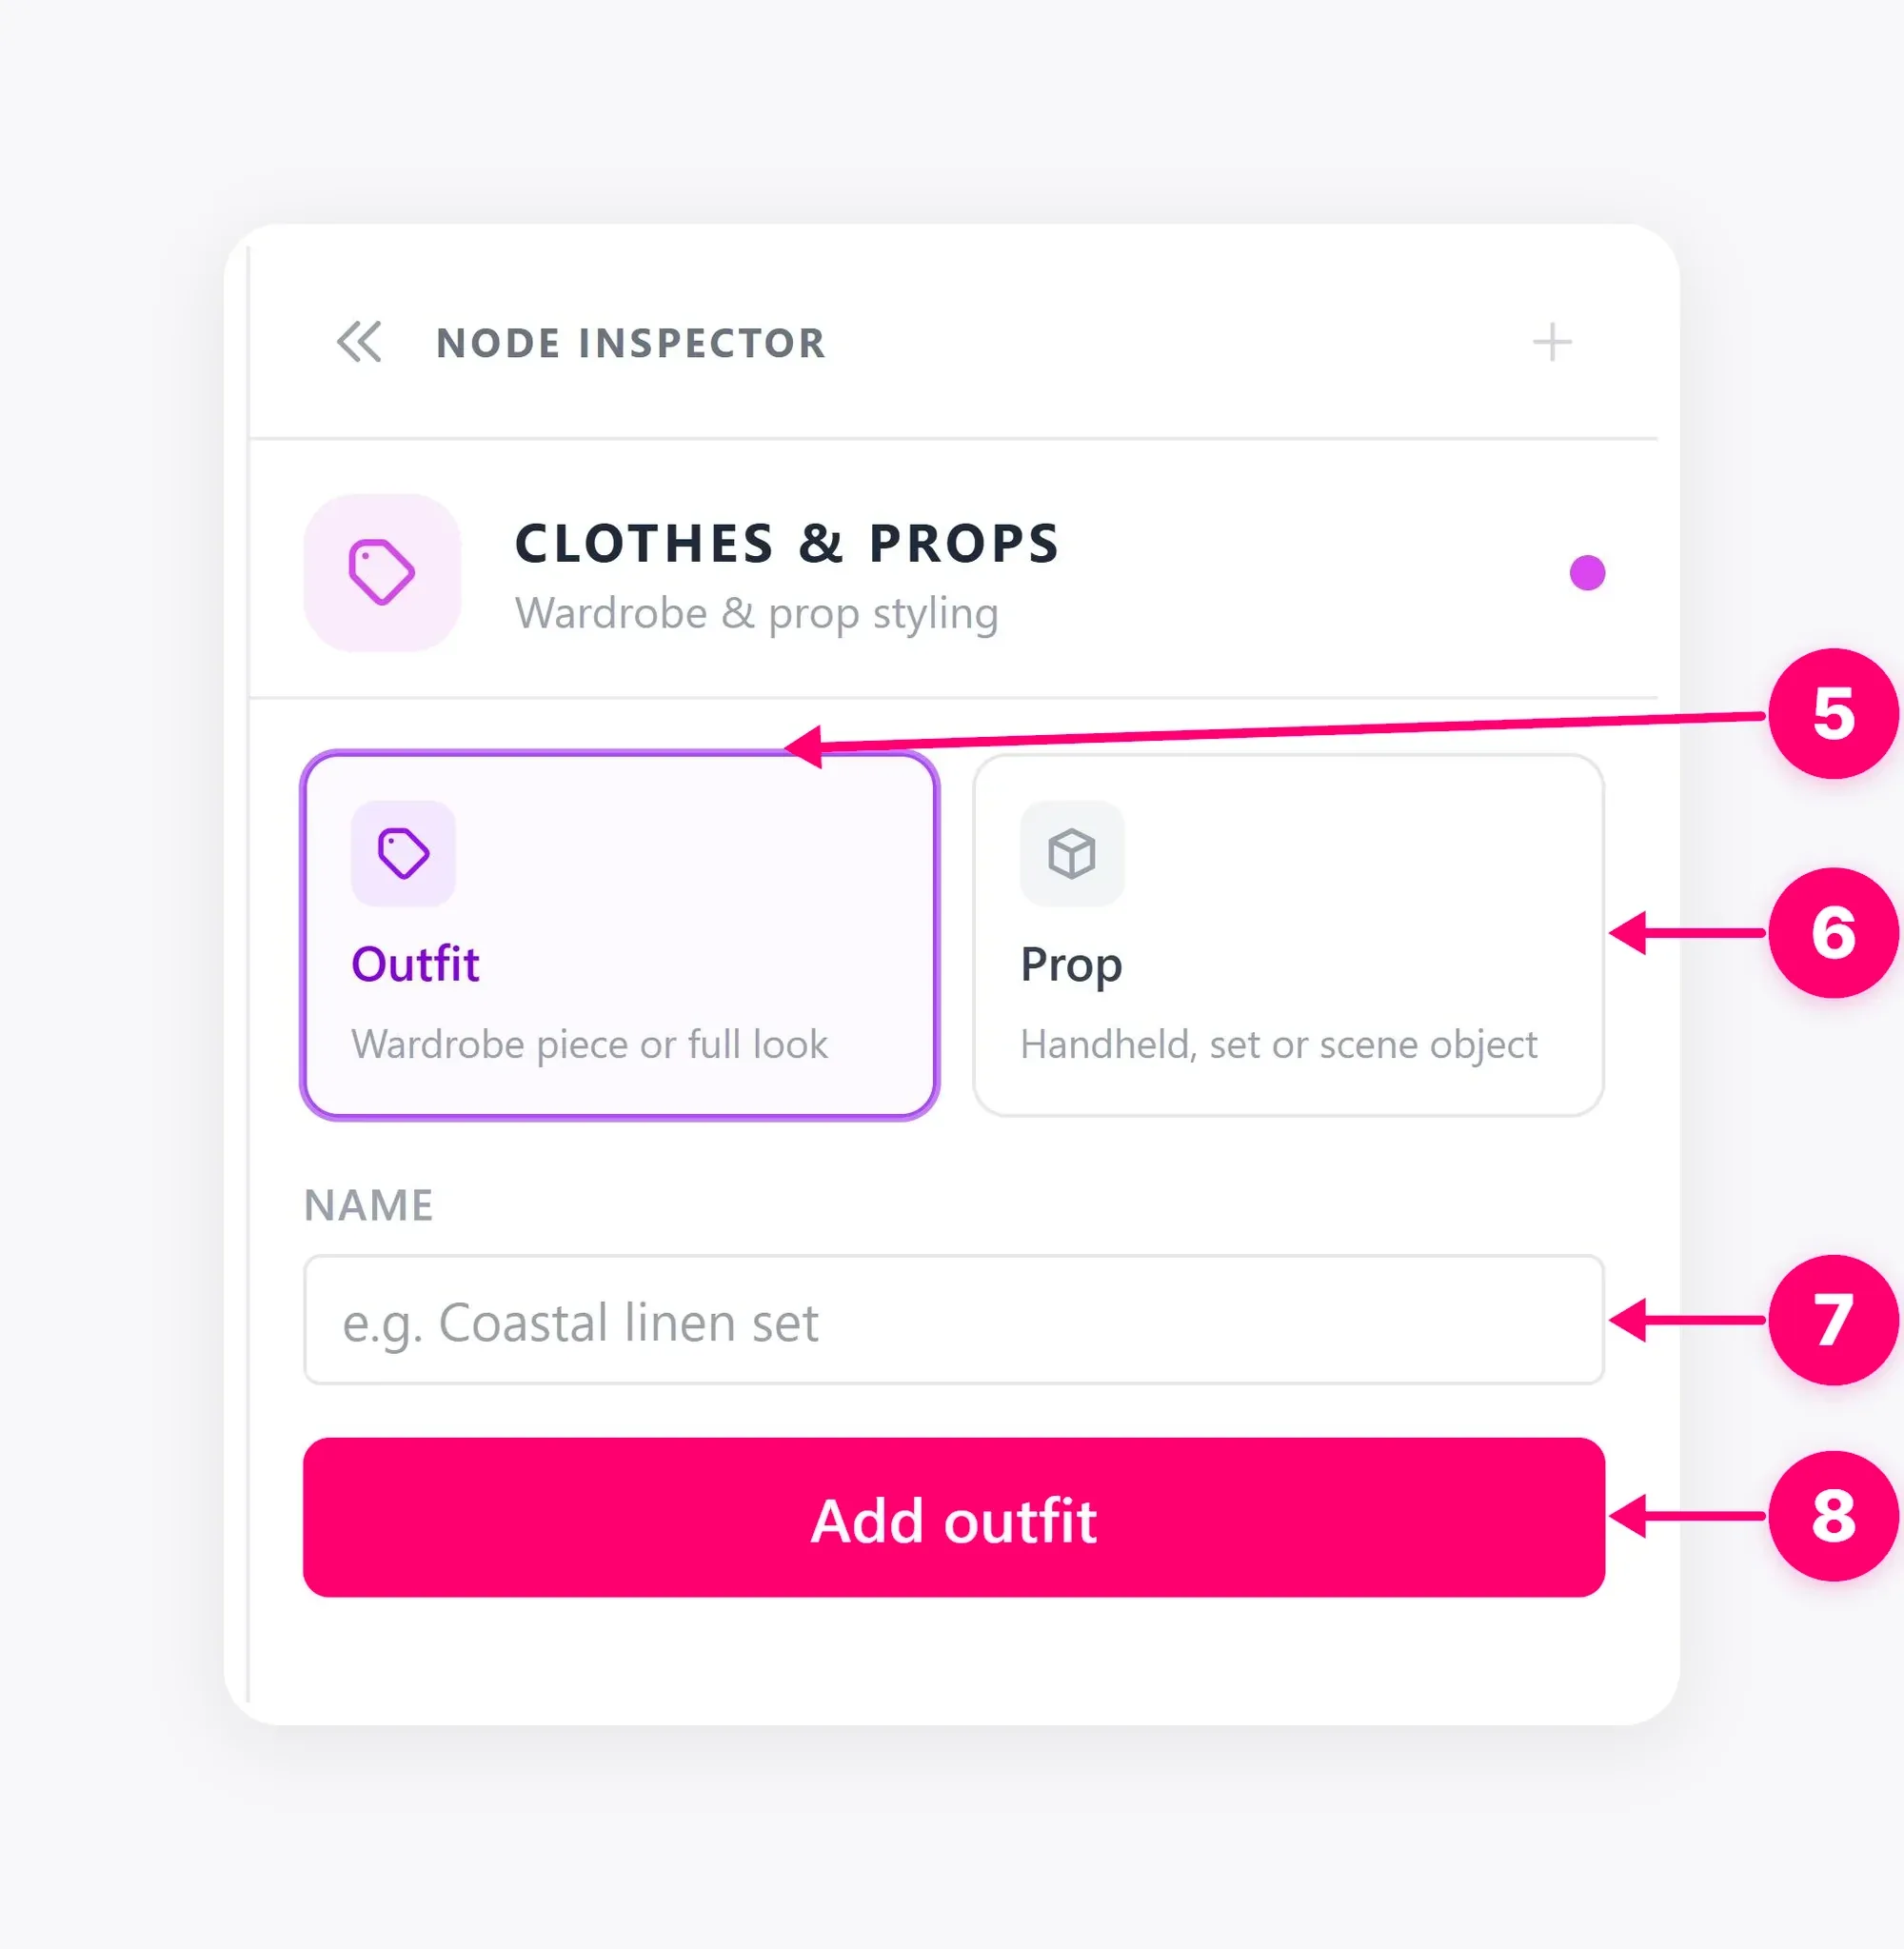
Open your Clothes & Props node and choose the item type. For board setup, see Add a node to the board. Give the outfit or prop a recognizable name and write clear instructions. Include the garment category, colors, materials, fit, and style when they are important to the brief. For a prop, describe the visible shape, finish, and how it should be held or placed.
2. Choose prompt only or item settings
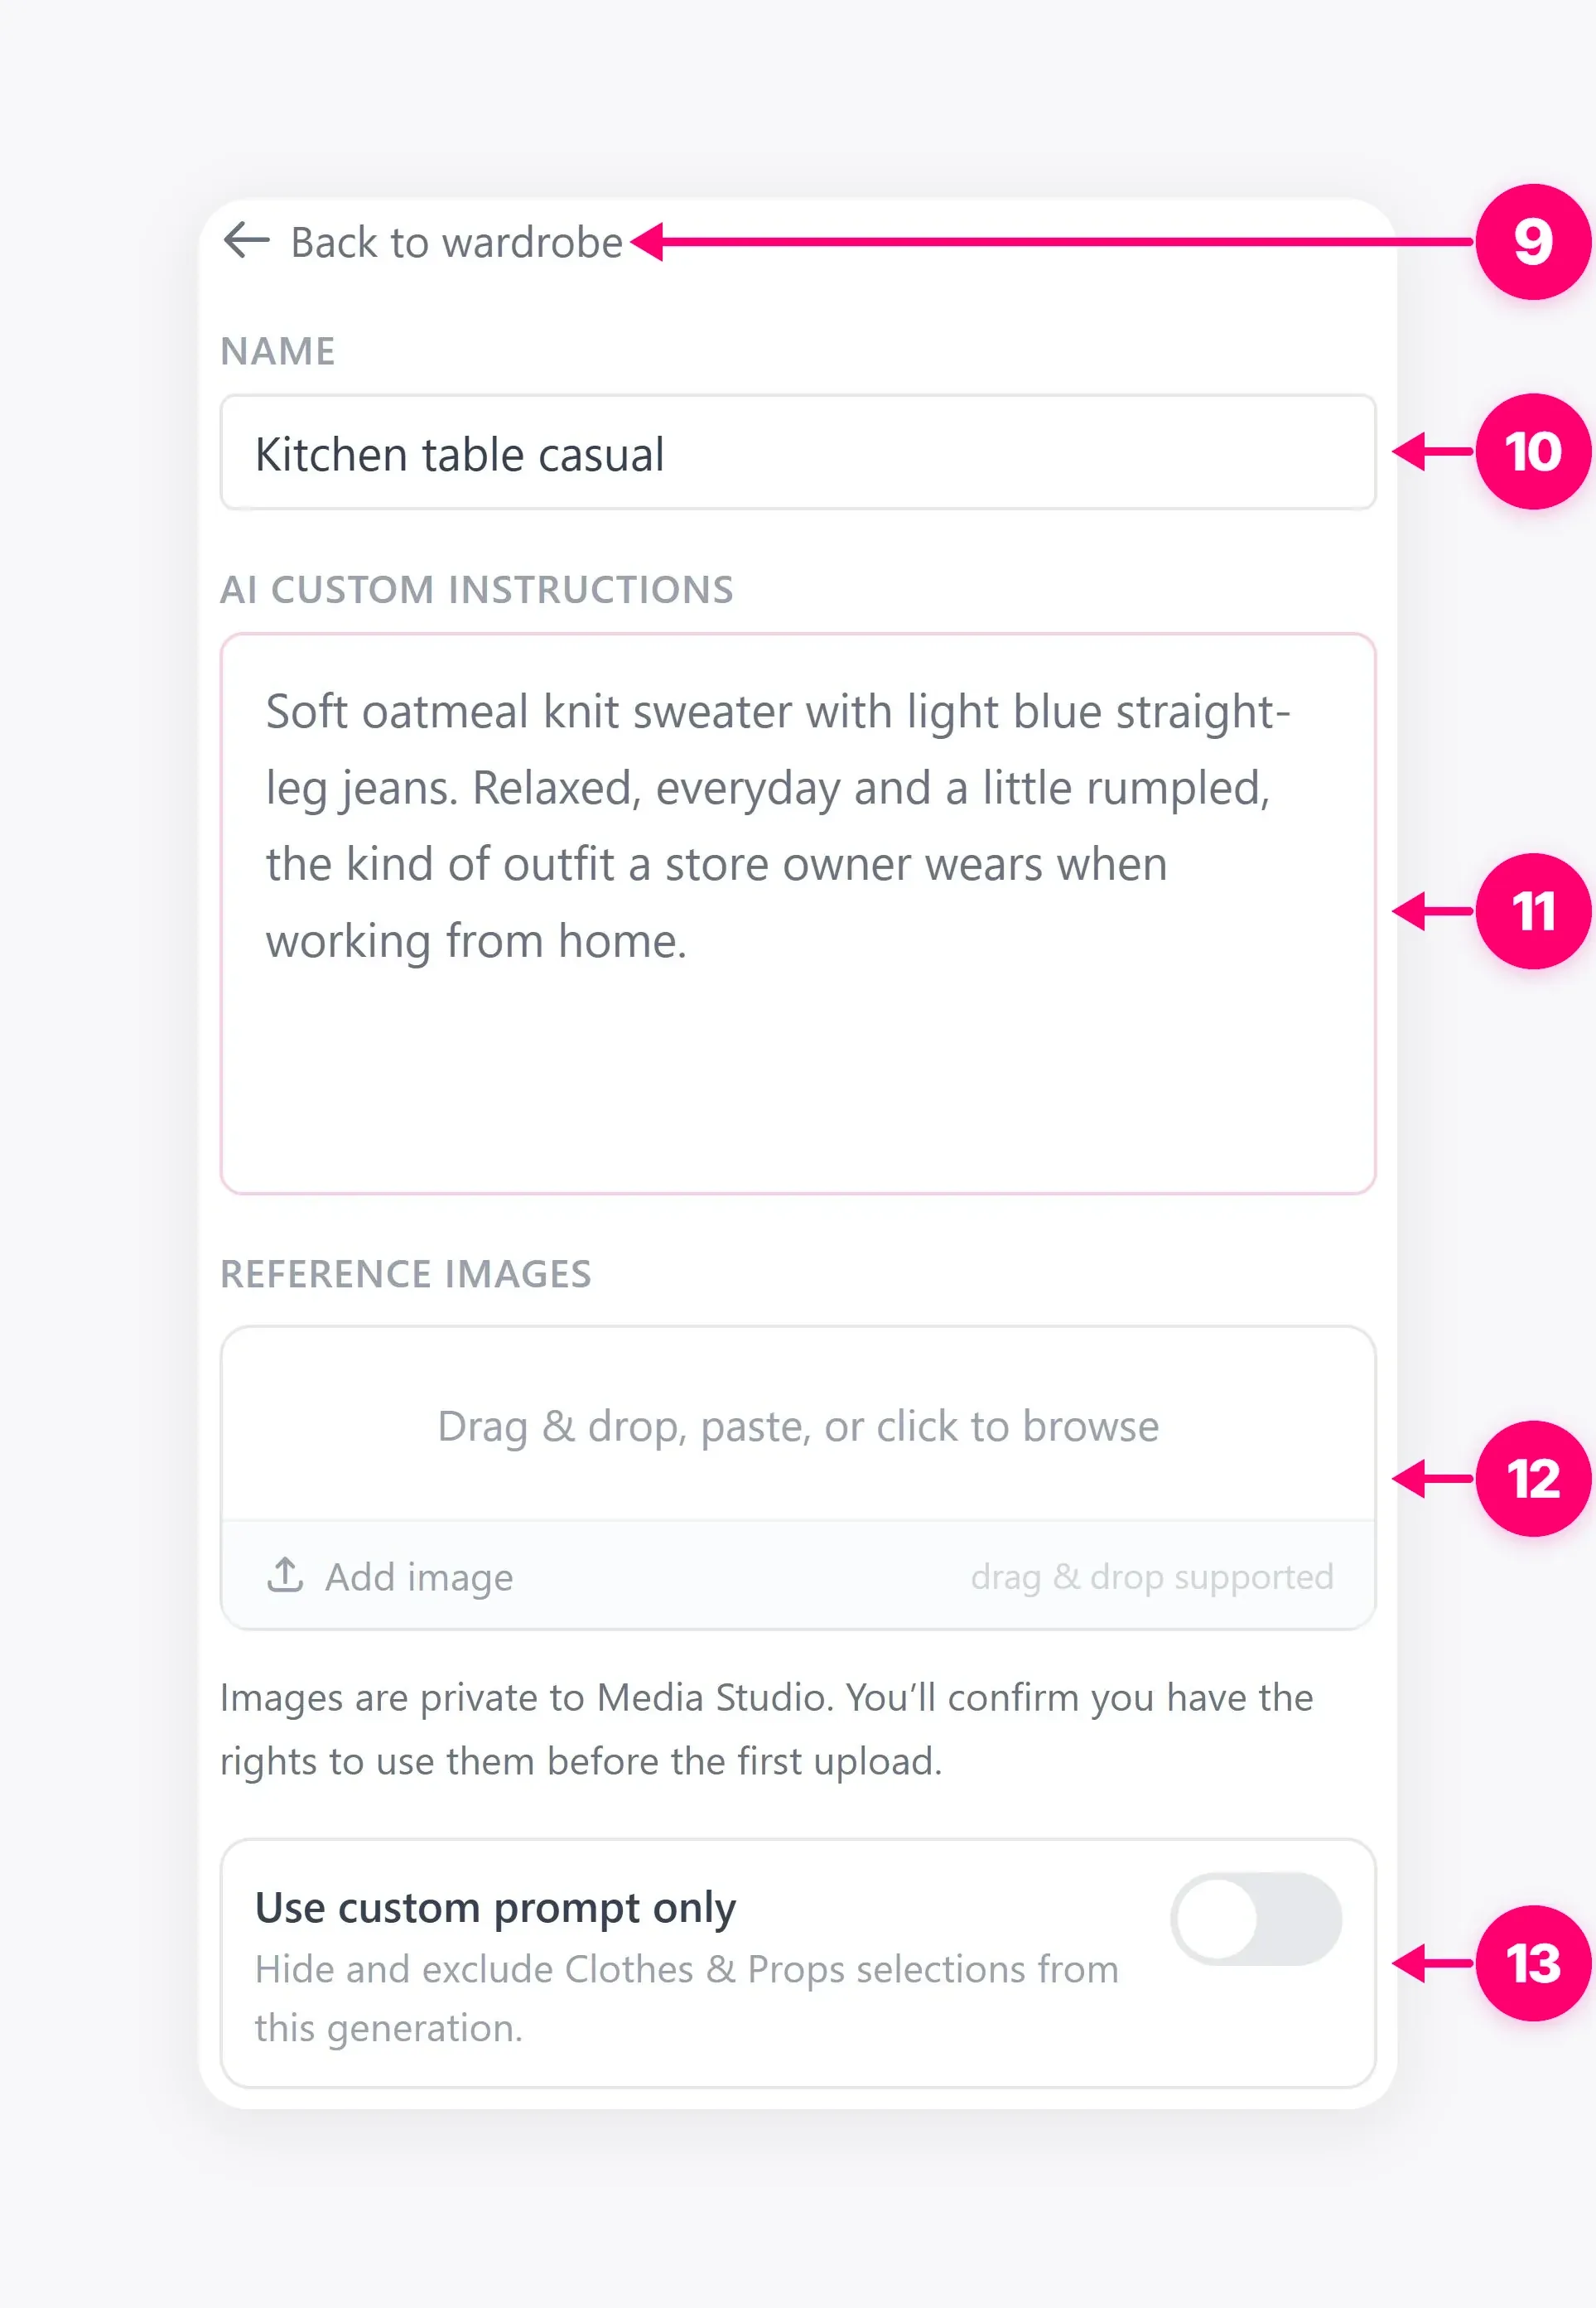
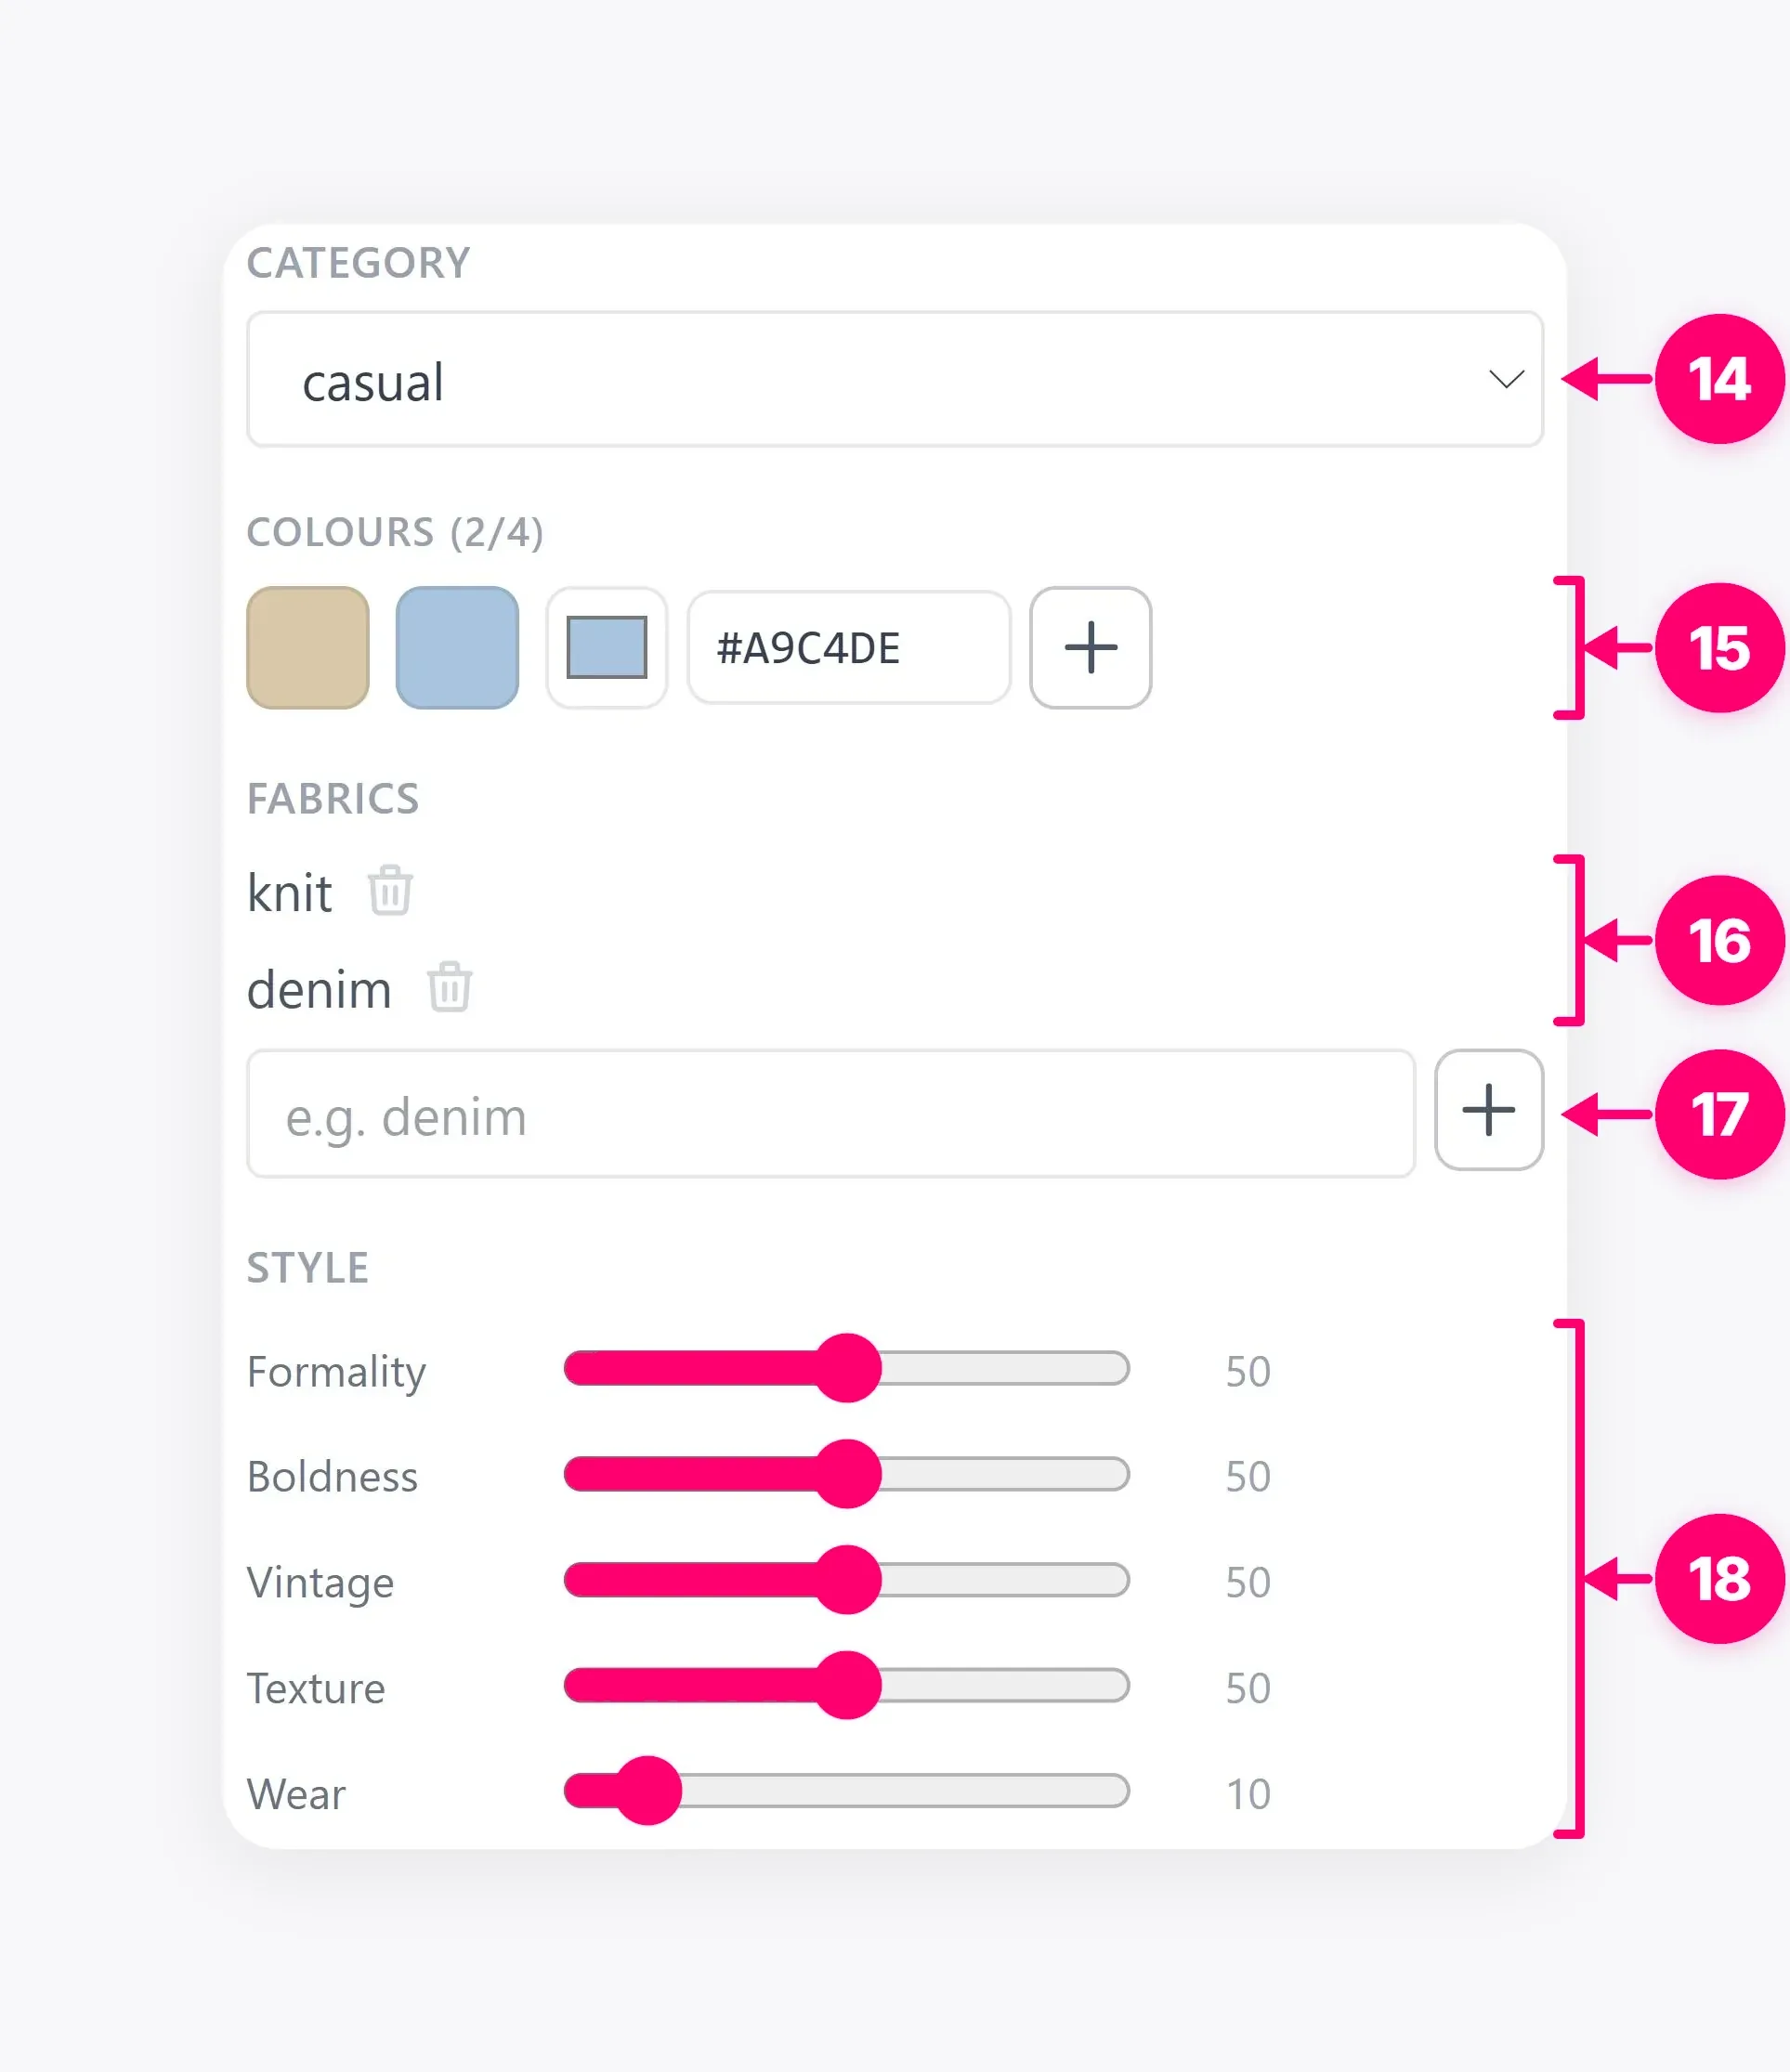
To describe the item yourself, turn on Use custom prompt only and put the visual details in your instructions. This hides and excludes the structured selections from generation. To use the editor’s controls, leave it off and set category, color, and style alongside your instructions. Check that the fields agree with the prompt. If brand colors matter, compare them with your approved Brand Kit. A generated image of a real product still needs a visual check against the actual item.
The screenshot below shows the structured settings path.
3. Choose a sheet mode and generate
For a standalone item, use a mode that displays the garment or prop without a person. For an outfit on a specific actor, connect the Cast node to Clothes & Props, then choose that actor in the linked mode. A Cast connection is required before the actor can appear as a linked choice. The screenshot’s person-free editorial option represents a flat-lay or hero style; it is not an actor link.
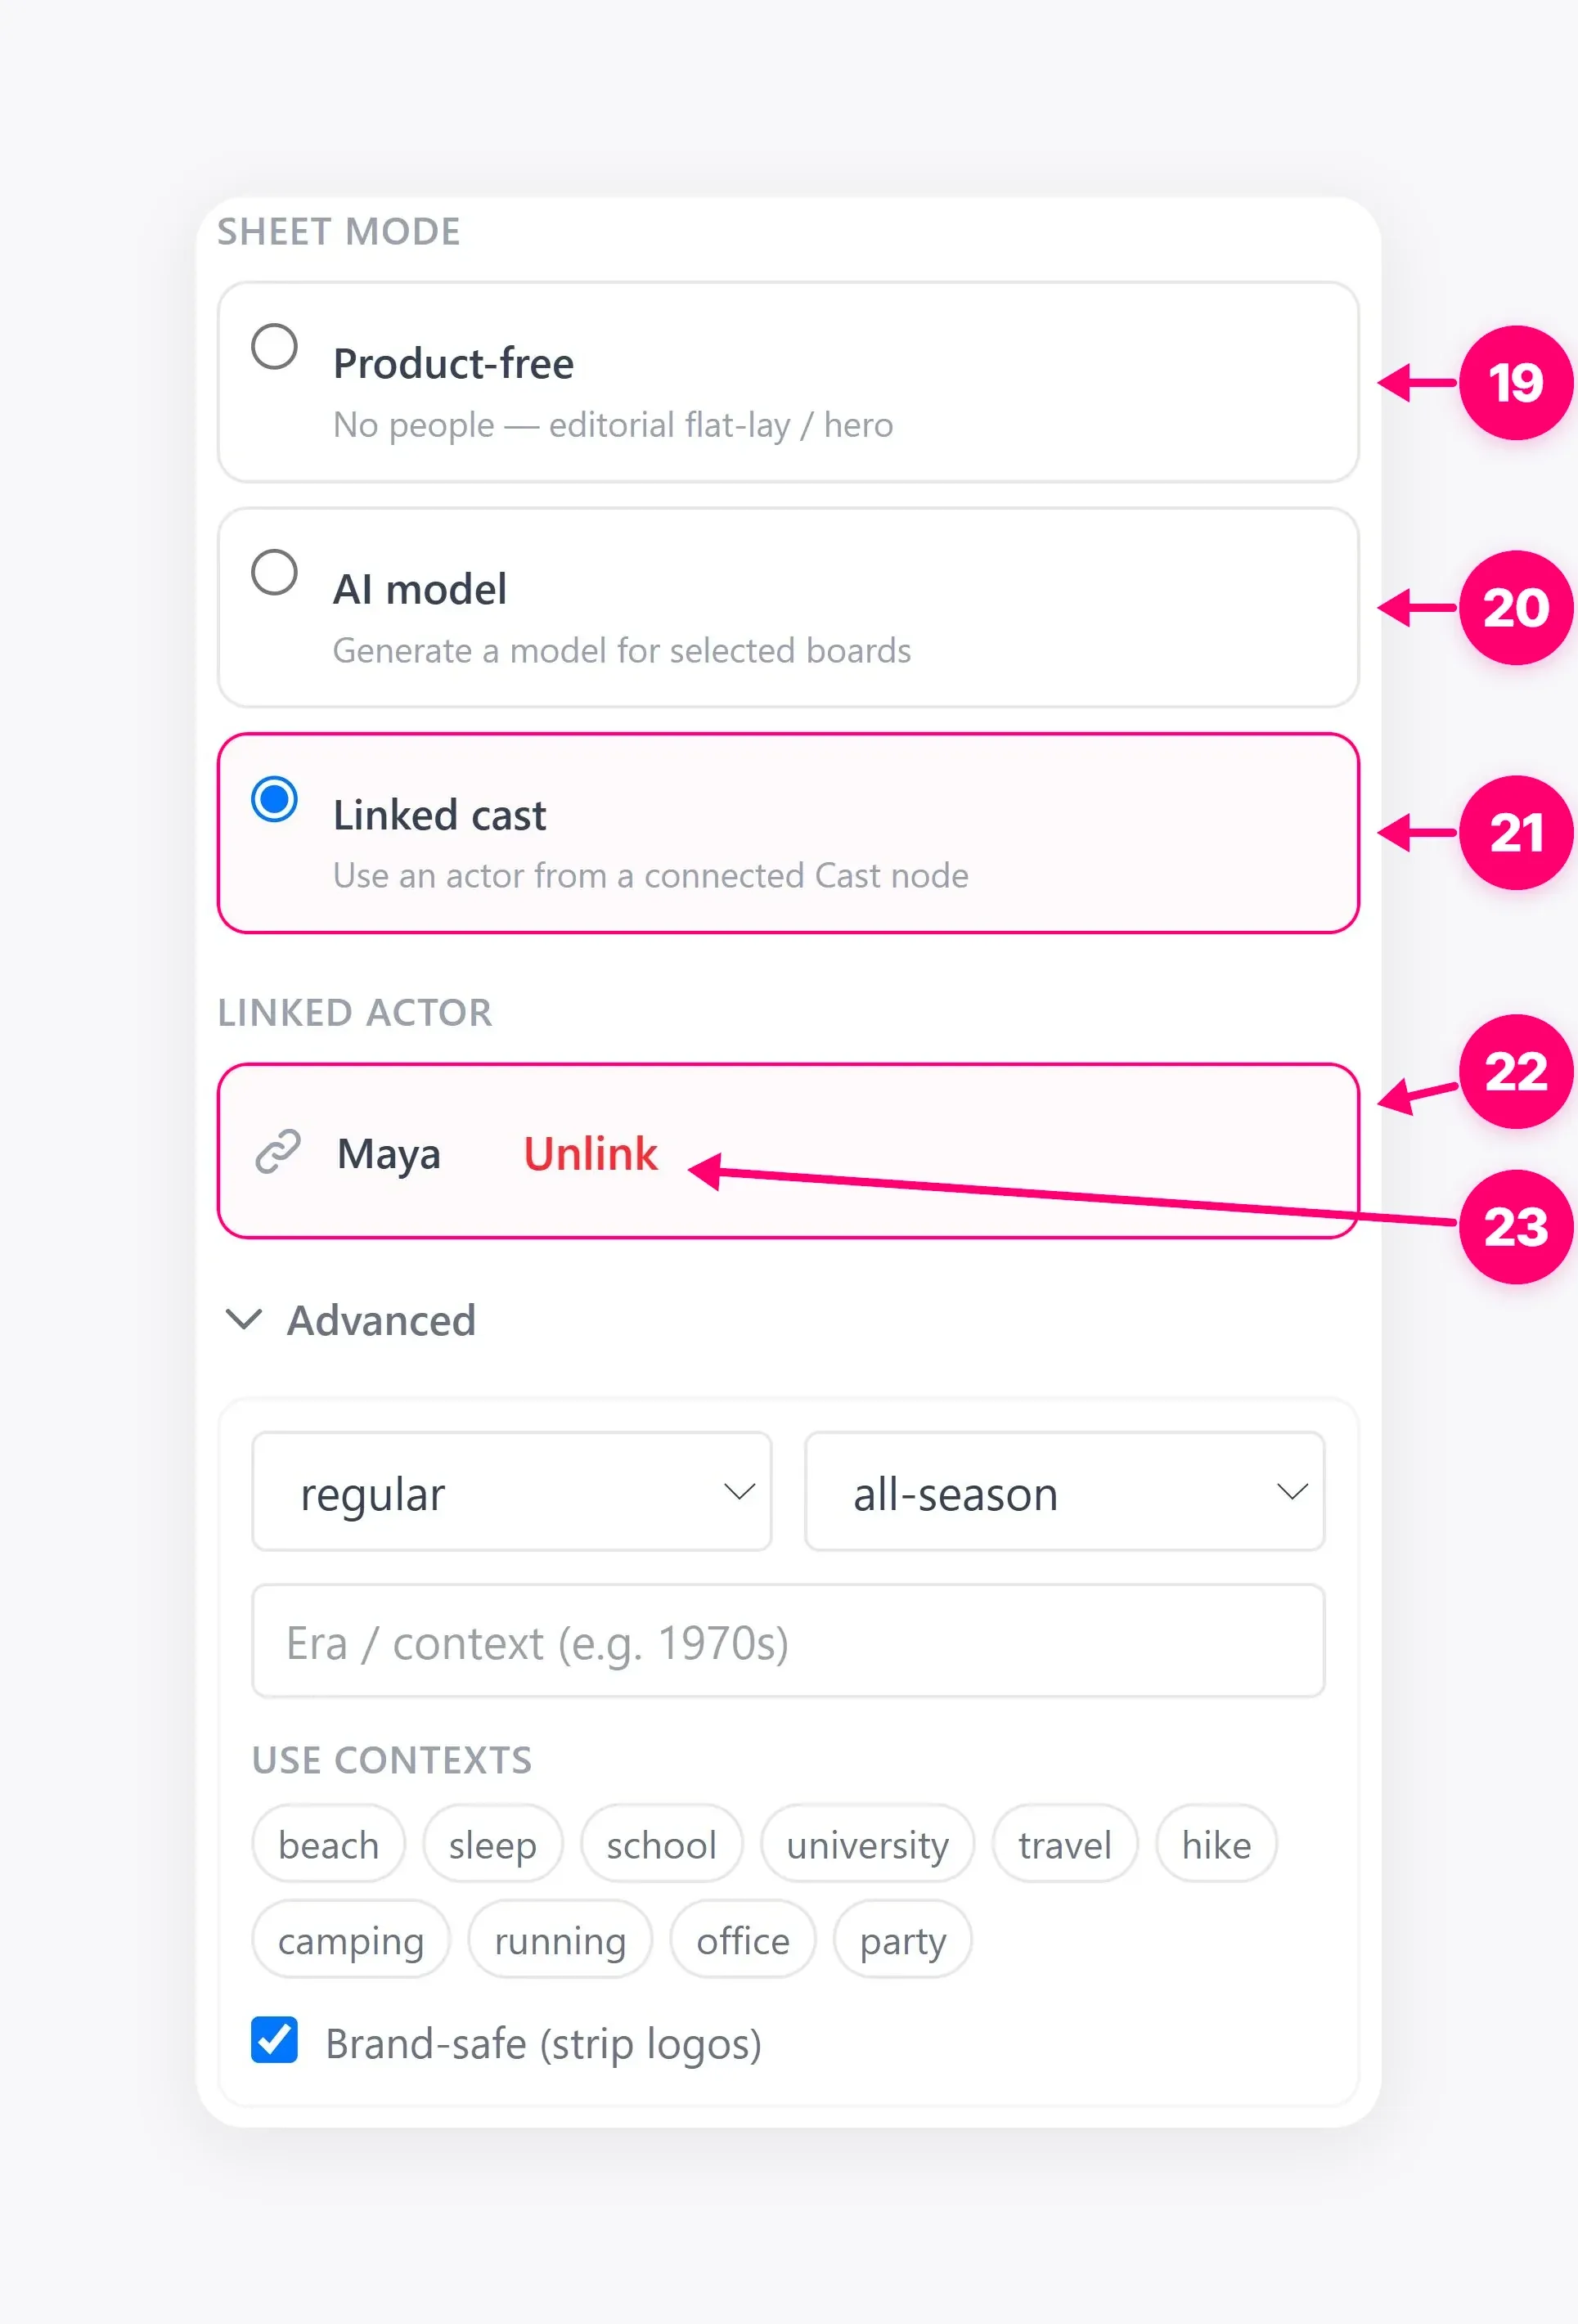
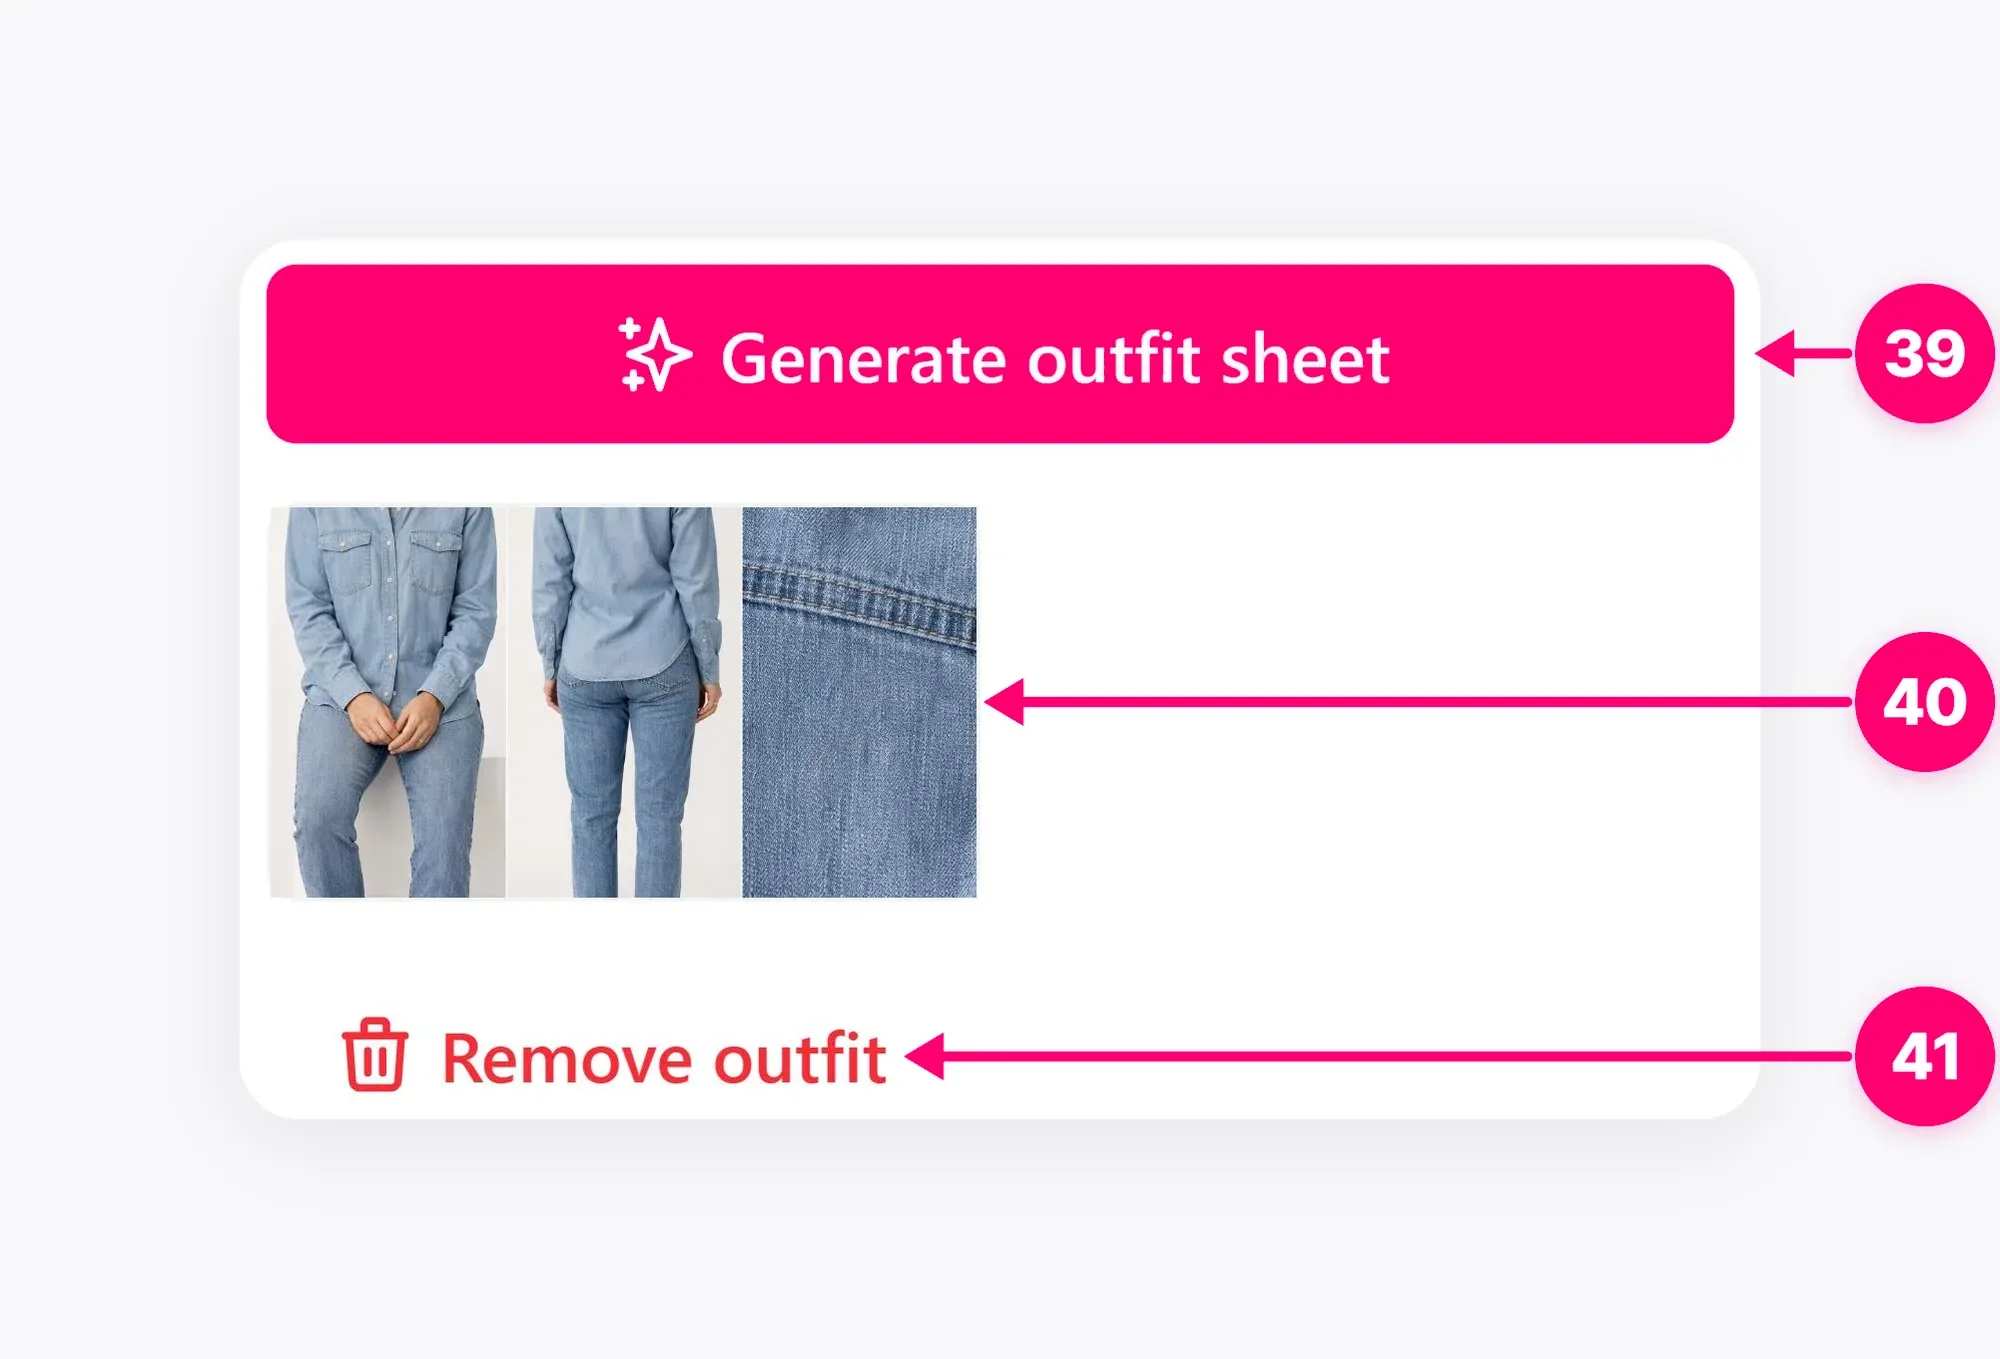
Choose an available rendering model and check the displayed estimate. Models and prices can differ by account. Generate the sheet, then inspect both the item’s details and, where applicable, how it appears on the actor. Revise any mismatched color, fit, branding, or anatomy before reusing the output.
4. Use the result downstream
Connect the finished item to a Storyboard or Static Ad when the creative should use it. A connection supplies a possible reference; confirm the downstream node’s selected inputs or reference roles before generation. Review the final creative as well, since a strict reference setting guides the model but does not guarantee a perfect reproduction of the item.
Weiterlesen
Create a reusable Cast actor, set appearance and voice metadata, render a reference sheet, and use the result in Media Studio.
Erste SchritteLernen Sie die Media Studio-Steuerung kennen: Boards erstellen, Vorlagen nutzen, gespeicherte Medien laden und passende Knoten für Ihre Inhalte wählen.
Getting StartedConnect source assets, choose a planning model, write a storyboard brief, and generate visual frames for every selected shot.