 English
 Français
 Deutsch
 Español
Dieser Artikel ist noch nicht in Ihrer Sprache verfügbar. Es wird die englische Version angezeigt.
Getting Started
Media Studio: plan a Storyboard
Connect source assets, choose a planning model, write a storyboard brief, and generate visual frames for every selected shot.
YieldBI TeamGrowth ResearchAktualisiert Okt. 2026
Auf dieser Seite
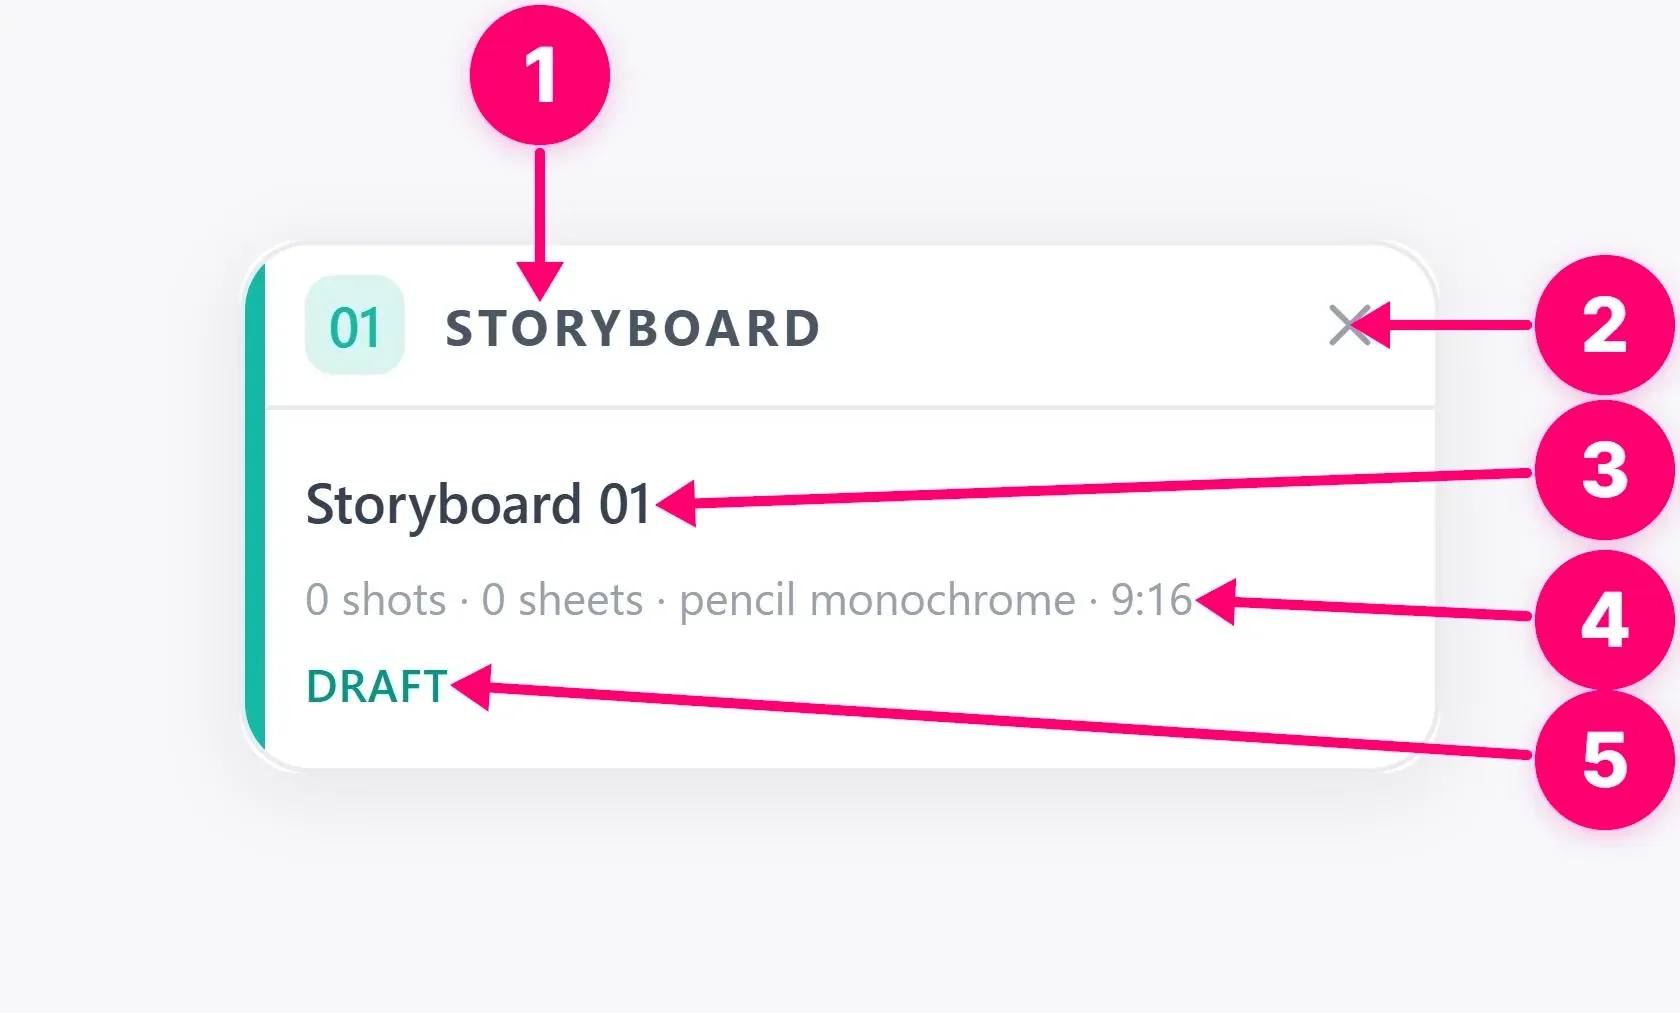
The Storyboard node turns a brief and connected source assets into a shot list. It helps you decide what happens in each shot before video generation. Set a target duration for your board and review the total again after editing shots.
1. Prepare the board
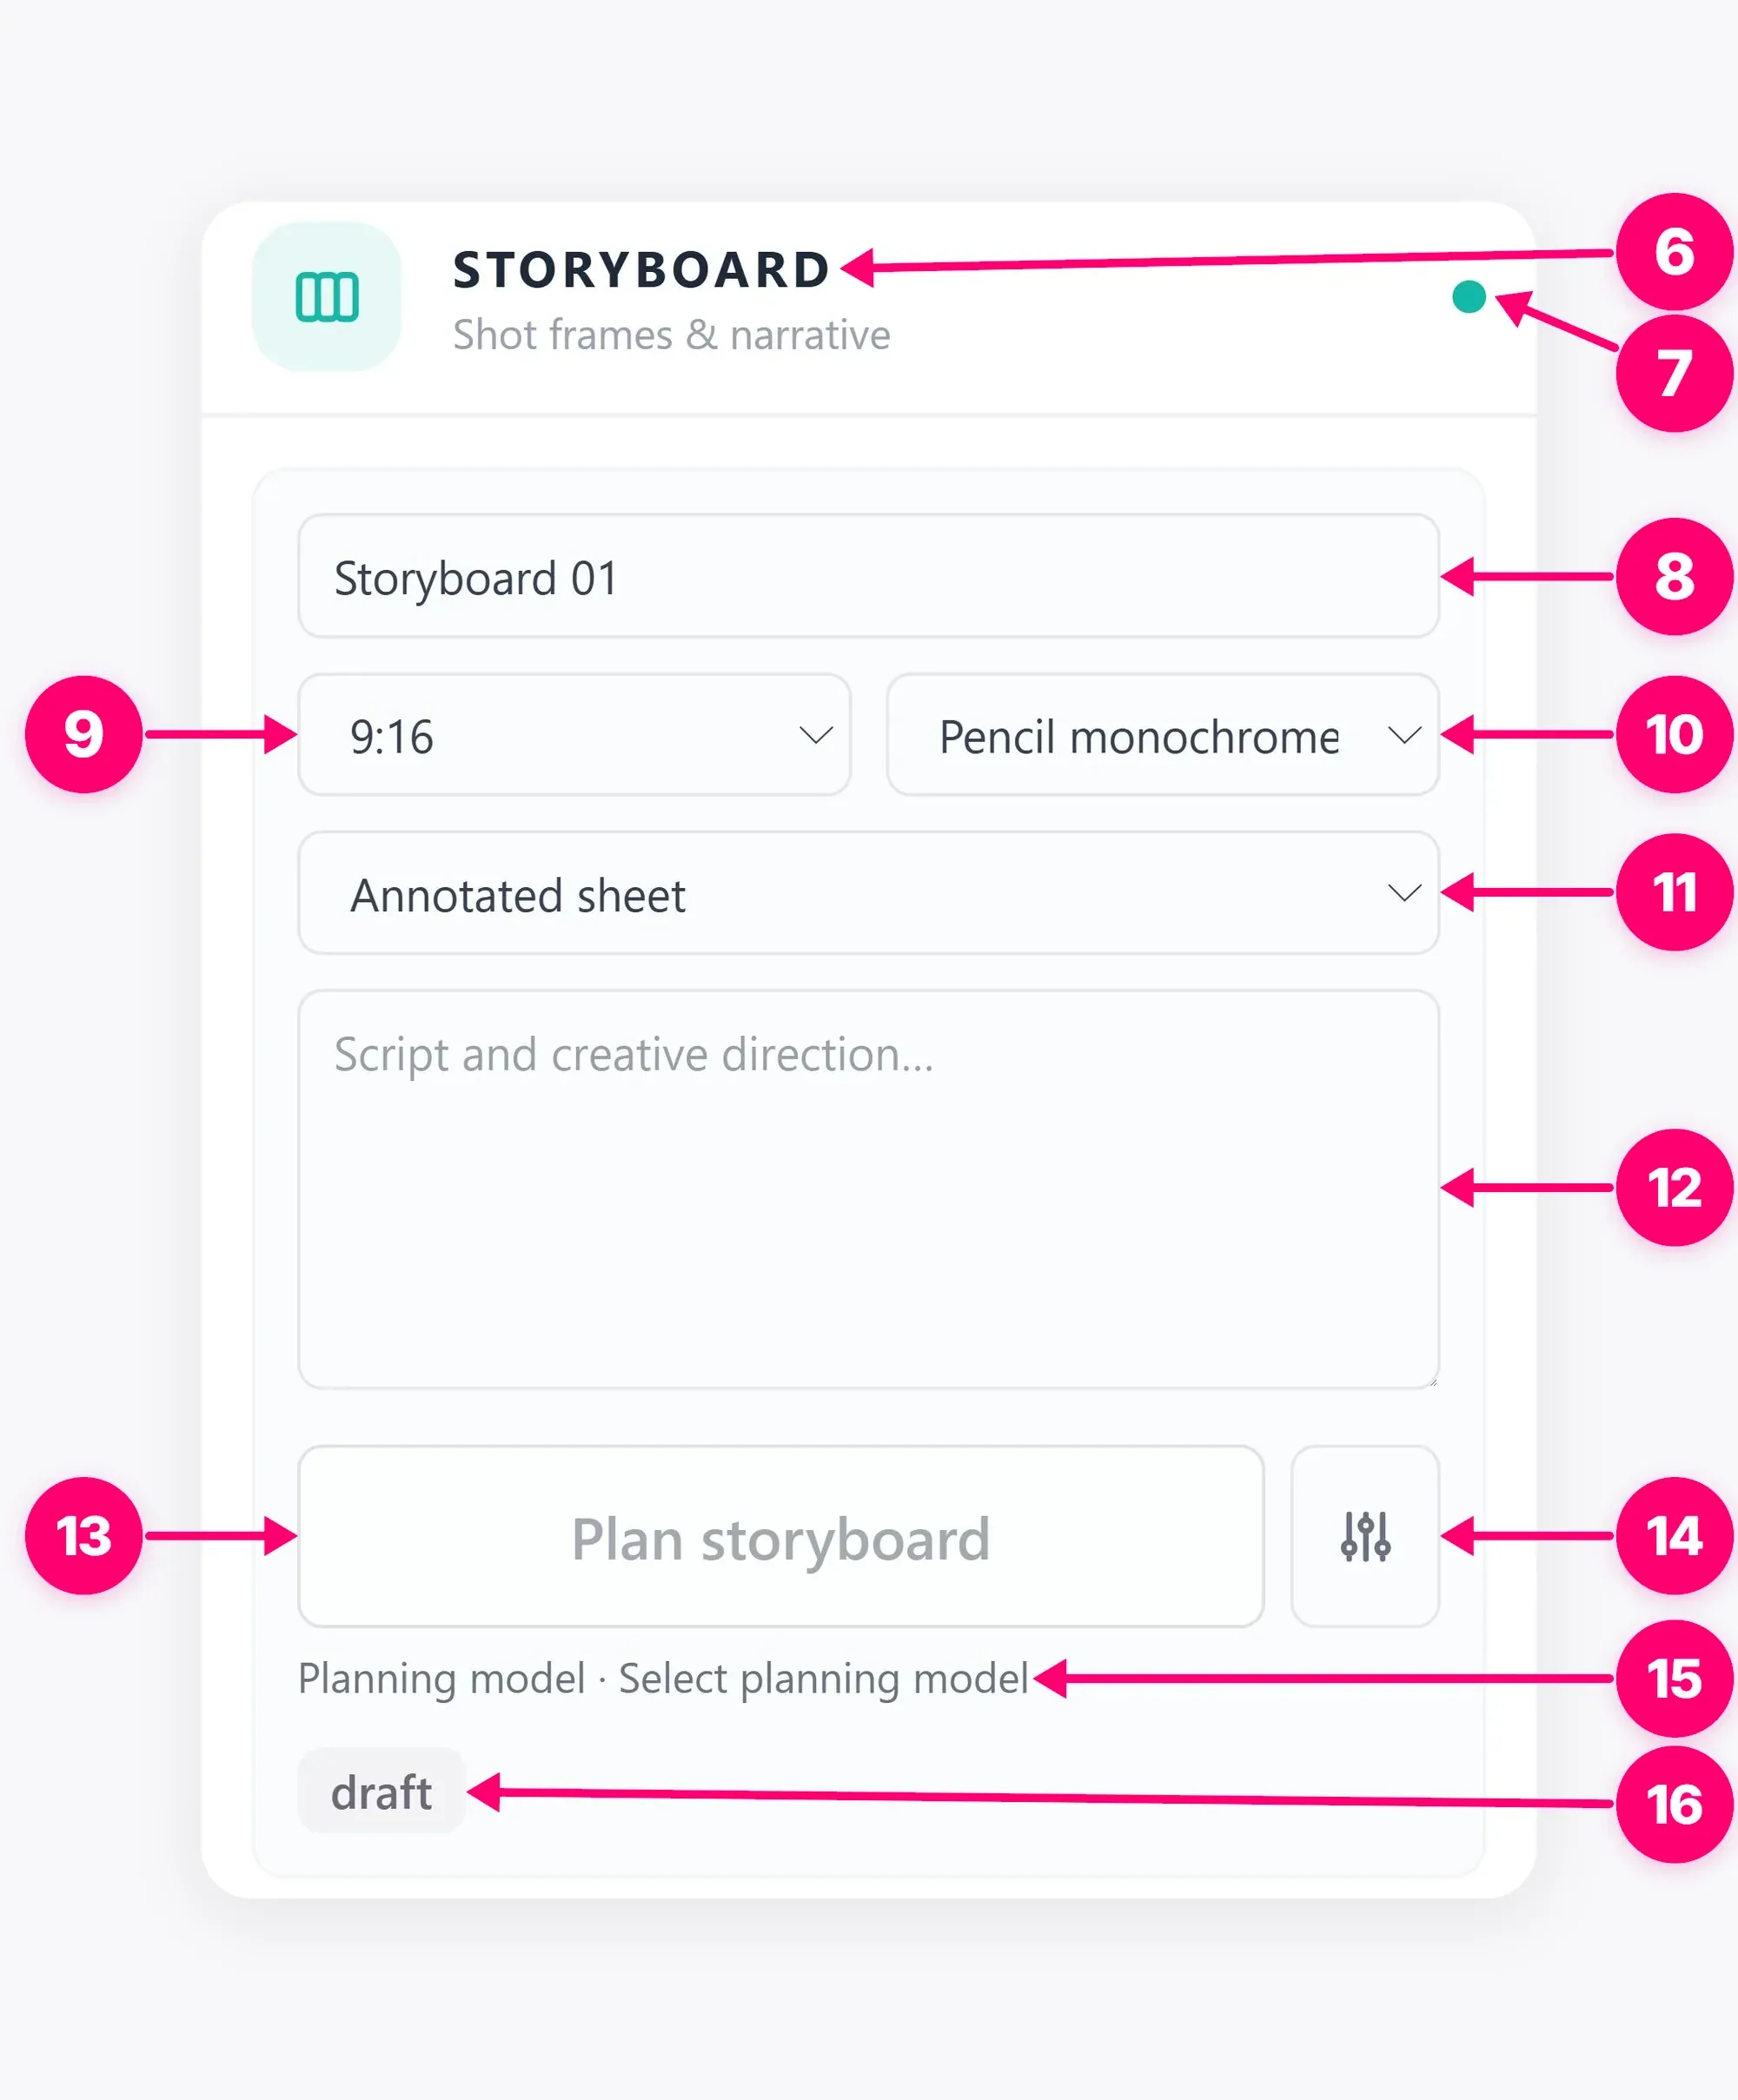
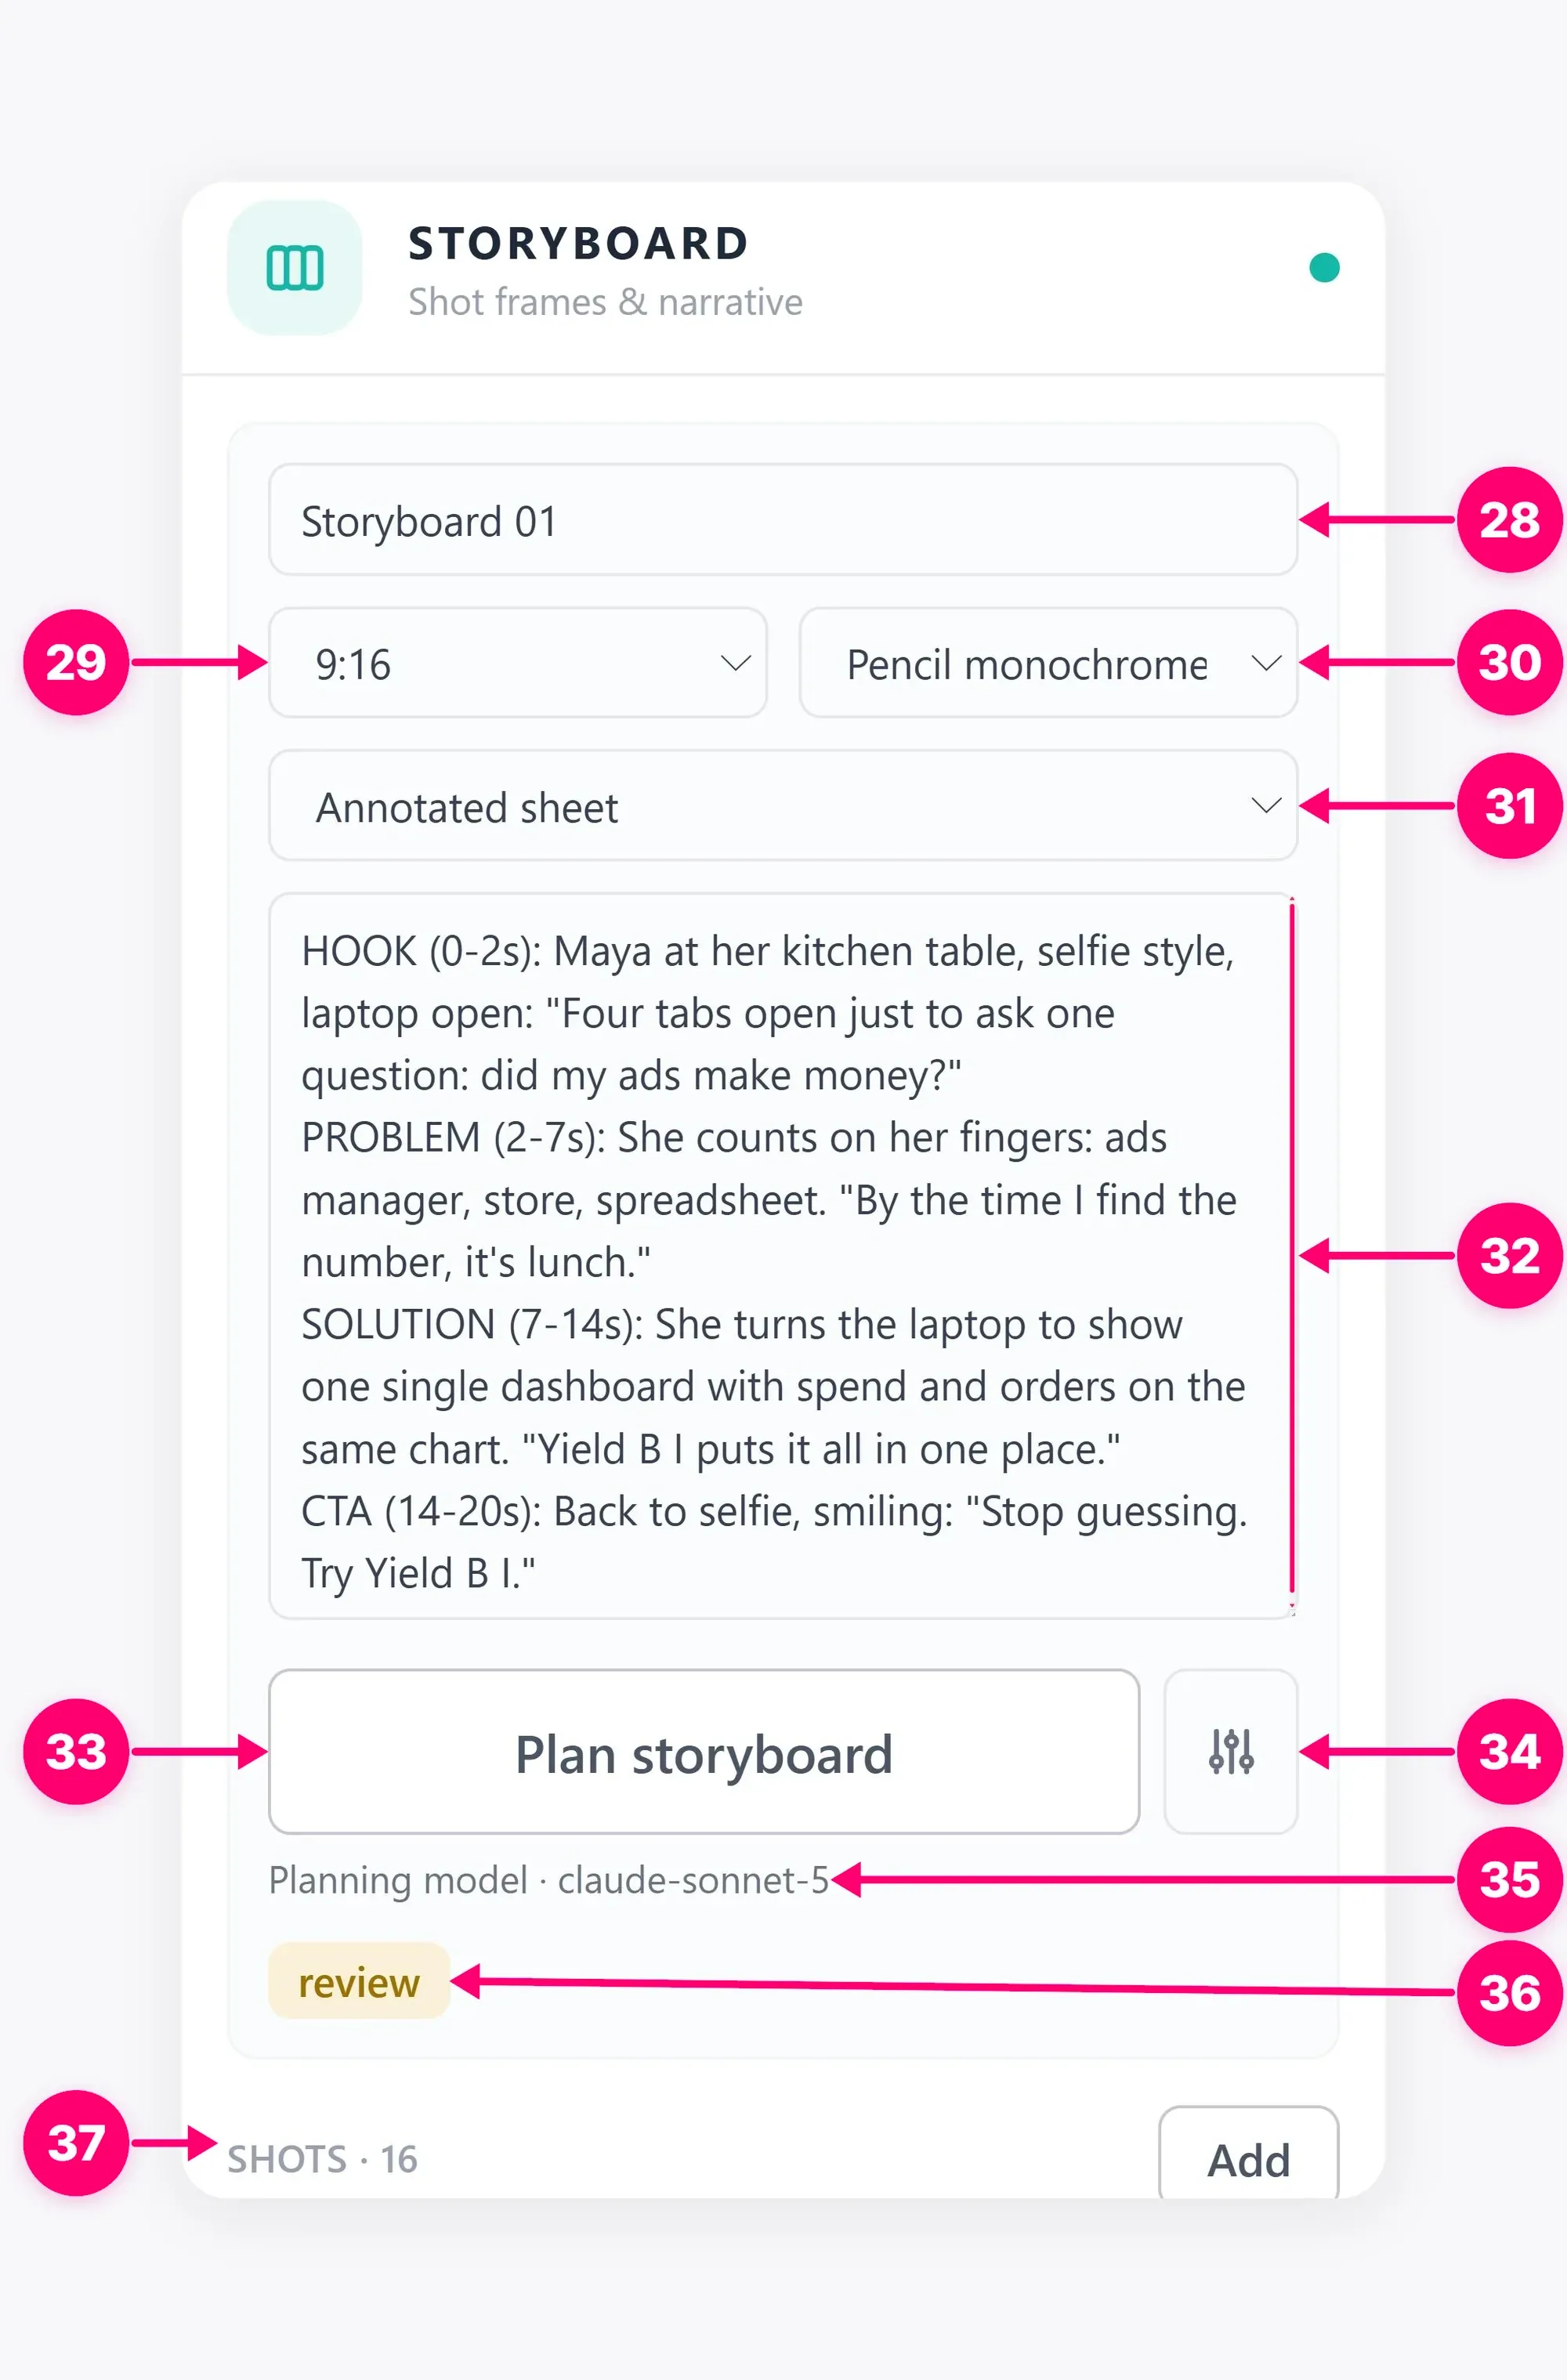
For board setup, see Add a node to the board. Connect your Storyboard to at least one relevant source node, such as Cast, Product, Location, Clothes & Props, or Brand Kit. Choose the account whose assets and models you will use. An empty board cannot be planned: the app requires an account, a planning model, a written brief, and at least one directly connected source asset.
2. Choose a model and write a brief
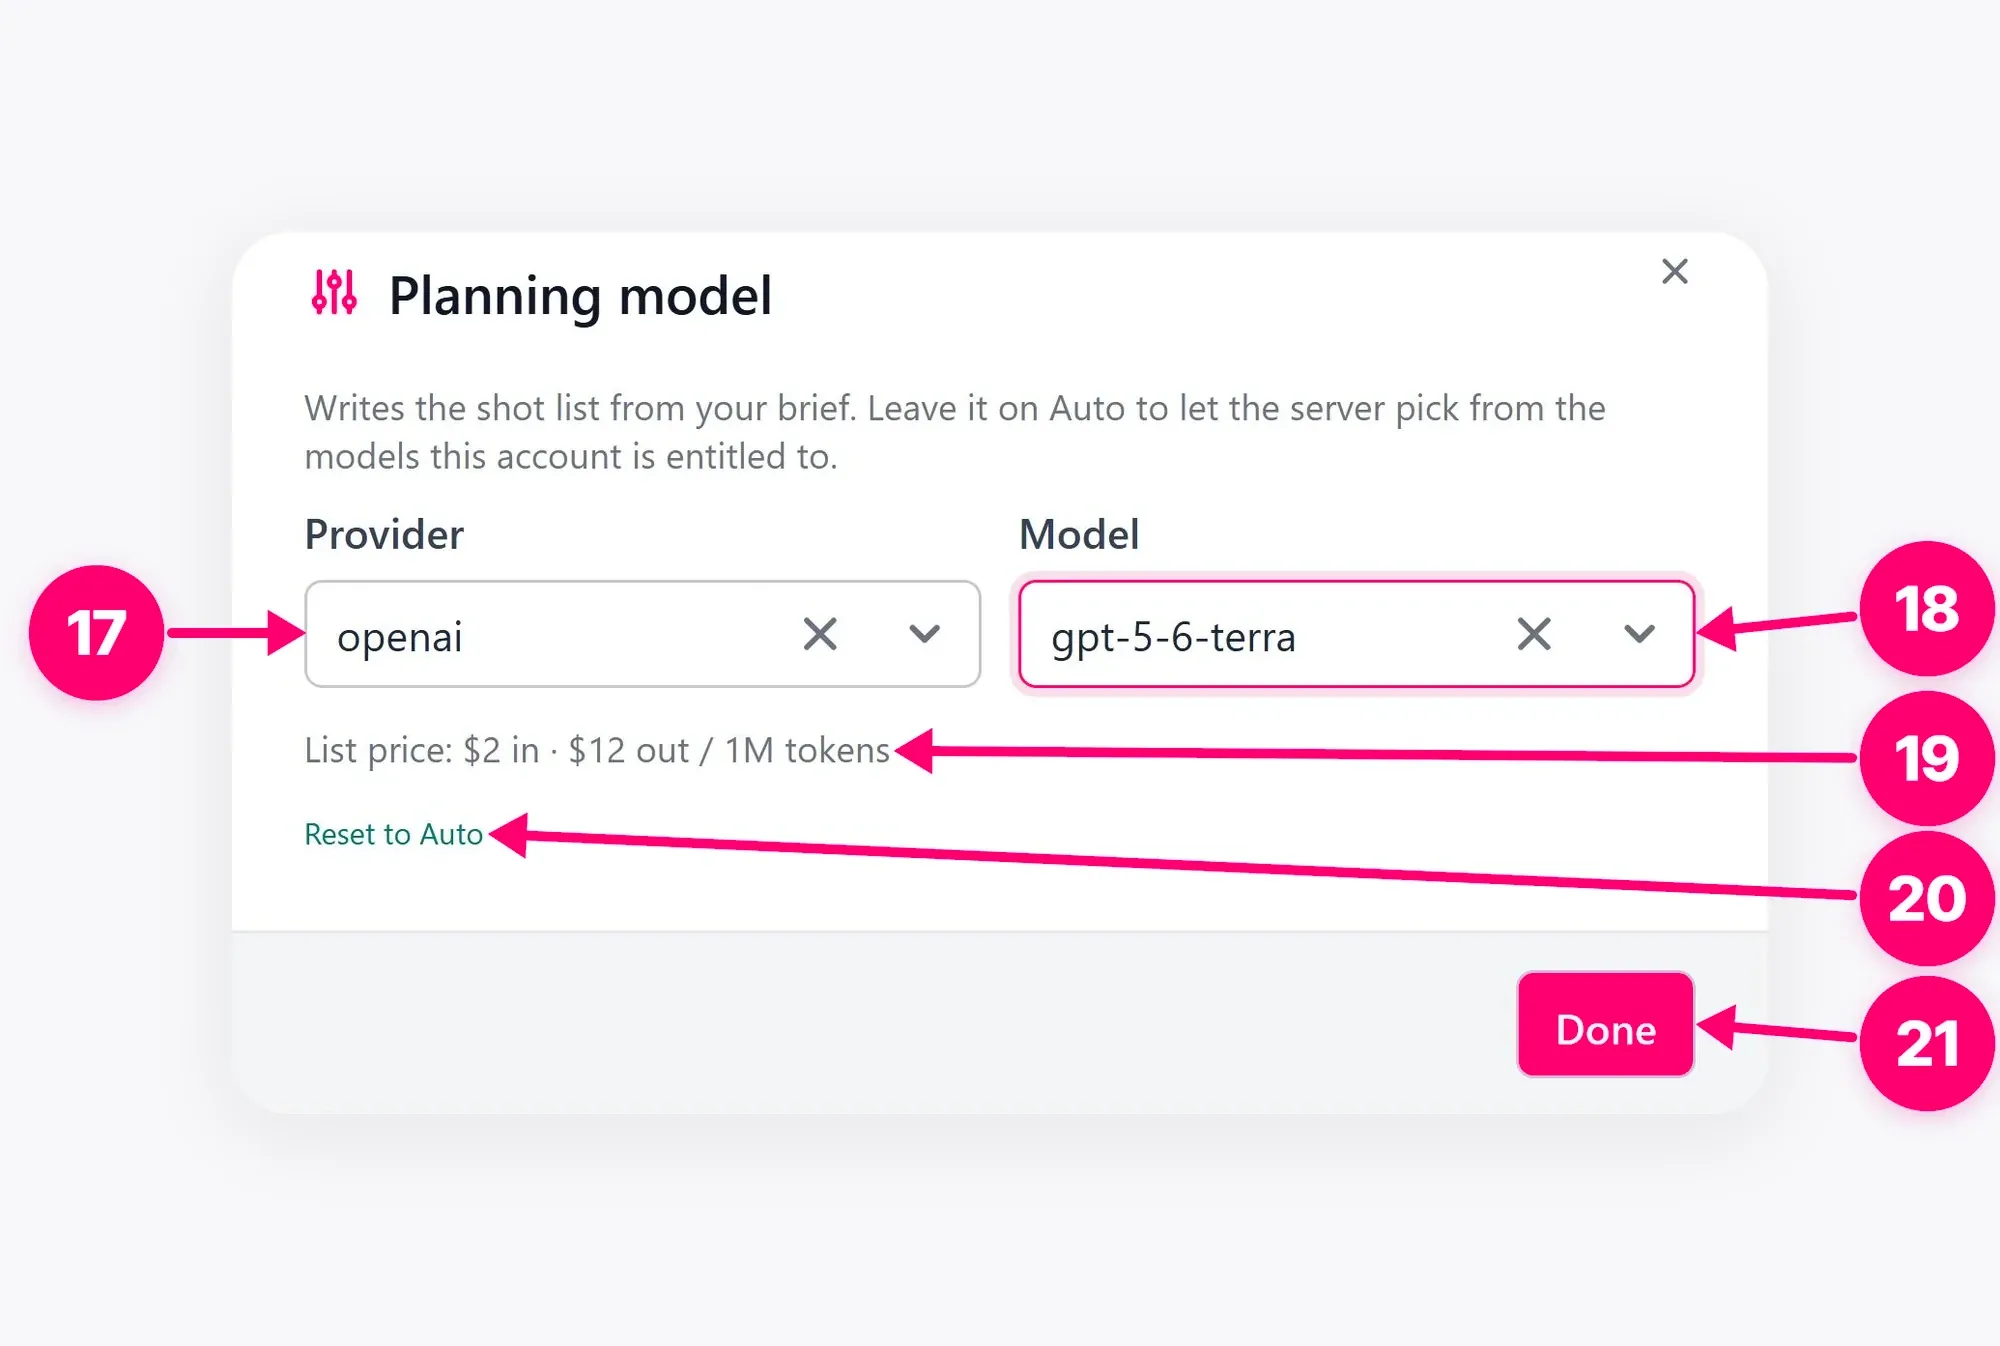
Open the planning model selector and choose a model available to your account. The names in the screenshot are examples, not a fixed model list. Write the brief with the story arc, product, setting, audience, target duration, and constraints. State any must-have shots or details explicitly, then review the connected sources so the plan can refer to the intended versions.
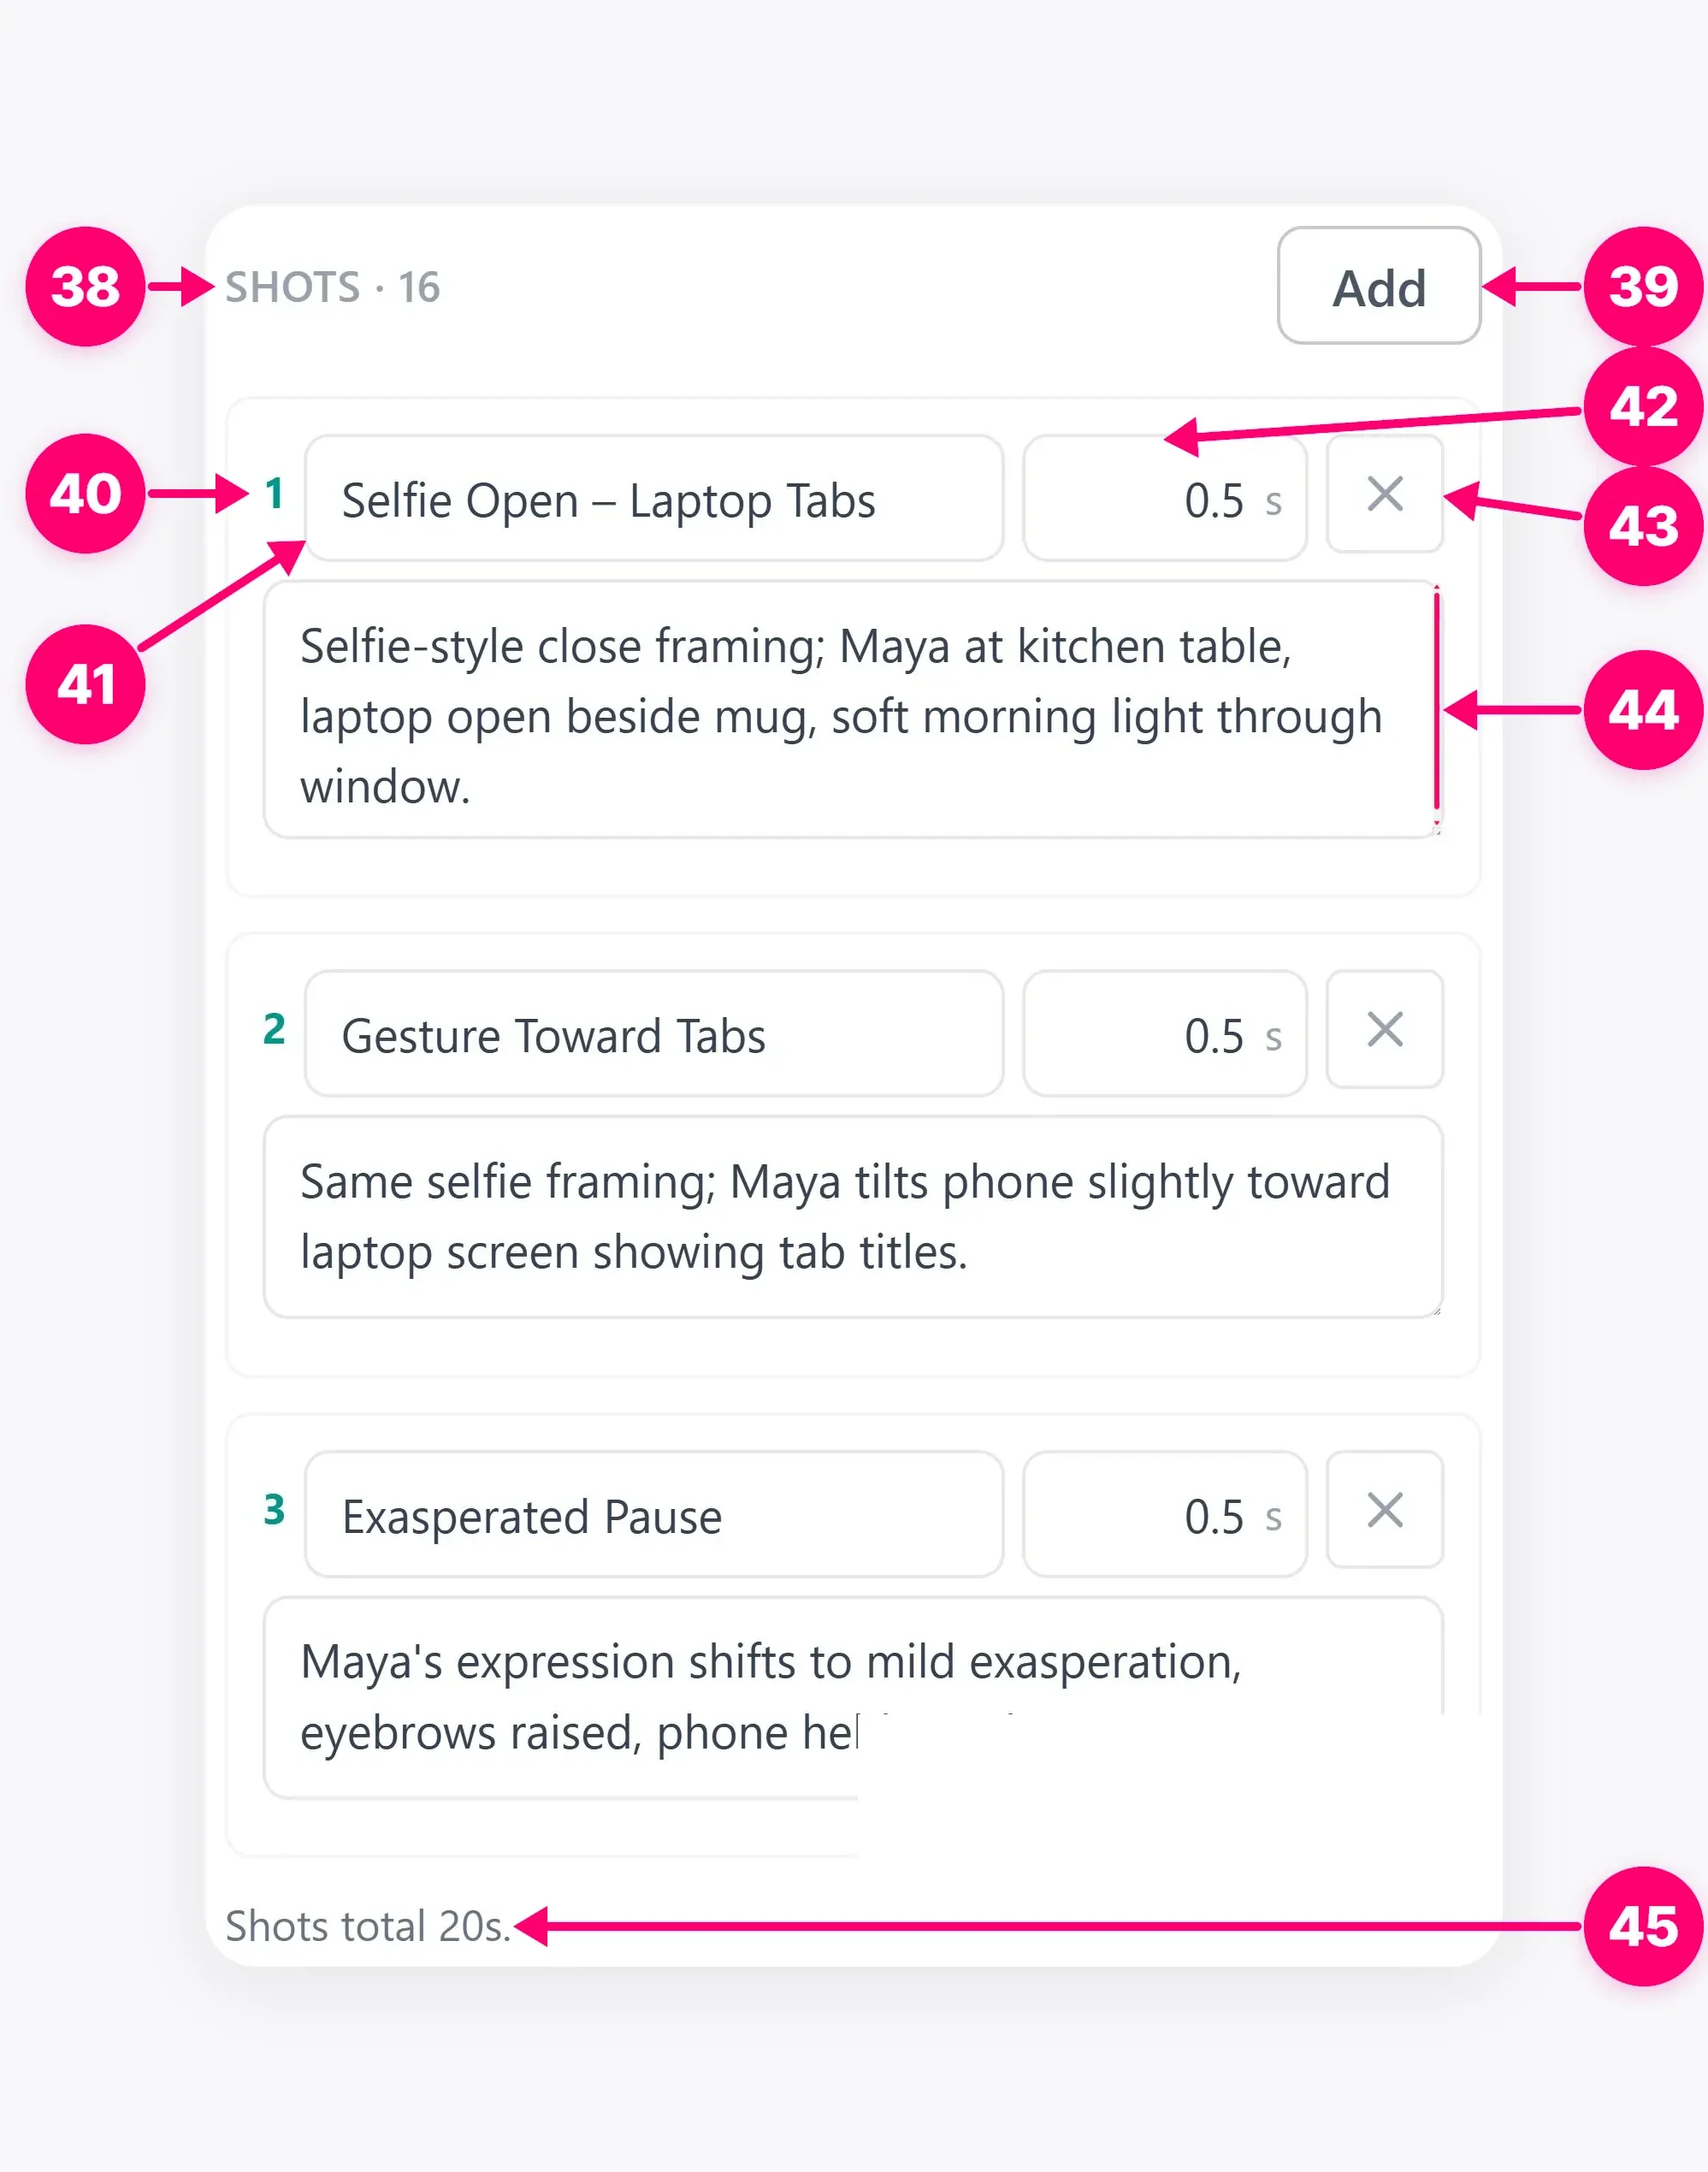
Run planning and read the resulting shot list. Check the order, purpose, and duration of every shot. If the total does not match your intended runtime, edit the shots or the brief and plan again.
3. Review shots and generate frames
Select the shots that should continue to the next stage and generate a frame for each of them. A frame is the visual reference for a shot. Inspect framing, actor identity, product details, setting, text, and continuity from one frame to the next. Regenerate or adjust shots that do not match the brief.
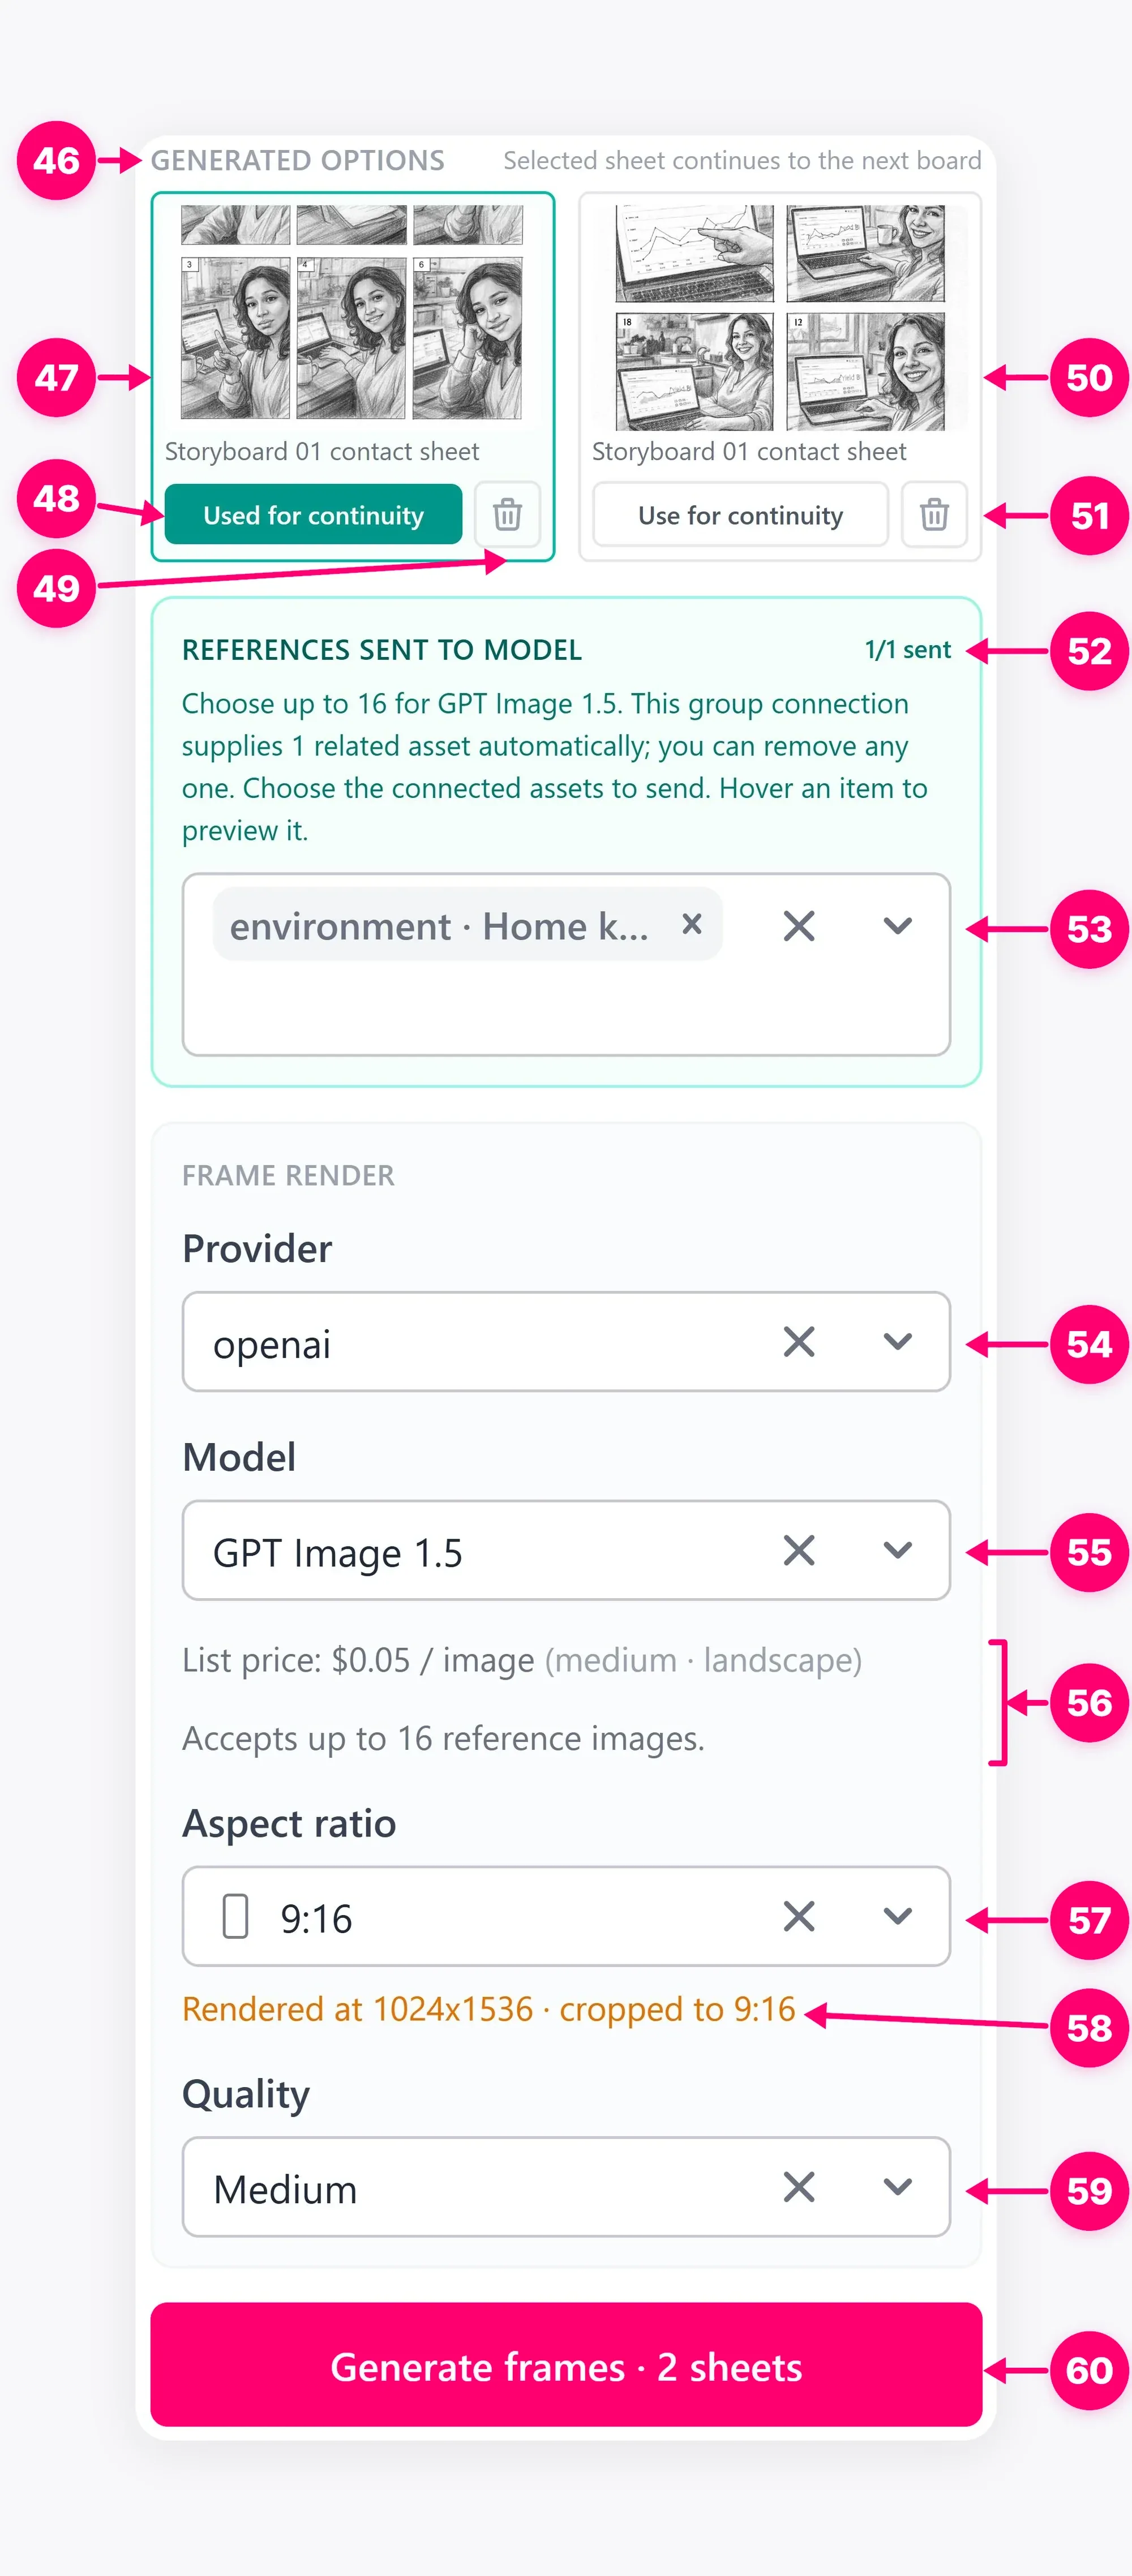
Models, costs, and render results depend on the current account. Do not assume the visual from one frame will be reproduced perfectly in video. Keep the approved frame with its shot, then continue to Scenes when every selected shot has a frame. If scene generation is disabled, check that requirement before changing video settings.
For a simple still image, you can use Static Ad without making a Storyboard. The Storyboard path is most useful when timing, sequences, and continuity need explicit review. Keep the shot list and its approved frames together while you work, so a later change to one source asset does not silently alter the reference you intended for a scene.
Weiterlesen
Use the Brain node to turn a creative brief and selected source assets into a reviewable plan before generating images or video.
Getting StartedCreate video scenes from selected storyboard shots, check frame prerequisites, references, durations, and render settings.
Getting StartedCreate a reusable Cast actor, set appearance and voice metadata, render a reference sheet, and use the result in Media Studio.